The for loop
When parts of a program are repeatedly carried out, you
call that a loop. You already learned about one import
kind of loop — the main loop,
loop()
. Your KosmoDuino
uses that to handle the most important tasks in your
program. It reads out input pins, processes the
measurement data, and then responds — over and over
again from the beginning.
You may often prefer, however, not to get caught in an
endless loop, and you might rather have just a certain
number of repetitions. For that, you can use a
for
loop.
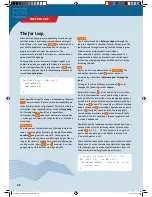
You will usually be using it in the following manner as a
so-called
counting loop:
i < 20;
:
This is the test condition:
Before each pass through the
loop, this condition is checked. If the condition is met, the
loop is passed through, meaning that the entire program
code inside the curly brackets is carried out.
If the condition is not met, the loop is abandoned: The
program code in the curly brackets is not carried again.
Instead, the program continues with the next instruction
following the loop.
++i
:
First of all, this is an abbreviation for
i = i + 1
. The
value of the counter variable
i
in other words, is
increased by 1. But when?
After each pass through the
loop!
As long as the value of the counter variable
i
is not
changed, the following is what happens:
Before the first pass,
i
has the value 0. That is less than
20. So the test condition is met, and the loop is passed
through. After the instructions in the loop body have been
carried out, the value of the counter variable is raised by 1.
The value of
i
is now 1. The condition is still met, the loop
body is carried out,
i
is raised by 1 again and so on and so
forth. If
i
finally has the value of 19, the loop body is
carried out one more time and
i
is then increased to the
value of 20. The test condition is then no longer met, and
the loop is abandoned.
How often has the loop body now been carried out? It has
been carried out for the following values of the counter
variable
i
: 0, 1, 2, 3, ..., 19. The numbers 1 to 19 yield 19
passes, and one more pass is added for the value 0. So
there are 20 passes in all!
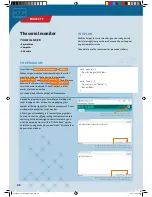
The counter variable, by the way, is not just there to count.
You can use its current value at any time in the loop body.
If, for example, you want to output all numbers from 1 to
42 on the serial monitor, you can do as follows:
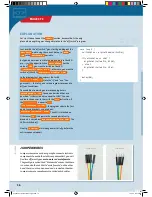
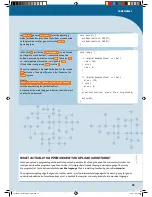
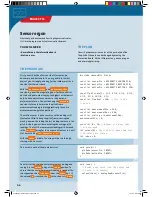
for (int i = 0; i < 20; ++i) {
Instruction 1;
Instruction 2;
...
}
What does that mean? The loop is introduced by the word
for
. The instructions that are carried out repeatedly are
in the block inside the curly brackets. This block with the
instructions to be repeated is often called the
loop body.
For the loop to know how often to repeat these
instructions, the
for
loop needs some more information
— which you can find inside the parentheses. Let’s take a
closer look:
int i = 0;
:
This is known as the initialization of the loop. Before the
loop is run through the first time, you apply the
counter
variable
i
and give it the value of 0. You can give the
counter variable any name and starting value you like. As
long as the counter variable has no special meaning, you
usually use the letters
i
,
j
, and
k
as names. As a rule,
you generally start with the starting value of 0.
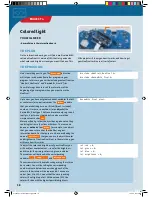
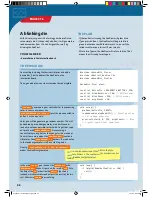
// Outputs the numbers 1, 2, 3,..., 42:
for (int i = 1 ; i <= 42; ++i) {
Serial.println(i);
// Outputs the current
// value from i
}
30
THE FOR LOOP
CodeGamer manual inside english.indd 30
7/19/16 12:32 PM

