background image

12

The Equipment

This section presents the items 
that you will find in your 
experiment kit and explains 
how to use them. These items 
constitute the basic 
equipment for all your 
microscopic investigations. 
Because they are used for the 
preparation of specimen 
slides, they are also called 
“specimen slide equipment.”

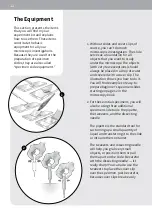
1.  Without slides and cover slips, of 

course, you can’t do much 
microscopic investigation. The slide 
serves as a foundation for all 
objects that you want to study 
under the microscope. The objects 
(with very few exceptions) should 
always be placed in a drop of water 
and covered with a cover slip. The 
illustration shows you how to do it. 
You will find examples of easy-to-
prepare beginner’s specimen slides 
starting on page 12 in the 
microscopy book. 

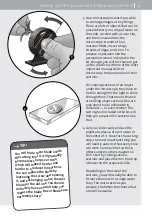
2.  For these initial specimens, you will 

also be using three additional 
specimen slide tools: the pipette, 
the tweezers, and the dissecting 
needle.  
 
The pipette is the standard tool for 
suctioning up a small quantity of 
liquid and transferring it to the slide 
or into another container.  
 
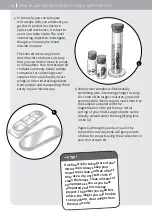
The tweezers and dissecting needle 
will help you grab very small 
objects, or position them or pull 
them apart on the slide. Be careful 
with the dissecting needle — it’s 
really sharp! You can also use the 
tweezers to place the cover slip 
over the specimen. Just be careful, 
because cover slips break easily.

1

2

Summary of Contents for TKx400i DUAL-LED

Page 1: ...str 5 7 70184 Stuttgart Germany 49 0 711 2191 0 www kosmos de Thames Kosmos 301 Friendship St Providence RI 02903 USA 1 800 587 2872 www thamesandkosmos com Thames Kosmos UK Ltd Goudhurst Kent TN17 2QZ United Kingdom 01580 212000 www thamesandkosmos co uk EXPERIMENT MANUAL Quickstart Guide Descriptions of the permanent slide preparations and tips for initial investigations ...

Page 2: ... sun it could cause a fire WARNING Not suitable for children under 3 years Choking hazard small parts may be swallowed or inhaled First check the list of parts to be sure all the correct parts are present in the kit Keep the packaging and instructions as they contain important information Rules for Safe Experimentation Carefully prepare your work area for the experiments Make sure you have enough ...

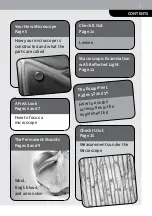
Page 3: ...ges 6 and 7 How to focus a microscope The Permanent Mounts Pages 8 and 9 Wool frog s blood and onion skin The Equipment Pages 12 and 14 How to use the accessories in the experiment kit Check It Out Page 10 Lenses Macroscopic Examination with Reflected Light Page 11 Check It Out Page 15 Measurements under the Microscope ...

Page 4: ...4 with specimen slides 10 5 and permanent mounts Wool 1 718 086 Onion skin 1 718 087 Frog s blood 1 718 088 6 Box with cover slips and sheet of labels 1 705 228 7 Tweezers 1 705 321 8 Dissecting needle 1 705 233 9 Pipette 1 717 169 10 Magnifying glass 1 717 170 11 Sample container 3 717 172 12 Graduated cylinder 1 717 175 13 Cutting tool microtome 1 717 177 14 Chambered sample box 1 717 178 1 2 3 ...

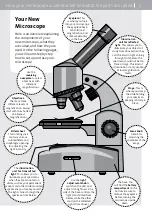
Page 5: ...e sharpness of the image Stage This is where you clamp the slide holding your specimen keeping it firmly in place Use the revolving nosepiece to select objectives with different magnifications Objectives There are three different levels of magnification Always start with the shortest one lowest magnification Filter wheel This rotating disk contains various colored filters and diaphragm openings fo...

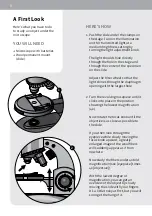
Page 6: ...nes through the diaphragm opening with the largest hole 2 Turn the revolving nosepiece until it clicks into place in the position showing the lowest magnification 4x Now rotate the focus knob until the objective is as close as possible to the slide If you then look through the eyepiece while slowly moving the focus knob upward a greatly enlarged image of the wool fibers will suddenly appear as if ...

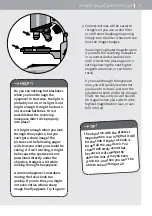
Page 7: ...de if the focus knob is turned all the way down You should definitely avoid that because it will smudge the objective lens or maybe even scratch it and then you won t be able to see anything at all Do you see nothing but blackness when you look through the eyepiece In that case the light is probably not on or its light is not bright enough It might be due to old or weak batteries Or is it possible...

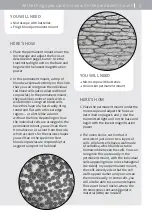
Page 8: ...em YOU WILL NEED Microscope with batteries Wool permanent mount HERE S HOW 1 Place the permanent mount under the microscope and adjust the focus as described on pages 6 and 7 Use the transmitted light unit on the base of the microscope and begin with the lowest magnification power 2 Now as you observe the wool fibers you will notice that they are colored After all wool is made from the hairs of sh...

Page 9: ...pes you will see in the specimen Red blood corpuscles are responsible for oxygen transport in the blood HERE S HOW 1 Place the permanent mount under the microscope and adjust the focus as described on pages 6 and 7 Use the transmitted light unit on the base and begin with the lowest magnification power 2 The onion skin is so thin that it consists of just one or two layers of cells All plant cells ...

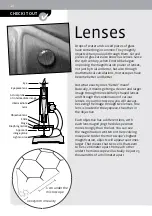
Page 10: ... better But what exactly does better mean Basically it means getting a clearer and larger image through more skillfully shaped lenses and through the combination of various lenses In your microscope you will always be seeing the image through two lenses One lens is located in the eyepiece the other in the objective Each objective has a different lens with each lens magnifying the slide specimen mo...

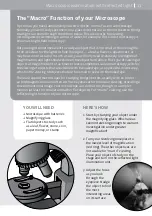
Page 11: ... sometimes called macroscopy which is the viewing of objects that are visible with the naked eye as opposed to microscopy which is the viewing of objects that are too small to see with the naked eye There are special macroscopes for studying things like this usually with 20 fold or 40 fold magnification and often with two eyepieces for binocular viewing providing a three dimensional image Your mic...

Page 12: ...ter and covered with a cover slip The illustration shows you how to do it You will find examples of easy to prepare beginner s specimen slides starting on page 12 in the microscopy book 2 For these initial specimens you will also be using three additional specimen slide tools the pipette the tweezers and the dissecting needle The pipette is the standard tool for suctioning up a small quantity of l...

Page 13: ... The cutting tool included in the kit will help you prepare thin sections like that 4 Get your slide ready and use the pipette to place a drop of water in the center of it Now for the cutting step the most important thing you will need is patience Not every slice will work Some will be too thick others uneven others maybe too thin Start by cutting several sections and place them in the drop of wat...

Page 14: ...e optics and mechanics it is best to use it on a table inside The most interesting objects to investigate though will usually be found outside in nature The colored microscopy book describes lots of objects of study that you can find on trees in ponds or in meadows Your microscope kit contains some very handy sample containers for collecting water samples from a rain barrel insect wings or other i...

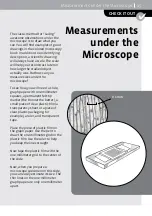
Page 15: ...elt tip marker the thinner the better a small piece of clear plastic film a transparency sheet or a piece of clear plastic packaging for example a ruler and transparent tape Place the piece of plastic film on the graph paper Use the pen to draw the one millimeter grid on the plastic film Use the ruler to help you keep the lines straight Now tape the plastic film with the one millimeter grid to the...

Page 16: ...trations Friedrich Werth Horb Photos ExQuisine fotolia com page 3 bottom left 8 top Mark Bachofer Stuttgart page 3 top left bottom right 8 bottom 9 10 15 Michael Flaig prostudios Stuttgart page 2 Packaging design fine tuning Michaela Kienle Dürmentingen Hailtingen using a photorealistic digital illustration by Andreas Resch St Ulrich am Waasen Österreich 1st English Edition 2017 Thames Kosmos LLC ...

Reviews: