Owner’s Manual
13
This is the stage where you put the effort in. After regular use, the muscles in your legs will become
more flexible. Work at your own pace and be sure to maintain a steady tempo throughout. The rate of
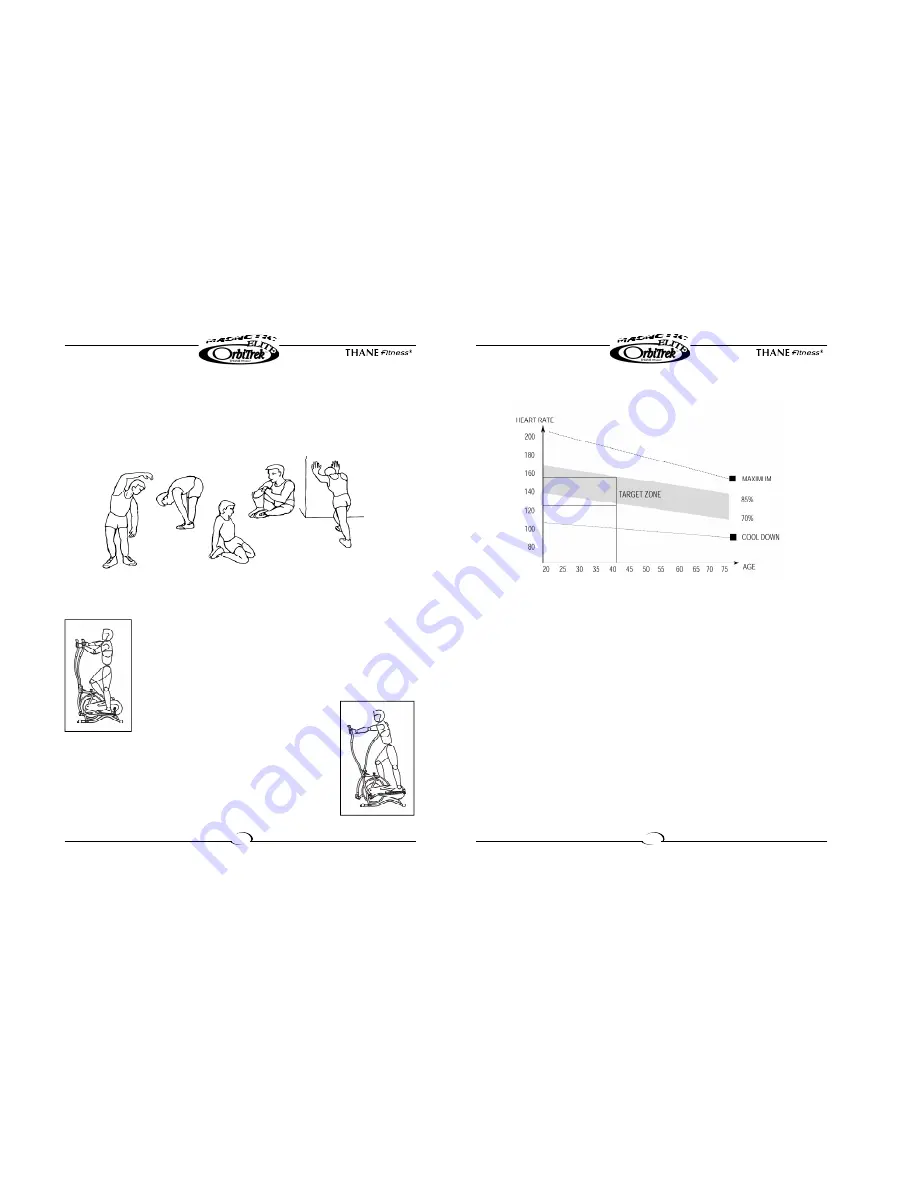
work should be sufficient to raise your heartbeat into the target zone shown on the graph below.
This stage should last for a minimum of 12 minutes
though most people start at about 15-20 minutes.
3. The Cool-Down Phase
This stage lets your cardio vascular system and muscles wind down. This is a repeat of the warm up
phase. First, reduce your tempo and continue at this slower pace for approximately 5 mintues before
you get off your Orbitrek Magnetic Elite. The stretching exercises should now be repeated, again
remembering not to force or jerk your muscles into the stretch.
As you get fitter, you may need to train longer and harder. It is advisable to train at least three times
a week, and if possible to space your workouts evenly throughout the week.
MUSCLE TONING
To tone muscle while on your Orbitrek Magnetic Elite you will need to have the resistance set quite
high. This will put more strain on your leg muscles and may mean you cannot train for as long as you
would like. If you are also trying to improve your fitness you may need to alter your training program.
You should train as normal during the warm up and cool down phases, but towards the end of the
exercise phase you should increase the resistance making your legs work harder. You will have to
reduce your speed to keep your heart rate in the target zone.
WEIGHT LOSS
The important factor here is the amount of effort you put in. The harder and longer you work, the more
calories you will burn. This is effectively the same as if you were training to improve your fitness, the
difference being the goal.
Owner’s Manual
12
Using your Orbitrek Magnetic Elite will provide you with several benefits. It will improve your physical
fitness, tone your muscles and in conjunction with a calorie controlled diet, help you lose weight.
1. The Warm-Up Phase
This stage helps get the blood flowing around the body and the muscles working properly. It will also
reduce the risk of cramp and muscle injury. It is advisable to do a few stretching exercises as shown
below. Each stretch should be held for approximately 30 seconds. Do not force or jerk your muscles
into a stretch. If it hurts, STOP.
2. The Exercise Phase
SIDE BENDS
INNER THIGH
STRETCHES
FORWARD
BENDS
OUTER THIGH STRETCHES
CALF/ACHILLES
STRETCHES
Grasp the handlebars, then switch the handlebars to and
fro in tandem to move along with the pedals, do elliptical
cycle movement. Your Orbitrek Magnetic Elite has
reversable movement. Forward pedalling emphasizes your
quadriceps muscle (front thighs), while backwards
pedalling emphasizes your hamstrings (back thighs).
Remember, if you want to change your movement
direction, stop movement first.
Start Position
Stand on the left side of the bike, grasp the handlebars (under the
handlebar end caps about 100mm), then stride your left leg, place your
left foot on the left pedal, then stride your right leg, place your right foot on
the right pedal, adjust your hands and stand pose to a comfortable position.
Moving Position


