background image

PAGE 4 OF 8

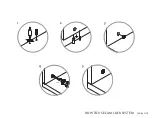
HOW TO USE CAM LOCK SYSTEM

180º

1

2

3

4

5

Summary of Contents for Clybourn 4 Cube Cubby Tall

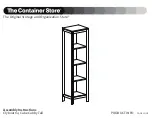
Page 1: ...PAGE 1 OF 8 PRODUCT INFO The Original Storage and Organization Store Assembly Instructions Clybourn 4 Cube Cubby Tall ...

Page 2: ...Shelf Bottom Panel Fixed Shelf Back Panel PARTS LIST Please review the hardware listed on the next page as well as individual components of this product As you unpack and prepare for assembly place the contents on a carpeted or padded area to protect them from damage A D E E F B B C ...

Page 3: ...N HEAD SCREW H11 x 2 CORNER BRACKET H13 x 20 DOWEL H4 x 16 TRUSS HEAD SCREW H8 x 4 WASHER H2 x 4 THIN CAM H3 x 8 THICK CAM H7 x 2 WALL STRAP H12 x 4 FLAT HEAD SCREW H5 x 2 WALLANCHOR H9 x 2 WALL SCREW H10 x 12 CAM COVER TOOLS REQUIRED PHILLIPS SCREWDRIVER ...

Page 4: ...PAGE 4 OF 8 HOW TO USE CAM LOCK SYSTEM 180º 1 2 3 4 5 ...

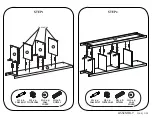
Page 5: ...PAGE 5 OF 8 STEP 1 STEP 2 ASSEMBLY H1 x 4 CAM BOLT H3 x 4 THICK CAM H13 x 8 DOWEL H10 x 4 CAM COVER H10 x 4 CAM COVER H1 x 4 CAM BOLT H3 x 4 THICK CAM H13 x 8 DOWEL front edge ...

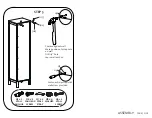
Page 6: ...PAGE 6 OF 8 STEP 3 STEP 4 ASSEMBLY H11 x 2 CORNER BRACKET H1 x 4 CAM BOLT H2 x 4 THIN CAM H13 x 4 DOWEL H10 x 4 CAM COVER H4 x 16 TRUSS HEAD SCREW H12 x 4 FLAT HEAD SCREW H12 ...

Page 7: ...H6 x 2 PAN HEAD SCREW H7 x 2 WALL STRAP H8 x 4 WASHER Position against wall Mark position of strap hole on wall Drill 1 4 hole tap in wall anchor Fasten anti tip strap with wall screw provided H9 H8 H5 H5 x 2 WALL ANCHOR H9 x 2 WALL SCREW ...

Page 8: ...gnated panels Exceeding these limits could cause sagging possibly resulting in failure of product or bodily injury Severe injury may occur if furniture tips over Never allow children to climb or play on this product Place heaviest items on lower shelves and as far back as possible never overload product 15 lbs 15 lbs 15 lbs 15 lbs 15 lbs ...

Reviews: