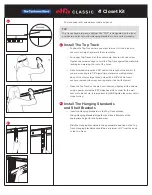
Notches
Tools needed: drill, screwdriver, level and pencil
TIP
Top Tracks have a top and a bottom. The “TOP” is designated on the label
and has two notches to allow Hanging Standards to be inserted properly.
Install The Top Track
• Position the Top Track where you want to mount it. Use a level to
ensure it is straight, and mark the screw holes.
• For longer Top Tracks, drill the center hole. Secure with one screw.
Tighten the screw enough to hold the Top Track against the wall while
leveling and marking the rest of the holes.
• Drill all marked holes with a 1/8" drill bit the length of the drill bit. If
you are mounting into 1/2" drywall (most common wall type) and
do not hit a stud, enlarge those holes with a 3/8" drill bit. Insert
anchors, remove the screw, and tap anchor flush with drywall.
• Place the Top Track on the wall, and insert and tighten all the screws
using a power drill with a #2 Phillips head bit. In order for the wall
anchors to be secure, it is important to HAND tighten the screw until it
stops
turning.
Install The Hanging Standards
and Shelf Brackets
• Insert the Hanging Standards in the Top Track notches.
Group Hanging Standards together and insert Brackets at the
appropriate height for shelf placement.
• Slide the Hanging Standards to the approximate position on the Top
Track. Hanging Standards should be a minimum of ½" from the ends
of the Top Track.
4' Closet Kit
A
A
B
B


