

página 19
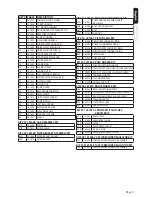
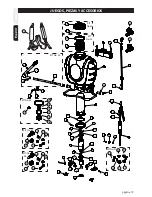
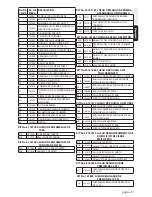
No. DE
CLAVE
No. DE
PIEZA
DESCRIPCIÓN
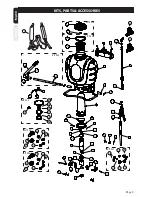
1
181521
TANQUE CON SOPORTE DE PIE
2
181528
MANGO PRINCIPAL
3
181824
ENSAMBLAJE DE VARILLA DE 21”
4
181820
ENSAMBLAJE DE CIERRE, SMITH PRO II
(VERSIÓN DE MOCHILA)
5
181495
CILINDRO DEL PRECIÓN
6
181500
CILINDRO DE LA BOMBA
7
181537
ARNÉS PARA LOS HOMBROS
8
181529
TORNILLO, MANGO SUPERIOR (4)
9
181508
BUJE DEL EJE CONDUCTOR (2)
10
181507
ARANDELA DEL EJE CONDUCTOR (2)
11
181525
TORNILLO DE TOPE
12
181524
ARANDELA DE TOPE
13
181523
TOPE
14
181509
ANILLO DE BRIDA
15
181510
TORNILLO DE LA ABRAZADERA
16
181511
TUERCA DE LA ABRAZADERA (2)
17
181502
TORNILLO DE CUERDA PROPIA (2)
18
181501
ARANDELA DE ACERO INOXIDABLE (2)
19
181531
TORNILLO DEL PISTÓN
20
181536
TUERCA DEL PISTÓN
21
181514
CUBIERTA DE LA BOMBA
22
181518
TORNILLO DE LA CAMPANA MANIVELA
(4)
23
181512
ABRAZADERA DE MANGUERA
24
181513
TORNILLO PARA ABRAZADERA DE
MANGUERA
25
181504
PIST
ÓN DE BOMBA
26
181526
CAMPANA MANIVELA IZQUIERDA
27
181506
ESLABÓN DE ENLACE HEMBRA
28
181505
ESLABÓN DE ENLACE MACHO
29
181527
CAMPANA MANIVELA DERECHA
30
181522
MANGA
KIT No.31 181446 JUEGO DE ENSAMBLAJE DE
TAPA
31A
181444
CUBIERTA DEL TANQUE
31B
171015
VÁLVULA DE RETENCIÓN
KIT No.32 181564 JUEGO DE ENSAMBLAJE DE
CANASTA DE FILTRO
32A
181445
JUNTA DE LA CANASTA FILTRO
32B
181519
CANASTRA DE FILTRO
KIT No.33 181787 JUEGO DE MANGO DE BOMBA
ASEGURADO CON TORNILLO
33A
181921
ENSAMBLAJE DE MANGO DE BOMBA
(AGARRADERA INCLUIDO)
33B
181745
EJE CONDUCTOR ASEGURADO CON
TORNILLO
33C
181756
TORNILLO
33D 181757
TUERCA DE BLOQUEO
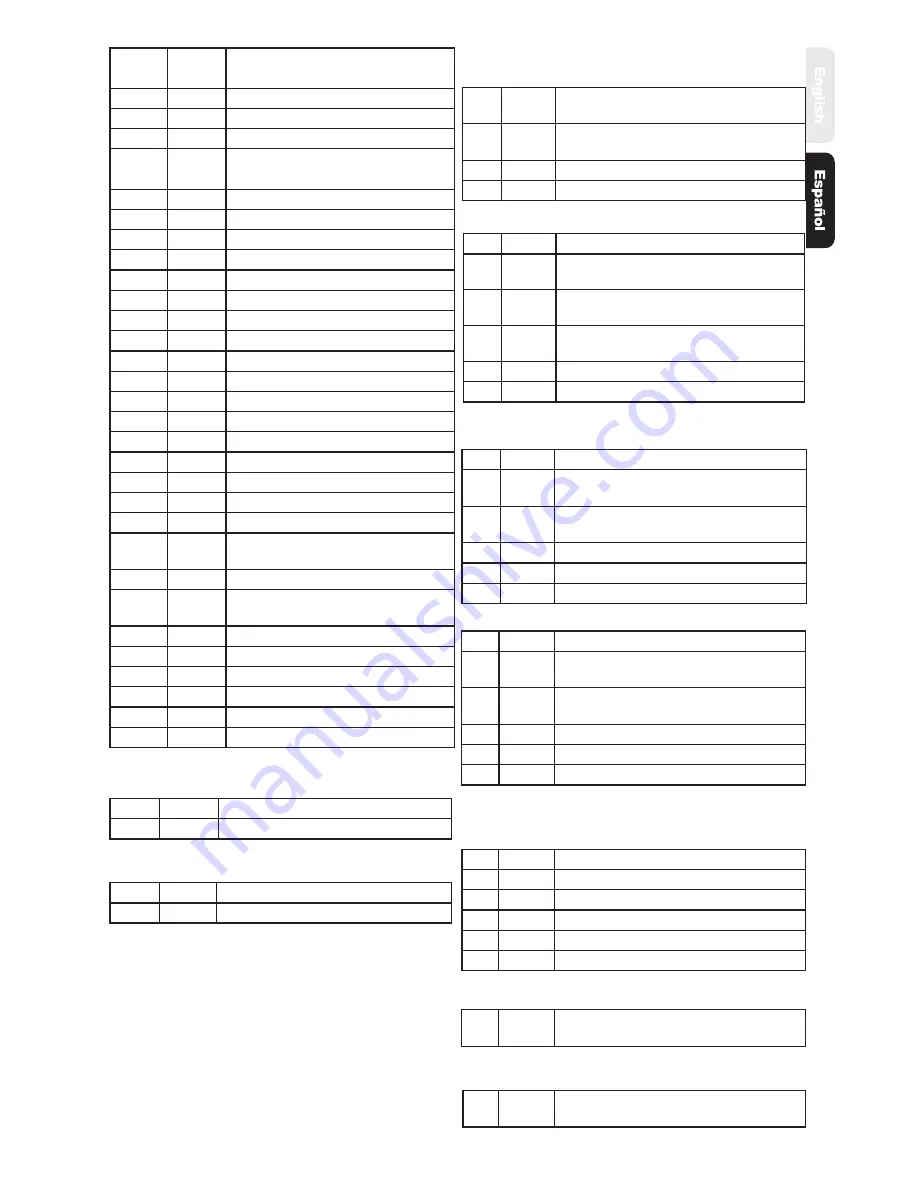
KIT No.34 181567 JUEGO DE SELLO DEL PIST
ÓN
34A
181496
ANILLO “O” DEL CILINDRO DEL PISTÓN
34B
181497
ARANDELA DEL CILINDRO DE LA BOMBA
(2)
34C
181498
ANILLO “O” PEQUEÑO DEL CILINDRO DE
LA BOMBA
34D 181499
ANILLO “O” GRANDE DEL CILINDRO DE LA
BOMBA
34E
181503
SELLO DEL PISTÓN
34F
171015
VÁLVULA DE RETENCIÓN
KIT No.35 181869 JUEGO DE BOQUILLA DE
POLICARBONATO
35A
181822
BOQUILLA DE POLICARBONATO AJUSTABLE
35B
180168
BOQUILLA AMARILLA DE VENTILADOR
PLANO (BAJO VOLUMEN)
35C
180097
BOQUILLA ROJA DE VENTILADOR PLANO
(ALTO VOLUMEN)
35D 180266
BOQUILLA PARA ESPUMA
35E
181812
SELLO DE BOQUILLA PLANA
35F
181804
TUERCA CIEGA DE BOQUILLA
KIT No.36 181870 JUEGO DE BOQUILLA DE COBRE
36A
181823
BOQUILLA DE COBRE AJUSTABLE
36B
180168
BOQUILLA AMARILLA DE VENTILADOR
PLANO (BAJO VOLUMEN)
36C
180097
BOQUILLA ROJA DE VENTILADOR PLANO
(ALTO VOLUMEN)
36D
180266
BOQUILLA PARA ESPUMA
36E
181812
SELLO DE BOQUILLA PLANA
36F
181804
TUERCA CIEGA DE BOQUILLA
KIT No.37 181910 JUEGO DE MANTENIMIENTO DE
DISPOSITIVO DE CIERRE
SMITH PRO II
37A
181840
SELLO DEL ASIENTO
37B
181493
ANILLO “O” DEL CUERPO DE LA VÁLVULA
37C
181468
FILTRO
37D
181812
SELLO DE BOQUILLA PLANA (2)
37E
181810
ANILLO “O” DE VARILLA
37F
181805
ANILLO “O” DE BOQUILLA AJUSTABLE
KIT No. 181825 JUEGO REGULADOR DE
PRESIÓN DE 14 PSI
39
181825
ENSAMBLAJE REGULADOR DE PRESIÓN
DE 14 PSI
KIT No.38 181826 JUEGO REGULADOR DE
PRESIÓN DE 25 PSI
38
181826
ENSAMBLAJE REGULADOR DE PRESIÓN
DE 25 PSI


