background image


For spares or support of your Handy product, 

please contact us: 


Tel: 01793 333212 

(Mon 

 Fri 8.00am to 5.30pm excl. Bank Holidays) 


Email: customerservice@handydistribution.co.uk 


To see our range of garden machinery & equipment visit: 

www.thehandy.co.uk  

Making gardening easier & affordable since 1938


Distributed by Handy Distribution, Murdock Road, Dorcan, Swindon, SN3 5HY 

Summary of Contents for 193845002

Page 1: ...S SPARES SUPPORT 01793 333212 Please read understand this manual payingparticular attention to the safety instructions before use The manufacturer reserves the right to change the product specification and livery according to continued product improvements Images used may differ slightly from the product INSTRUCTION MANUAL ...

Page 2: ......

Page 3: ...quires assembly before use See the Assembly section for instructions Because of the weight and size of the Trailer it is recommended that a minimum of TWO adults be present to assist with the assembly If you require any assistance with regards to the contents or operation of your machine please contact us TEL 01793 333212 MON FRI 8 00AM TO 5 30PM EXCL BANK HOLIDAYS EMAIL customerservice handydistr...

Page 4: ...closed safety instructions must be observed Only perform work described in these instructions for use any other use is incorrect The manufacturer will not assume responsibility for damage resulting from such use SAFETY SYMBOLS Safety alert symbol Used to alert you to potential personal injury hazards Obey all safety messages that follow this symbol to avoid possible injury DANGER Indicates an immi...

Page 5: ... clean and clear when operating CONDITIONS We recommend the machine is not used during winds This may affect the spreading pattern DRESS PROPERLY Do not wear loose clothing gloves scarfs neckties or jewellery rings wrist watches bracelets etc which can be caught in moving parts DO NOT OVERREACH Keep proper footing and balance at all times when using the machine Never stand on the machine Serious i...

Page 6: ...k STEP 1 Insert the latch lock between the latch mount brackets and connect them using an M6x20 hex bolt and a M6 lock nut Tighten so that the latch lock can still pivot Attach the extension spring to the latch lock and the latch mount bracket as shown in figure 1 Insert the Ø13x28 clevis pin through the holes in the latch mount brackets and secure with an Ø3 R pin STEP 2 Attach the latch lock ass...

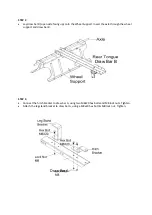
Page 7: ...Insert the axle through the wheel support and draw bar B STE STEP 4 Connect the hitch bracket to draw bar A using two M8x20 hex bolts and M8 lock nuts Tighten Attach the leg stand bracket to draw bar A using a M8x20 hex bolt M8 lock nut Tighten Draw Bar A Draw Bar B ...

Page 8: ...sections of the draw bar can pivot freely Insert clevis pin Ø13x98through both parts of the draw bar and secure with an R Pin Ø3 STEP 6 Place Flat Washer Ø16 onto the Axle followed by the wheel ensuring the inflation valve is facing away from the assembly Add a second Flat Washer Ø16 before inserting Cotter Pin Ø3x25 through the axle Repeat the same actions on the opposite side Draw Bar A ...

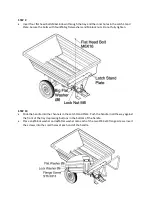
Page 9: ... the latch stand bracket The tabs at the ends of the channels must face the rear STEP 8 Place the poly tray down onto the Wheel Support the Latch Stand Plate Fasten the tray to the wheel support using eight M8x16 flat head bolts and M8 lock nuts Fasten the tray to the Latch Stand Plate Latch Stand Bracket using four M6x16 Flat head bolts and M6 lock nuts Ensure finger tight only ...

Page 10: ... lock nuts Do not fully tighten STEP 10 Slide the handle into the channels in the Latch Stand Plate Push the handle in all the way against the front of the tray depressing buttons in the bottom of the handle Place an Ø6 lock washer and a Ø6 flat washer onto each of the two ST6 3x13 flange screws Insert the screws into the small holes at each end of the handle ...

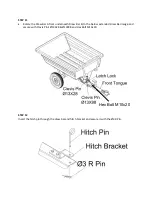
Page 11: ...underneath Draw Bar B to the below extended Draw Bar image and secure with Clevis Pin s Ø13X28 Ø13X98 and Hex Bolt M10x20 STEP 12 Insert the hitch pin through the draw bar and hitch bracket and secure it with the Ø3 R Pin Hex Bolt M10x20 ...

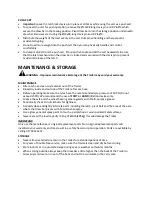
Page 12: ...caution when reversing the Trailer To avoid the Trailer jack knifing always reverse in a straight line CAUTION To avoid possible injury be sure that no bystander is near the cart before releasing the latch TOW CART Toconvert the cart for towing remove the plastic cap from the draw bar Remove the Ø13x98 clevis pin and R Pin which secure draw bar A in the storage position underneath draw bar B Pivot...

Page 13: ... make sure the tyres have the recommended tyre pressure of 20PSI Do not exceed 25PSI We recommend the use of FOOT or HAND inflation devices only Grease the axle and the wheel bearing area regularly with Multi purpose grease Periodically check all nuts bolts for tightness Annually clean and lightly lubricate parts including the latch pivot bolt and the area of the axle where the draw bar pivots wit...

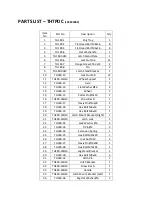
Page 14: ...DIAGRAM THTPDC 193845002 NOTE Parts Lists Diagrams are supplied for information purposes only not all parts are stocked individually we recommend you contact our Spares Team on 01793 333212 for expert advice ...

Page 15: ... 15 Cotter Pin Ø3x25 2 16 TH180 16GM Draw Bar B 1 17 TH180 17 Clevis Pin Ø13x28 1 18 TH180 18 Hex Bolt M6x16 2 19 TH180 19 Hex Bolt M6x20 1 20 TH180 20GM Latch Mount Bracket Right 1 21 TH180 21GM Latch Lock 1 22 TH180 22 Lock Washer Ø6 2 23 TH180 23 R Pin Ø3 3 24 TH180 24 Extension Spring 1 25 TH180 25 Hex Bolt M10x20 1 26 TH180 26 Lock Nut M10 2 27 TH180 27 Clevis Pin Ø13x98 1 28 TH180 28 Hex Bol...

Page 16: ...ent Spare Parts unless normal wear tear component which are covered for 30 days g All machines must be serviced within the first 12 months from the original date of purchase to comply with the warranty failure to do so will invalidate the 2nd year of the warranty All Handy Mowerland and Q Garden products a 1 year from the original date of sale to the first domestic user b 90 days from the original...

Page 17: ... products GJ Handy Co Ltd will never warranty in terms of the merchantability or the fitness for a particular purpose b No person is authorised to make any warranties representations or promises expressed or implied on behalf of GJ Handy Co Ltd or to modify the terms conditions or limitation of this warranty policy in any way c Neither GJ Handy Co Ltd nor any company affiliated with GJ Handy Co Lt...

Page 18: ...__________________________________ _____________________________________________ _____________________________________________ _____________________________________________ _____________________________________________ _____________________________________________ _____________________________________________ _____________________________________________ ___________________________________________...

Page 19: ......

Page 20: ...2 Mon Fri 8 00am to 5 30pm excl Bank Holidays Email customerservice handydistribution co uk To see our range of garden machinery equipment visit www thehandy co uk Making gardening easier affordable since 1938 Distributed by Handy Distribution Murdock Road Dorcan Swindon SN3 5HY ...

Reviews: