Owner's Manual
Entry Trim Maintenance
The entry trim screws mounted on the interior of the door should be checked to assure tightness. The diagrams on
the following page (Figure C) will show how to locate the screws. A detailed parts list is also included for your
convenience.
A heavily scratched handle or escutcheon can be removed and replaced if necessary. Here are the directions on how
to change each.
Changing 3080 Series Escutcheon or Handles
Step 1
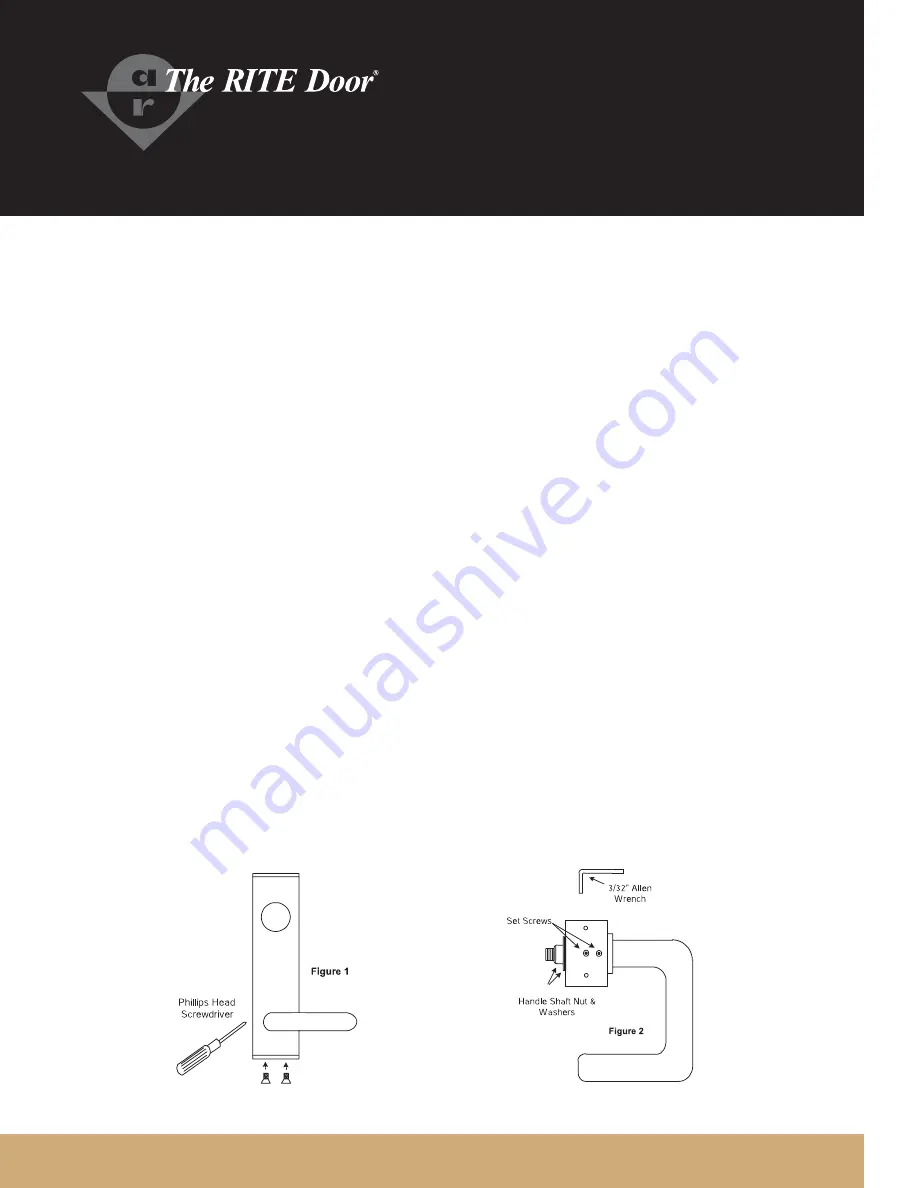
- Turn the lever handle into position shown in Figure 1.
- Remove the two flat Phillips head screws on the bottom escutcheon plate using a Phillips head screwdriver.
- Remove bottom escutcheon plate.
Step 2
- On the bottom of the trim, loosen the two set screws (TWO TURNS MAXIMUM!) with the 3/32" allen wrench
provided.
- Remove the handle shaft nut and two washers shown in Figure 2.
- Remove handle from escutcheon assembly.
- If handle only is being replaced move onto Step 3.
- Remove and replace escutcheon.
Step 3
- Replace lever and install washers and handle shaft nut. (DO NOT OVER TIGHTEN!) Nut should be lightly
tightened down then backed off until handle is operational.
- Tighten the two bottom set screws.
- Replace the bottom escutcheon plates and secure with the Phillips head screws.


