background image

A036PO30501409

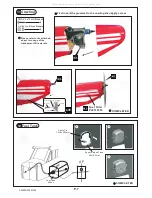
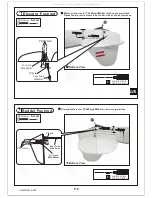
Cowling

11

PWA2 6x12mm 

Screw

.

d1.5xD6.5mm 

Silicon Grommet

4

4

First insert the grommet to the cowling then apply screw.

Please


refer


to


the


attached


sheet


for


usage


of


the


transparent


3D


template

.

P.7

Fuel


Tank

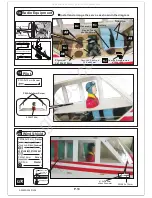
12

Fuel Tank

450cc

COMPLETED

UP

Fuel


Filler

PL8110030

COMPLETED

Double-sided Tape

40x100mm

Cable Tie

1.5x5x400mm

1

2

3

PWA2.6x12mm

Silicon Grommet d1

.

5xD6

.

5mm

Cowling

Fuselage

All manuals and user guides at all-guides.com

Summary of Contents for 1/4 SUPER CUB

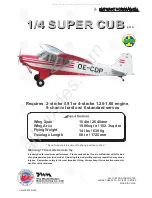
Page 1: ...lease seek advice if one is not familiar with this kind of engine powered precision model Operating this model without prior preparation may cause injuries Remember safety is the most important thing Always keep this instruction manual at hand for quick reference Specifications are subject to change without notice Specifications Requires 2 stroke 0 or 4 stroke engine 5 channel radio w 6 standard s...

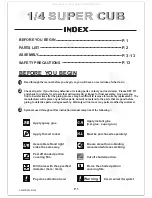
Page 2: ...U BEGIN PARTS LIST ASSEMBLY SAFETY PRECAUTIONS P 1 P 2 P 13 BEFORE YOU BEGIN Read through the manual before you begin so you will have an overall idea of what to do Symbols used throughout this instruction manual comprise of the following 1 2 3 P 1 3mm Do not overlook this symbol Cut off shaded portion Peel off shaded portion covering film Pay close attention here Pierce the shaded portion coverin...

Page 3: ...c PLASTICTUBEd2xD3x300mm 1pc 11 SCREWPWA2 6x12mm 4pcs SILICONGROMMETd1 5xD6 5mm ForCowling 4pcs COWLING 1pc 12 FUELTANK450cc 1set CABLETIE1 5x5x400mm 1pc DOUBLE SIDEDTAPE40x100mm 1pc 13 SCREW PB2x16mm 6 pcs FUEL TUBE Ø6x5mm 2 pcs CLEVIS PL4112103 2 pcs TRI HORN M3x22mm L PL4111251 2 sets PUSHROD Ø1 8x1000mm w Threads For Elevator Servo 2 pcs 14 SCREW PB2x16mm 3 pcs FUEL TUBE Ø6x5mm 1 pc CLEVIS PL4...

Page 4: ...5mm Straper Fuel Tube Ø6x5mm PB2x30mm Tri horn M3x22mm Clevis Pushrod Ø1 8x120mm PWA2x8mm 1mm 1mm Ø1mm pilot holes for The Wings Maker horn are pre drilled Please look for pin hole marks at under side of control surfaces tri TWM PL8210010 CLEVIS WRENCH 12 PB2 x 30mm Screw 16 PWA2 x 8mm Screw All manuals and user guides at all guides com ...

Page 5: ... 15mm Main Wing Strut 3 4 Bottom View Temporary install the main wing adjust leveling of the stabilizer to make it as parallel to the main wing as possible Wing Struts 380mm 369mm 202mm 193mm 69mm P 4 Pre glued M3 Nut 4 d3xD7mm Washer 16 C C C C 69mm d3xD7mm Washer M3 x 15mm Screw 12 Plastic Wire Bracket All manuals and user guides at all guides com ...

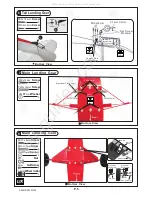
Page 6: ...P 5 1 5mm PA3x14mm Screw 3 3 PWA2x12mm Screw PA3x14mm 3 1mm Collar 1 5mm 1 5mm Copper Plate 1x10x40mm M3x3mm Set Screw Set Screw M3x3mm PA3 x12mm Screw d3xD7mm Washer 14 2 8 Main Landing Gear PA1 7 x 8mm Screw PM3 x 13mm Screw M3 Nut 3mm Set Screw 4 6mm Wheel Collar 6 8 16 8 4 4 PM3 x 13mm Screw 2 PM3x13mm PM3x13mm Aluminum Plate 2mm d3xD7 Washer All manuals and user guides at all guides com a l l...

Page 7: ...tle Pushwire Ø1 2x480mm Plastic Tube d2xD3x300mm 147mm 5 79 in Installed Engine Position d4xD12mm Washer M4x35mm SOCKET HEAD SCREW M4 NYLON INSERT LOCK NUT Copper Tube d4 1xD5x67 2mm M4x30mm Sock Head Screw 1 2 Make sure the rounded edges are facing the shock absorbing SILICON PAD KM3x20mm Screw Copper Tube d3 1xD4x7 2mm M3 Nylon Insert Lock Nut D4xD9mm Washer ANTI VIBRATION MOUNT INSTALLATION d4x...

Page 8: ...apply screw Please refer to the attached sheet for usage of the transparent 3D template P 7 Fuel Tank 12 Fuel Tank 450cc COMPLETED UP Fuel Filler PL8110030 COMPLETED Double sided Tape 40x100mm Cable Tie 1 5x5x400mm 1 2 3 PWA2 6x12mm Silicon Grommet d1 5xD6 5mm Cowling Fuselage All manuals and user guides at all guides com ...

Page 9: ...PL8210010 CLEVIS WRENCH PB2x16mm Screw 6 PB2x16mm Screw 3 Clevis PB2x16mm Fuel Tube Ø6x5mm Tri horn M3x22mm Ø1mm pilot holes for horn are pre drilled The Wings Maker tri Ø1mm pilot holes for horn are pre drilled Please look for pin hole marks at under side of control surfaces The Wings Maker tri 186mm 65mm 145mm 43mm All manuals and user guides at all guides com ...

Page 10: ...tor M2 Nut 2mm Washer 1 2 Please refer to the attached sheet for linkage connector installation 3x3mm Set Screw Throttle Servo 2mm 2mm Washer M2 Nut 2mm Washer PM2x16mm Screw 6 4 PM2x8mm Screw M2 Nut 6 M2 Nut M2 Nut PM2x8mm Clevis d2 5xD3 2x8mm d2 5xD3 2x8mm PM2x16mm PM2x8mm 2mm 2mm COPPER PLATE 1x10x40mm Window B COMPLETED d2xD5mm d2xD5mm 3mm Washer 6 All manuals and user guides at all guides com...

Page 11: ... shown in the diagram PC001102A PWA 2x12mm Screw d1 5xD6 5mm silicon Grommet PWA2 3x12mm P 10 KM 2x8mm M2 Nut Elevator Push rod Ø1 8x85mm Elevator Servo Pushrod Connector J1 Pushrod Ø1 8x85mm J2 Pushrod Ø1 8x1000mm J1 J2 M2 NYLON INSERT LOCK NUT PM2x14mm d2xD5mm Washer PWA2 3x12mm Screw d1 5x6 5mm Silicon Grommet 4 M2 NYLON INSERT LOCK NUT 2 PM2x14mm Screw 2 d2xD5mm Washer 4 4 All manuals and user...

Page 12: ...ing 21 Wing Tube Ø16x661mm 4 Set Screw M3 x 8mm Wing Tube PWA2 3x12mm Self Tightening Wing Latch Set Screw M3X8mm M3x8mm Set Screw WireØ0 8mm Completed Wing Tube Long slot Short slot All manuals and user guides at all guides com ...

Page 13: ... fuselage configuration as shown in the diagrams Wing Struts B C B C 22 23 A A Screw M3x8mm Washer d3xD7mm M3 NYLON INSERT LOCK NUT P 12 M3x8mm SocketHeadScrew d3xD7mm Washer M3NylonInert Lock Nut 2 4 2 All manuals and user guides at all guides com ...

Page 14: ...ine does not mean better performance In fact over powered engine may cause severe damage and injuries Make sure the air field is spacious never fly the plane too close to people and never get too close to a running propeller If you find wrinkles on the covering as a result of weather changes you can use hot iron to remove the wrinkles Please begin with lower temperature setting and gradually raise...

Page 15: ... Product Registration Form US Customers We would like to share with you any relevant information regarding your model including product news and free upgrade parts when applicable Please fill in the following and send to AirBorne Models 4749 K Bennett Drive Livermore CA 94551 USA 1 Name 2 Address 3 Phone E mail 4 Model Wing QC Fuselage QC QC numbers are stamped on wing and fuselage 5 Date of Purch...

Page 16: ...on guidance of the actual cutting of the pre painted cowling Simply cut the transparent 3D template to fit your engine and exhaust pipe then slide onto the actual cowling and use as template to mark the openings required for final cutting All manuals and user guides at all guides com a l l g u i d e s c o m ...

Page 17: ...Code No Size Package Code No Size Package Code No Size Package Code No Size Package Code No SV4031 KP0041300 Special tool for clevis installation Suitable for standard and small EP clevis Large Clevis Small Clevis All manuals and user guides at all guides com ...

Page 18: ...A036PO30501409 All manuals and user guides at all guides com ...

Reviews: