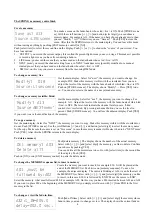
memory; it can be selected for ‘next’ under memory play and faded in by pressing [GO stop]. Choosing “MERGEmode”:
the DMX input data will be merged with the SPRINGDMX data according highest takes precedence. So the SPRING
functions as a control desk and a merger at the same time. On the second line you can set the DMX-in data to hold(= y) or
fade out(= n) on loss of DMX-in signal. You can change the setting by pressing button [YES] or [NO].
Setting the default fade time
Repeat pressing [next menu] or [previous menu] till you see the adjacent menu.
Here you can set the fade-in/out time which a memory automatically gets at
create time. It is also the time 'MANUAL' will fade-in in an automatic fade.
Change it by pressing [<<] or [>>] and/or selecting a digit.
Creating 16-bits fades
Repeat pressing [next menu] or [previous menu] till you see the adjacent menu.
The default minimal stepping size of a fade is 1/255 (=8 bits) of the total change
in value. With this menu you can set a smaller stepping size for particular control
channels by pairing them. Move the cursor to “PAIR CHxxx&xxx” and select by
pressing [<<] or [>>] the desired channel pair. Press on [YES] to confirm. Each
pair builds up one 16 bit control channel: channel N is the high byte and channel N+1 the low byte. This makes the
minimal stepping size for a fade 1/65535 (16 bits) of the total change in value. The real stepping size of the corresponding
byte values in the DMX signal depends on the DMX-rate and the fade time. Channel pairing is only useful if the DMX
steered devices can handle this. For example in case of moving lights; channel pairing gives the opportunity of a 16 bits
positioning. With [NO] you can undo a previous pairing.
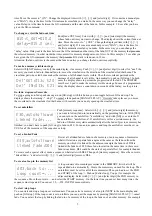
Viewing the selected memories in a Memory Control menu.
Repeat pressing [next menu] or [previous menu] till you see the adjacent menu.
Here you can enable live seeing a selected memory in a Memory Control menu.
There is one exception: is for example A04 next-memory in the main menu than
will A04 automatically the memory what is selected by pressing on [fade-in
time]. This memory will not shown live so you can change the fade time 'blind'.
If you select an other memory it will shown live, of course if yes is selected.
Setting the remote control type
Repeat pressing [next menu] or [previous menu] till you see the adjacent menu.
Here you can enable and selecting the remote control type. By pressing [<<] or
[>>] you can select “OFF”, “PRESET selector” or “MIDI, Channelxx”. For both
types of remote control you have to take account of the channel number. So if
you set “PRESET selector” you have aware of the channel number. The channel
number depends on the jumper setting on the remote controller. The default channel number is 1.
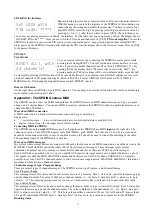
Create a BACKUP.
Repeat pressing [next menu] or [previous menu] till you see the adjacent menu.
You can create 1000 different copies (backups) of the whole set up and all
memories. These backups will be stored in an USB memory stick placed at right
side of the SPRING. Some older sticks does not work! Push on [<<], [>>] and
[select digit] to select the backup number and confirm this choice by pushing
[YES]. De file what will be created has the name P24-XXXX.TTL or P72-XXXX.TTL(SPRING-V3-24/72 only),
XXXX=1,2,..,1000. You can lock this file on a PC by setting the read only attribute. Do not edit the file because that will
damage the backup file.
Restore a BACKUP.
Repeat pressing [next menu] or [previous menu] till you see the adjacent menu.
With this menu you can restore a backup(if exist) from a USB memory stick By
pressing [<<], [>>] and [select digit] you select the backup number(1,2,...,1000).
Then, press on [YES] to confirm your choice. The display shows “Memory will
be overwrite!, Sure?”. Press on [YES] to start the operation. After that the
SPRING will make a restart. Press on [NO] to cancel the restore operation.
Caution: if you want to restore a P72-
XXXX.TTL backup file the SPRING must be set-upped for 72 channels. A P24-XXXX.TTL file can only restored
on a SPRING set-upped for 24 channels.
8
Remote
control=
PRESET
selector_
PAIR Ch001&002_
for 16bit fade:n
Default fade
time=003.0s
Show Memory in
Mem’ctrl menu:n
RESTORE
memory
backup
0001?
CREATE
memory
backup
0001?


