NEBULA OPERATION 21
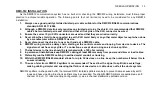
SETTING LOCAL SCENES ON/OFF
To set the local Scenes playback on or off:
1. From the top menu, press Menu twice.
2. Press Up
5
or Down
6
to select “Local Scenes” (on page 2), then press
“on”
(Right
4
) or
“off”
(Left
3
) to
set the scenes playback On or Off (this also sets off Local and Remote Shows).
3. Press Back until you reach the top menu: the screen shows “Changes saved to flash memory”.
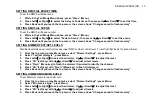
SETTING REMOTE SCENES ON/OFF
To set Remote Scenes playback on or off (for use with Theatrelight Wallplate controllers):
1. From the top menu, press Menu twice.
2. Press Up
5
or Down
6
to select “Remote Scenes” (on page 2), then press
“on”
(Right
4
) or
“off”
(Left
3
) to
enable or disable Remote Scenes playback (this also sets off Local and Remote Shows). The Remote LED
lights when Remote Scenes are enabled.
3. Press Back until you reach the top menu: the screen shows “Changes saved to flash memory”.
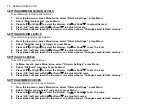
SETTING UP AREA ID AND REPORT ID
To set Remote Scenes area ID (for use with other Nebulas and with Theatrelight Wallplate controllers), and Report ID (for
use with Theatrelight Reporting software) for each dimmer pack:
1. From the top menu, press Menu twice.
2. Press Up
5
or Down
6
to select “Setup Area ID” (on page 2), press Menu.
3. With the cursor over the Area ID, press
5
or Down
6
to set the Area ID to a value between 1 and 8.
4. Press Right
4
or Left
3
so the cursor is over the Report ID number.
5. With the cursor over the Report ID, press
5
or Down
6
to set the Report ID to a value between 1 and 250.
6. Press Back until you reach the top menu: the screen shows “Changes saved to flash memory”.
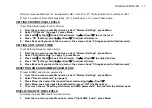
SETTING SCENES LEVELS
To setup Scenes levels:
1. From the top menu, press Menu twice.
2. Press Up
5
or Down
6
to select “Local Scenes” (on page 2), then press Menu.
3. Press Up
5
or Down
6
to select the Scene number you want to edit, then press Menu.
4. Press Left
3
or Right
4
to select the dimmer, Up
5
or Down
6
to adjust the Scene level.
Summary of Contents for NEBULA
Page 4: ......


