ECHO PELLET E.I. II
PELLET HEATER
17
HIGH TEMP/FLUE AND TRIM
INDICATORS
High Temp/Flue
: There is a small window to the
left of the fan button that will blink red if the flue
pipe becomes obstructed or there is a high wind
condition, creating a back draft. If there is problem
with the fan guard becoming blocked due to dust
and lint build up then this light will come on and
stay steady red. The feed will shut off and the stove
will shut down when these two conditions are
present. Maintenance is required and thorough
cleaning and pipe check must be performed if these
conditions persist.
Battery Light
: When the green light is blinking the
battery is charging. When the green light is steady
the battery is fully charged. If this light is red, then
the battery terminals are plugged in backward.
Trim Button
: On the left side of the control panel
there is a small, round button that will turn
clockwise and counter-clockwise. This button
allows you to control the feed rate in each setting
—
Low, Med, and High. By turning the button
clockwise you can increase the feed rate in each
setting. By turning the button counter-clockwise
you can decrease the feed rate.
Move this button carefully
! It is designed to
fine-tune the heater in each position in the event
you change brands of pellets and/or live at a
higher elevation.
BATTERY OPERATION
Always plug AC cord in before DC battery.
1. The battery must be one foot from the stove to
ensure that the terminal does not touch any part
of stove.
2. The Echo Pellet 12V back-up can be purchased
as an option and includes the following
components:
a.
Deep cycle seated 12-volt gel cell battery
(available at most battery stores)
b. Battery connector cables for hook-up to
the heater (available from your dealer or
Thelin Hearth Products)
3. To hook up the battery and engage the 12-volt
back-up system, do the following:
a. Connect the red battery cable to the (+)
positive terminal on the battery. Then plug
the red banana plug into the red receptacle
on the stove.
The red must be plugged in
first
before the black
.
b. Connect the black battery cable to the (-)
negative terminal on the battery. Then plug
the black banana plug into the black
receptacle on the stove. If you hook up the
cables correctly the LED light on the control
panel come on and glow green. If hooked up
improperly, this LED will glow.
WARNING: Make sure the red cable goes to
the red terminal (positive connector) and the
black cable goes to the black terminal (negative
connector).
4. If you decide to purchase your own 12-volt
back-up system, we recommend a sealed gel
cell battery.
Failure to install the proper
battery could cause physical harm to you
and/or your property and will also void the
heater warranty
.
5. When the battery is properly connected and the
heater plugged in, the following will happen
automatically:
a.
The heater will automatically switch to 12-
volt power if there is a power failure and
switch back when power is restored.
b. The battery will be trickle charged as long
as the heater is plugged into 110 AC wall
outlet.
Do not use extension cords
. The
trickle charge will not recharge a low or
dead battery, but will keep a charged
battery at maximum performance.
Do not
unplug stove for the summer and keep
Summary of Contents for ECHO-COMSTOCK PELLET E.I. II
Page 4: ...ECHO PELLET E I II PELLET HEATER 4 LABORATORY LISTING LABEL...
Page 9: ...ECHO PELLET E I II PELLET HEATER 9 FIGURE 4...
Page 10: ...ECHO PELLET E I II PELLET HEATER 10 FIGURE 5...
Page 11: ...ECHO PELLET E I II PELLET HEATER 11 FIGURE 6...
Page 14: ...ECHO PELLET E I II PELLET HEATER 14 FIGURE 8...
Page 22: ...ECHO PELLET E I II PELLET HEATER 22 FIGURE 13 REPLACEMENT PARTS LIST...
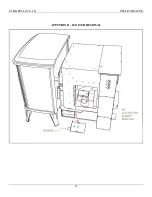
Page 27: ...ECHO PELLET E I II PELLET HEATER 27 APPENDIX B E I FIREPOT ASSEMBLY...
Page 29: ...ECHO PELLET E I II PELLET HEATER 29 APPENDIX D IGNITER REMOVAL...
Page 31: ...ECHO PELLET E I II PELLET HEATER 775 241 2586...


