background image

8  •


ENGLISH

The ultrasonic humidier should be thoroughly cleaned daily after use, and weekly when being 
used frequently.
• 

Unplug the humidifier before cleaning and storage. 

• 

Never allow unused water to sit in the water tank or base for an extended peiord. 

• 

If the mist or humidifier produces an unpleasant smell, stop use and wash immediately 
before attempting use again. 

• 

Do not submerge the base nor allow to be held under running water. 

Daily Cleaning Procedure / After Use:

1. 

Ensure that the power is set to MIN (OFF)  and the power cord is unplugged. 

2. 

Remove water tank and empty completely. Empty any remaining water in base .

3. 

Wipe all components with a soft, dry cloth – tank, cap, base and interior of base 
including the nebulizer and transducer. 

4. 

Do not use detergents or soaps. 

5. 

Hand dry or allow to dry completely before storage. 

Weekly Cleaning Procedure:

1. 

Remove water tank and empty completely. Empty any remaining liquid in base.

2. 

Prepare a solution of 50% white vinegar and 50% water. 

3. 

Replace cap and return water tank to base; this will allow the base to fill up with the 
vinegar solution and allow the ‘base’ to soak. 

4. 

DO NOT TURN THE HUMIDIFIER ON

5. 

Allow to soak a minimum of 4 hours, overnight is suggested. 

CLEANING, MAINTENANCE & STORAGE

Summary of Contents for 11-526

Page 1: ...INSTRUCTION MANUAL ENGLISH ESPA OL Cool Mist Ultrasonic Humidifier Model 11 526 Please read this instruction manual completely before operating this unit...

Page 2: ...LETELY BEFORE USING YOUR UNIT TO ENSURE SAFE AND EFFECTIVE USE AS WELL AS LONG LIFE OF THE PRODUCT HUMIDIFIER USE TIPS To maintain and prolong the lifespan of the humidifier only use room temperature...

Page 3: ...0 2020 Veridian Healthcare LLC Toll Free Customer Care Help Line 1 866 326 1313 Monday Friday 8 30 a m 4 30 p m CST Introduction 2 Important Safeguards Care Safety Information 4 5 Product Features 6 I...

Page 4: ...rd or plug if it has been submersed in water or dropped Read all instructions carefully before using the appliance Before connecting the appliance check if the voltage indicated at the bottom of the a...

Page 5: ...en given supervision or instructions concerning the use of the appliance by a person responsible for their safety Never add essential oils in the water tank of the humidifier The oils can damage the h...

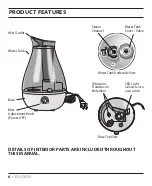
Page 6: ...stment Knob Power OFF Base DETAILS OF INTERIOR PARTS ARE INCLUDED THROUGHOUT THIS MANUAL Water Tank Steam Channel Water Tank Cover Valve Water Tank Underside View Base Top View LED Light Indicates uni...

Page 7: ...ed to aim the mist in the desired direction and turn the mist adjustment knob to the desired level The LED light will illuminate indicating the unit is ON 5 The water tank will automatically fill the...

Page 8: ...power cord is unplugged 2 Remove water tank and empty completely Empty any remaining water in base 3 Wipe all components with a soft dry cloth tank cap base and interior of base including the nebulize...

Page 9: ...water tank 7 Wipe all components with a soft dry cloth tank cap base and interior of base including the nebulizer and transducer 8 Hand dry or allow to dry completely before storage NOTE Humidifier pa...

Page 10: ...ILLUMINATE Confirm the unit is plugged in Check the knob is ON turn toward MAX INDICATOR LIGHT IS ON BUT NO MIST OUTPUT Check for hard water mineral deposits in the base and on transducer clean follo...

Page 11: ...ED ROOM SIZE Medium to Large AVERAGE HUMIDITY OUTPUT 7 1 fl hour outputdependsonroomtemperature humidityandmistoutputsetting RUN TIME Up to 24 hours min setting Up to 10 hours max setting SOUND LEVEL...

Page 12: ...rrantor s option is the sole remedy under this warranty ANY IMPLIED WARRANTIES WHICH THE PURCHASER MAY HAVE ARE LIMITED IN DURATION TO THE TIME THAT THE ORIGINAL CONSUMER PURCHASER OWNS THE PRODUCT So...

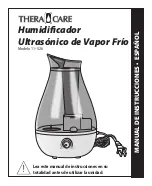
Page 13: ...MANUAL DE INSTRUCCIONES ESPA OL Humidificador Ultras nico de Vapor Fr o Modelo 11 526 Lea este manual de instrucciones en su totalidad antes de utilizar la unidad...

Page 14: ...ZAR LA UNIDAD PARA GARANTIZAR UN USO SEGURO Y EFECTIVO Y UNA VIDA TIL PROLONGADA DEL PRODUCTO CONSEJOS PARA USAR EL HUMIDIFICADOR Para conservar y prolongar la vida til del humidificador utilice nicam...

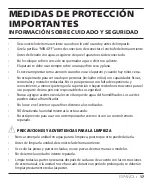
Page 15: ...ayuda sin costo del servicio de Atenci n al Cliente 1 866 326 1313 Lunes a viernes de 8 30 a m a 4 30 p m hora est ndar del centro Introducci n 14 Medidas de protecci n importantes informaci n sobre c...

Page 16: ...si cualquiera de sus partes est da ada incluidos el cable o el enchufe si ha sido sumergida en agua o si se ha ca do Lea con atenci n todas las instrucciones antes del uso Antes de conectar la unidad...

Page 17: ...la supervisi n o hayan recibido instrucciones para el uso por parte de una persona responsable de su seguridad Nunca agregue aceites esenciales en el tanque de agua del humidificador Los aceites puede...

Page 18: ...Apagado Base EN EL MANUAL SE INCLUYE INFORMACI N DE LAS PARTES INTERIORES Tanque de agua Canal del vapor V lvula de la tapa del tanque de agua Vista inferior del tanque de agua Vista superior de la ba...

Page 19: ...ra dirigir el vapor en la direcci n que desee y gire la perilla de ajuste del vapor al nivel deseado Se encender la luz de LED para indicar que la unidad est ENCENDIDA 5 El tanque de agua llenar autom...

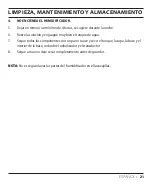
Page 20: ...e la unidad est en MIN OFF M N APAGADA y que el cable est desconectado 2 Retire el tanque de agua y vac elo completamente Vac e el agua que haya quedado en la base 3 Seque todos los componentes con un...

Page 21: ...y bien el tanque de agua 7 Seque todos los componentes con un pa o suave y seco el tanque la tapa la base y el interior de la base incluido el nebulizador y el transductor 8 Seque a mano o deje secar...

Page 22: ...rme que la unidad est enchufada Verifique que la perilla est ENCENDIDA gire hacia MAX EL INDICADOR DE LUZ EST ENCENDIDO PERO NO SALE EL VAPOR Verifique que no haya dep sitos de agua dura o minerales e...

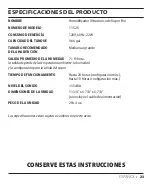
Page 23: ...DE LA HUMEDAD 7 1 fl hora la salida depende de la temperatura ambiente la humedad y la configuraci n para la salida del vapor TIEMPO DE FUNCIONAMIENTO Hasta 24 horas configuraci n m n hasta 10 horas c...

Page 24: ...TODA GARANT A IMPL CITA QUE EL COMPRADOR PUDIERE TENER ES DE DURACI N LIMITADA RESPECTO DEL TIEMPO QUE EL PRODUCTO SE ENCUENTRA EN PODER DEL COMPRADOR CONSUMIDOR ORIGINAL En algunos estados no se perm...

Reviews: