1-877-420-1330
Quest DRY 180 Installation, Operation and Maintenance Instructions
15
www.QuestHydro.com
Info@QuestHydro.com
quest
quest
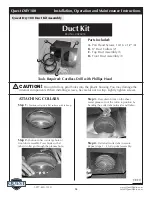
Quest Dry 180 Duct Kit Assembly Continued
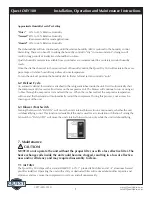
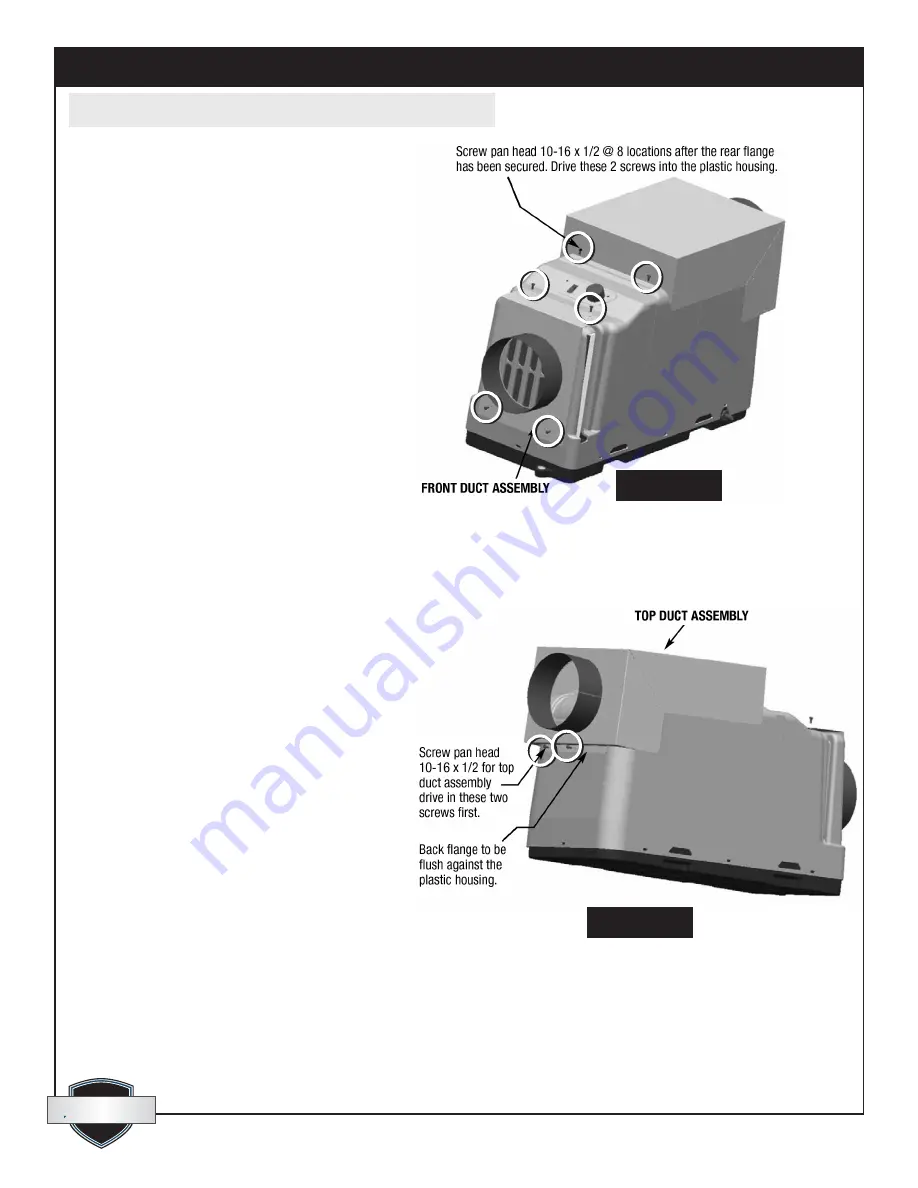
FIGURE 1
FRONT DUCT ASSEMBLY
Step 1.
Check sealing foam on the front duct
assembly. Ensure that none has come loose.
Step 2.
Place front duct assembly on the intake side
of the dehumidifier.
Step 3.
Center the front duct assembly. Ensure the
sealing foam makes contact around the plastic intake
grill surface. Sealing foam should not cover any of
the inlet portion of the intake grill.
Step 4.
DO NOT DRILL PILOT HOLES FOR
SCREWS. You will risk possibly damaging the
internal components. Using the through holes
provided in the front duct assembly, screw in the
four 10-16 X 1/2 screws directly into the plastic
housing (see Figure 1 — screws indicated in white
circle). Be careful not to strip loose. Lightly tighten
screws. Do this in all four through hole locations.
TOP DUCT ASSEMBLY
Step 1.
Check sealing foam on the top duct
assembly. Ensure none has come loose.
Step 2.
Place top duct assembly, ensure the sealing
foam makes contact around the plastic surfaces.
Step 3.
Center the top duct assembly, ensure the
sealing foam makes contact around the plastic
surfaces.
Step 4.
Ensure the rear flange of the top duct
assembly is seated flush against the back of the
plastic housing. See Figure 2.
Step 5.
DO NOT DRILL PILOT HOES FOR
SCREWS. You will risk possibly damaging the
internal components. Using the through holes
provided in the top duct assembly, secure back
flange of the top duct assembly first. Drive two 10-
16 X 1/2 screws directly into the plastic housing.
After the back flange has been secured, drive in the
last two screws (located on the top) into the plastic
housing using the same procedure.
Step 6.
Start unit and check for any air leaks around
the perimeter of the ducts.
Step 7.
If any leaks are found, seal leak with foil
tape.
FIGURE 2


