quest
quest
1-877-420-1330
Quest DRY 180 Installation, Operation and Maintenance Instructions
8
www.QuestHydro.com
Info@QuestHydro.com
7.2 Cleaning and Replacement
Check filters every three to six months. Clean and/or replace when filters are visibly dirty. See cleaning
instructions below.
Replacement filters can be ordered from your dealer or online
at www.Santa-Fe-Filters.com.
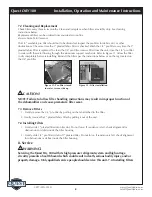
The 1/4” washable pre-filter should not to be discarded. Inspect the pre-filter for debris, dirt, or other
obstructions at the same time the 1” pleated fabric filter is checked. Wash the 1/4” pre-filter every time the 1”
pleated fabric filter is replaced. To clean the 1/4” pre-filter, remove filter from the unit, rinse the 1/4” pre-filter
in water with the water flowing through the aluminum support mesh side. Refer to Figure 11. Allow the filter
to dry completely before reinstalling. Reinstall the filters per the instructions below or on the tag located on
the 1/4” pre-filter.
NOTE: Failure to follow filter handling instructions may result in improper function of
the dehumidifier and cause premature filter wear.
7.3 Remove Filters
1. Gently remove the 1/4” pre-filter by pulling on the tab attached to the filter.
2. Gently remove the 1” pleated fabric filter by pulling it out of the unit.
7.4 Installing Filters
1. Gently slide 1” pleated filter into filter slot. Do not force. If resistance is felt, check alignment for
obstructions or debris inside the filter housing.
2. Gently slide 1/4” pre-filter to left of 1” pleated filter. Do not force. If resistance is felt, check alignment
for obstructions or debris inside the filter housing.
8. Service
Servicing the Quest Dry 180 with its high pressure refrigerant system and high voltage
circuitry presents a health hazard which could result in death, serious bodily injury, and/or
property damage. Only qualified service people should service this unit. 7.4 Installing Filters
Figure 11: Pre-filter rinsed
in water, screen side up.
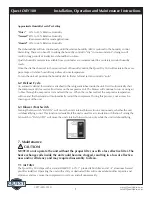
Figure 12: Filter installation.
CAUTION!
WARNING!


