Page 8
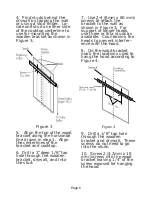
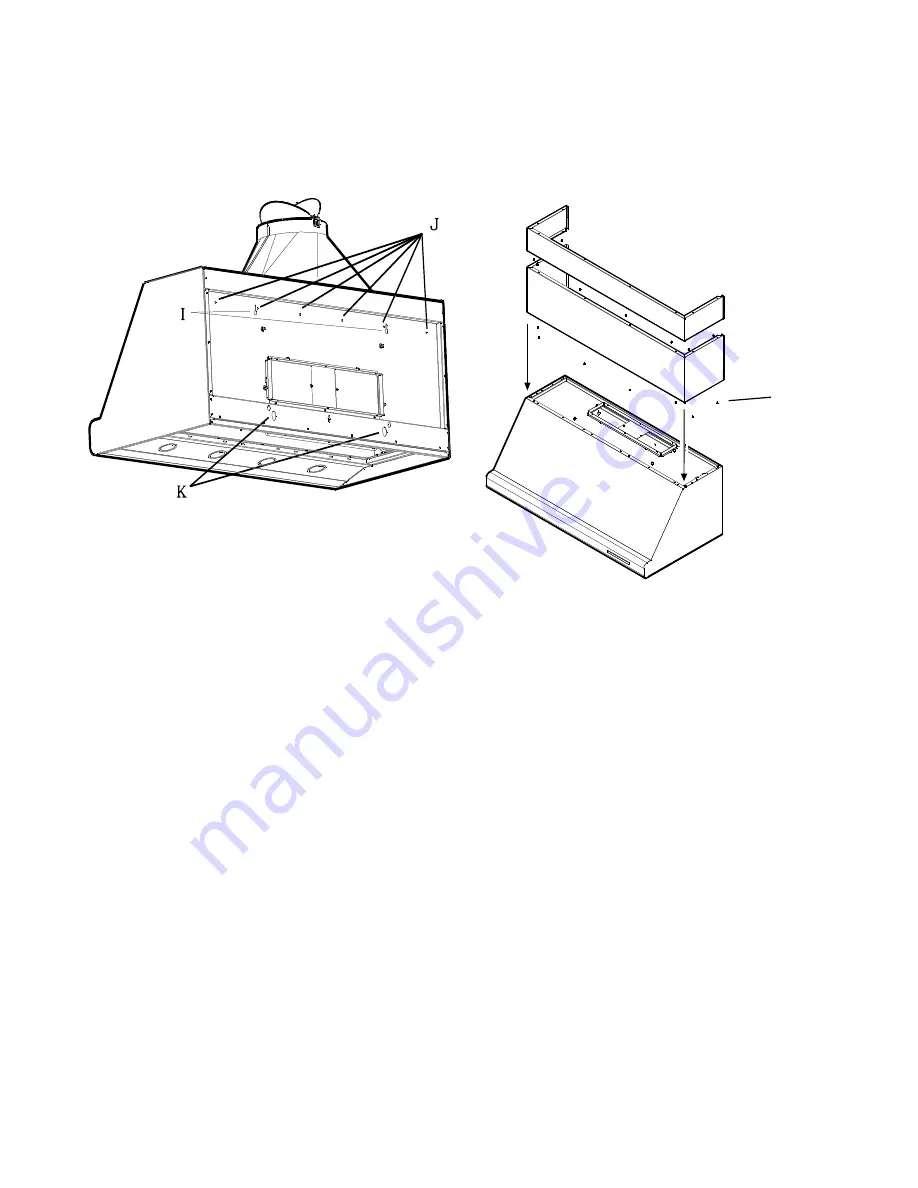
12. Hang the hood using
slots
IIIII
in Figure 8. Make
sure the wood bracket fits
into the recess on the back
of the hood.
Figure 8
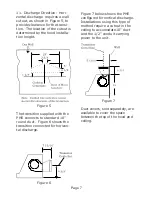
13. Tighten the screws in
slots
IIIII
. Use slots
IIIII
to level
the hood.
14. From inside the hood
drive screws (4.2 mm x 18
mm) through holes
J
J
J
J
J
into
wooden bracket.
15. Drill a 3/8” tap hole
through the center of the
oval holes K into the wall.
Insert two wall plugs into
drilled holes. Tighten hood
to wall anchors by installing
2 screws with washers.
Assembly and Installation
Assembly and Installation
Assembly and Installation
Assembly and Installation
Assembly and Installation
of the Duct Covers:
of the Duct Covers:
of the Duct Covers:
of the Duct Covers:
of the Duct Covers:
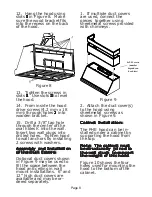
Optional duct covers shown
in Figure 9 may be used to
fill the space between the
hood and ceiling in wall
mount installations. 6” and
12” high duct covers are
available and may be or-
dered separately.
1. If multiple duct covers
are used, connect the
pieces together using
sheetmetal screws provided
with chimneys.
Figure 9
2. Attach the duct cover(s)
to the hood using
sheetmetal screws as
shown in Figure 9.
Cabinet Installation:
Cabinet Installation:
Cabinet Installation:
Cabinet Installation:
Cabinet Installation:
The PHE hood can be in-
stalled under a cabinet by
supporting the hood from
the top.
Note: The cabinet must
Note: The cabinet must
Note: The cabinet must
Note: The cabinet must
Note: The cabinet must
be structurally joined to
be structurally joined to
be structurally joined to
be structurally joined to
be structurally joined to
the wall studs to support
the wall studs to support
the wall studs to support
the wall studs to support
the wall studs to support
the weight of this hood.
the weight of this hood.
the weight of this hood.
the weight of this hood.
the weight of this hood.
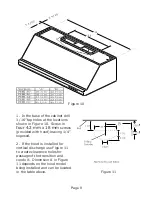
Figure 10 shows the four
holes
used for mounting the
hood to the bottom of the
cabinet.
4x9.5 Screws
(number
depends on
hood size)


