16
Initial start-up
The time of day, language and time display settings may
be accessed at any time by pressing
SETTINGS
while the
appliance is in Standby mode.
1. Connect the appliance to the power supply.
2. Select a setting with the left
<
or
>
button.
3. Change the setting parameter with the right
<
or
>
button.
4. Press
ENTER
.
–
The screen changes to standby mode.
Available settings
Home Connect
™
assistant
About Home Connect
The Home Connect wizard is a part of the initial
installation of the appliance on certain models. If
connection is not completed during the first start-up of
the appliance it may be accessed in the settings menu.
The Home Connect app must first be successfully installed
on a mobile device. See the section “Home Connect™”
on page 24 for full instructions on how to install the
Home Connect app.
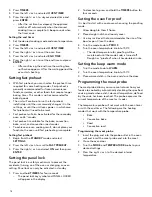
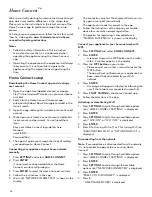
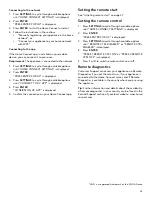
Setting up Home Connect
1. Begin from the
STANDBY
mode and select
SETTINGS
.
2. Press the left
<
or
>
to scroll to
HOME CONNECT.
3. Press
ENTER
.
4. Follow the instructions on the display.
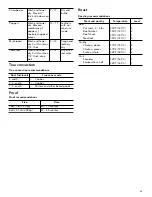
Setting the convection conversion
To convert most baked items for use with convection bake
and true convection (cookies, cakes, pies, etc.), the oven
temperature often needs to be decreased by 25 °F (14
°C). The convection conversion setting reduces the
temperature you enter automatically.
•
The unit will continue to run the convection
conversion value indefinitely until the user manually
changes it in the settings, or until the unit loses power,
in which case convection conversion will need to be
reset.
•
Convection conversion is available for the convection
bake and true convection modes only.
•
For meats and poultry, the temperature should not be
reduced. The same temperature recommended in
recipes and cooking charts for meats and poultry
should be used.
Setting the convection conversion
1. Begin from the
STANDBY
mode and select
SETTINGS
.
2. Press the left
<
or
>
to scroll to
CONVECT
CONVERSION.
3. Press the right
<
or
>
and select
ON
.
Door locking
3
Symbol is displayed during and after the self-clean mode
when the door is locked.
Remote service
3
Symbol is displayed if customer service is connected during
remote access.
Settings
3
Press to access the settings.
Home Connect
3
Remotely control your appliance with a quick click or voice
command.
Mode
Definitions and recommendations
Electric
main
Gas
main
Electric
aux.
Gas
aux.
1
Pro Grand models only
2
Pro Harmony models only
3
Not available on 30'' models
Setting
Option
Time of day
Time in hours and minutes
Language
English, Français, Español
Clock format
12 hr, 24 hr
Clock display
Digital, Analogue
Fast preheat
On, Off
Key press sound
On, Off
Display brightness
1 – 5
Standby mode
On, Off
Dark mode
On, Off
Convect conversion On, Off
Decreases oven temperature by
25°F (14 °C)
Temperature offset • Temp offset: Right oven
-35° to +35°F (-20° to +20 °C)
• Temp offset: Left oven
-35° to +35°F (-20° to +20 °C)
Sabbath
On, Off
Home Connect
Set up using the assistant
Factory settings
Restore
Service access
Connect
Customer service
Displays customer service contact
information
Summary of Contents for PRD304WHC
Page 1: ...THERMADOR COM 8VH DQG FDUH GU IDE Professional Series Pro Grand and Pro Harmony Ranges...
Page 69: ......
Page 70: ......
Page 71: ......


