English 12
Adjusting the Leveling Legs
The range must be level for proper alignment of the oven
doors. All models have a total of (4) leveling legs, one
beneath each corner, that are threaded into the cast
aluminum base structure (see
Figure 9 on page 11
).
--
Rotating the right front leveling leg clockwise will raise
the right corner of the door. Rotating the right front
leveling leg counterclockwise will lower the right side of
the door. Rotating the left front leveling leg will result in
the opposite effect. (See also
“Step 9: Placing and
Leveling the Range” on page 25
.)
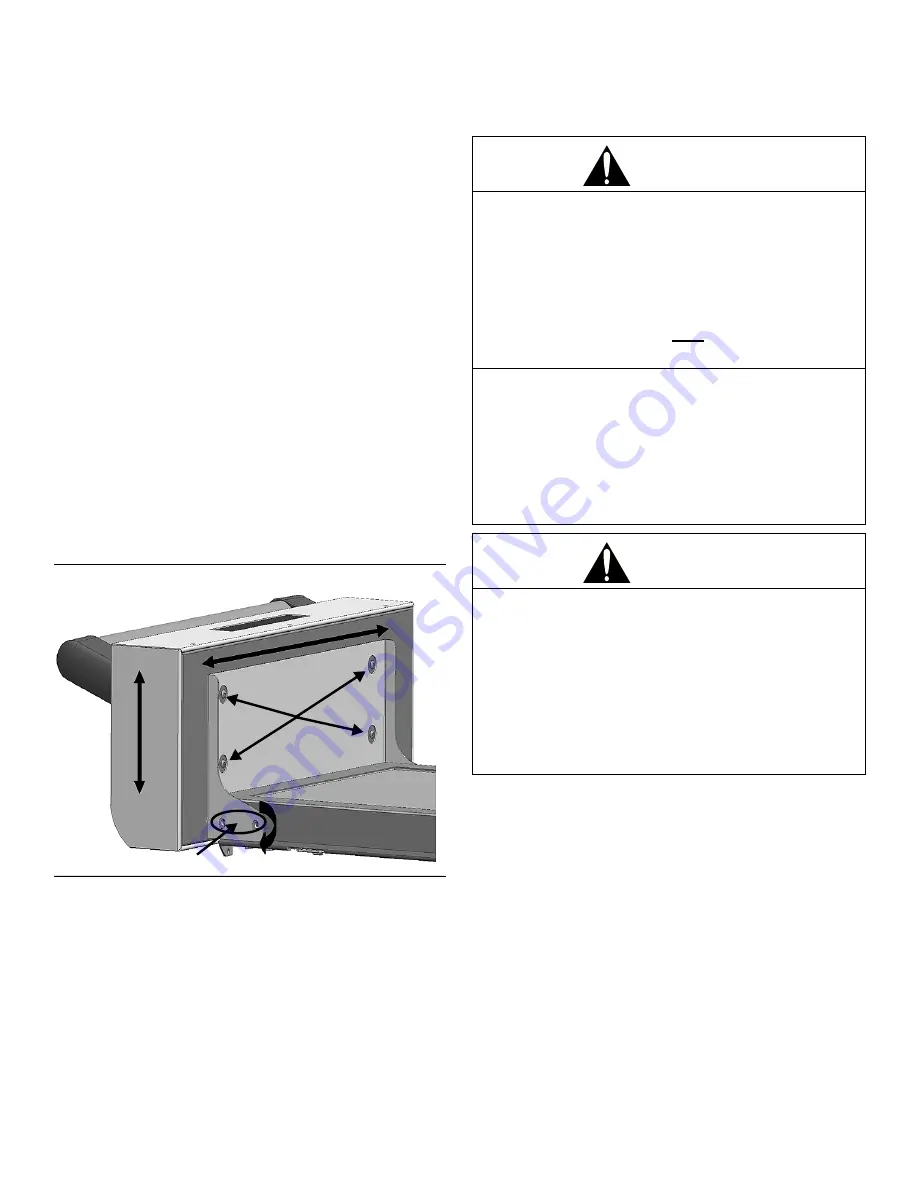
Adjustment for the Warming Drawer Front
1.
To adjust the tilt angle on the warming drawer so the
front face is flush with the front face of the steam oven
door, loosen the (2) screws on both sides of the drawer
frame. Once the correct tilt is achieved, tighten the
screws.
2.
To adjust vertical and horizontal location to ensure an
even gap between the oven doors, loosen the (4)
screws on the back side of the warming drawer door.
Adjust the height of the warming drawer door so that its
bottom edge lines up with the bottom edge of the main
oven door. Adjust the warming drawer door side to side
so that it aligns with the steam oven door. Once all
gaps are even, tighten the screws.
Note:
The
steam oven door is not adjustable.
Step 5: Installing Anti-Tip
Device
ATTENTION — PROPERTY DAMAGE:
• Contact a qualified installer or contractor to determine the
proper method for drilling holes through the wall or floor
material (such as ceramic tile, hardwood, etc.)
• Do not slide the range across an unprotected floor.
• Failure to follow these instructions may result in damage
to wall or floor coverings.
Figure 11: Warming Drawer Adjustment
Adjust Tilt
Adjus
t Verti
cal &
Horizo
ntal
WARNING:
RANGE TIPPING HAZARD:
•
All ranges can tip and injury can result. To prevent
accidental tipping of the range, attach it to the floor by
installing the Anti-Tip Device supplied.
•
A risk of tip-over may exist if the appliance is not
installed in accordance with these instructions. For all
ranges an anti-tip device must be installed as per
these instructions.
If the range is pulled away from the wall for cleaning,
service or for any other reason, ensure that the Anti-Tip
Device is properly re-engaged when the range is pushed
back against the wall. In the event of abnormal usage
(such as a person standing, sitting, or leaning on an
open door), failure to take this precaution can result in
tipping of the range. Personal injury might result from
spilled hot liquids or from the range itself.
WARNING:
ELECTRICAL SHOCK HAZARD:
•
Use extreme caution when drilling holes into the wall
or floor as there may be concealed electrical wires.
•
Identify the electrical circuits that could be affected
by the installation of the Anti-Tip Device, then turn off
power to these circuits.
• Failure to follow these instructions may result in
electrical shock or other personal injury.
Summary of Contents for Professional PRO-HARMONY PRD36
Page 95: ...Español 31 ...


