A40i, A60i
Manual 0-5466
OPERATION
4-7
Set Operating Pressure
NOTE!
Before the gas pressure is set, the torch type, leads length,
type of cutting and amperage should all be set as they
will affect the pressures required. If any of those are
changed, the pressure should be checked again to make
sure it is optimized.
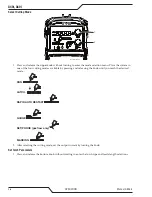
1. Gas pressure must be set in the cutting mode to be used, not in the SET/PURGE mode. Each mode may
require a different pressure for optimal cutting. (90 - 125 PSI / 6.2 - 8.6 bar)
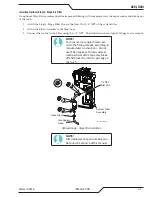
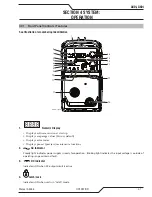
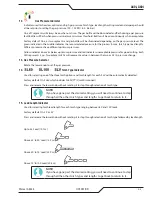
2. Set the gas pressure/flow using the lower knob, 2. Changes will show on the Gas Pressure Interlock
The green indicator in the center is the ideal setting. Each indicator when lit separately is equal to 5 lbs. from
the segment next to it. Each will show 5, 10 or 15 lbs or more below or above the ideal. When two segments
are illuminated together then the change is half as much or 2.5 lbs.. The pressure settings will all be affected
by the other settings for torch, torch length and type of cutting and will require adjustments to the pressure
setting.
Cutting Operation
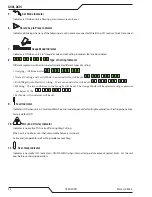
When the torch leaves the workpiece during cutting operations in the RUN mode, there is a brief delay in restarting the
pilot arc. With the system in the RAPID AUTO RESTART mode, when the torch leaves the workpiece the pilot arc restarts
instantly, and the cutting arc restarts instantly when the pilot arc contacts the workpiece. (Use the 'Rapid Auto Restart'
mode when cutting expanded metal or gratings, or trimming operations when an uninterrupted restart is desired).
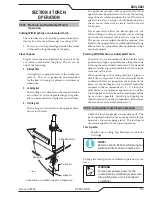
With the system in the LATCH mode the main cutting arc will be maintained after the torch switch is released. To exit or
cancel the LATCH mode, press and release the trigger again or lift the torch from the cutting surface so the arc goes out.
Typical Cutting Speeds
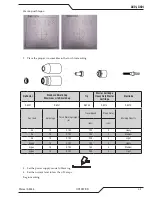
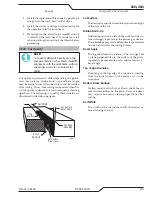
Cutting speeds vary according to torch output amperage, the type of material being cut, and operator skill. Refer to
Section "4T.08 Recommended Cutting Speeds for Mechanized Torch With Exposed Tip" and following for greater details.
Output current setting or cutting speeds may be reduced to allow slower cutting when following a line, or using a
template or cutting guide while still producing cuts of excellent quality.
Postflow
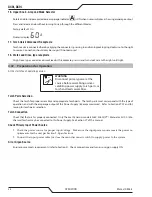
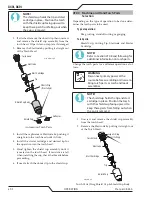
Release the trigger to stop the cutting arc. Gas continues to flow for approximately 20 seconds. During post - flow, if
the user moves the trigger release to the rear and presses the trigger, the pilot arc starts. The main arc transfers to the
workpiece if the torch tip is within transfer distance to the workpiece.
Shutdown
Turn the ON / OFF switch to OFF, to the left as you face the unit from the rear. After a short delay all Power Supply indi-
cators and fan shut OFF. Unplug the input power cord or disconnect input power. Power is removed from the system.
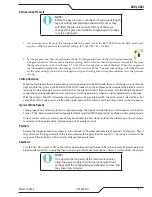
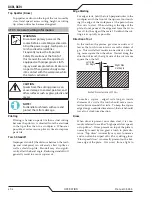
NOTE!
To maximize the longevity of the internal electronics,
allow the power supply to continue running (without
cutting) until the cooling fan speed changes to slow.. This
may take a few minutes
Summary of Contents for A40i
Page 6: ...This Page Intentionally Blank...
Page 8: ...This Page Intentionally Blank...
Page 12: ...TABLE OF CONTENTS This Page Intentionally Blank...
Page 16: ...A40i A60i WARRANTY INFORMATION Manual 0 5466 W 2 This Page Intentionally Blank...
Page 24: ...A40i A60i INTRODUCTION Manual 0 5466 2T 4 This Page Intentionally Blank...
Page 32: ...A40i A60i INSTALLATION Manual 0 5466 3 8 This Page Intentionally Blank...
Page 34: ...A40i A60i INSTALLATION Manual 0 5466 3T 2 This Page Intentionally Blank...
Page 80: ...A40i A60i OPERATION Manual 0 5466 4T 36 This Page Intentionally Blank...
Page 95: ...A40i A60i Manual 0 5466 PARTS LIST 6 3 This Page Intentionally Blank...
Page 99: ...A40i A60i Manual 0 5466 PARTS LIST 6 7 A 07994_AB 1 4 2 3 5 6 7 8 9 10 12 11 10 13...
Page 110: ...A40i A60i APPENDIX Manual 0 5466 A 10 APPENDIX 8 SYSTEM SCHEMATIC 400V 3PHASE CE Art A 13478...
Page 111: ...A40i A60i Manual 0 5466 APPENDIX A 11 Art A 13478...
Page 112: ...A40i A60i APPENDIX Manual 0 5466 A 12 APPENDIX 9 SYSTEM SCHEMATIC 208 480V 3PHASE Art A 13479...
Page 113: ...A40i A60i Manual 0 5466 APPENDIX A 13 Art A 13479...
Page 115: ...This Page Intentionally Blank...

