Form: 2435-3
Arctic Installation and Operation Manual
Revision: 10
P/N 105641-01
Date: 12-1-2018
Thermal Solutions, 1175 Manheim Pike, Lancaster, PA 17601
Web:
Phone:
717-239-7642
Fax:
877-501-5212
Email:
41
4.
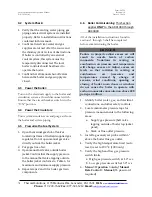
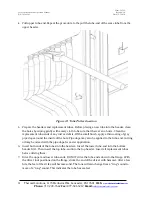
Pull upper tube-end. Repeat the procedure to the pull the tube-end of the same tube from the
upper header.
Figure 12: Tube Puller Insertion
5.
Prepare the headers and replacement tubes. Before placing a new tube into the header, clean
the holes by wiping gently with emery cloth to be sure that there are no burrs. Clean the
replacement tube-ends of any rust or debris. With a small brush, apply a thin coating of gray
pipe dope around the inside of the hole. Pipe dope may also be applied to the tube-end. Cutting
oil may be mixed with the pipe dope for easier application.
6.
Insert both ends of the tubes into the headers. Insert the lower tube-end into the bottom
header first. Then insert the top tube-end into the top header. Insert all replacement tubes
before driving them.
7.
Drive the upper and lower tube-ends. DO NOT drive the tube-ends down to the flange. With
the driver tool positioned on the flange, strike the end of the driver with hammer. After a few
hits, the feel of the strike will become solid. The tone will also change from a “ting” sound to
more of a “tong” sound. This indicates the tube has seated.

