


Page 11 of 17
AIR CONDITIONER USE
Operating your air conditioner properly helps you
obtain the best possible results.
This section explains proper air conditioner operation
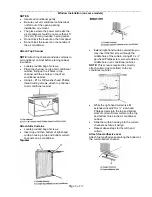
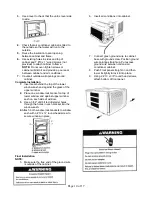
IMPORTANT:
•
If you turn off the air conditioner, wait at least
3 minutes before turning it back on. This
prevents the air conditioner from blowing a
fuse or tripping a circuit breaker.
•
Do not try to operate your air conditioner in
the cooling mode when outside temperature
is below 65ºF. The inside evaporator coil will
freeze up, and the air conditioner will not
operate properly.
NOTE:
In the event of a power failure, your air conditioner
will operate at the previous settings when the power
is restored.
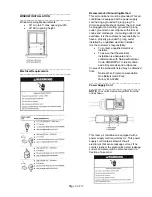
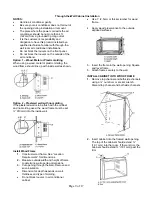
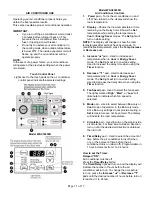
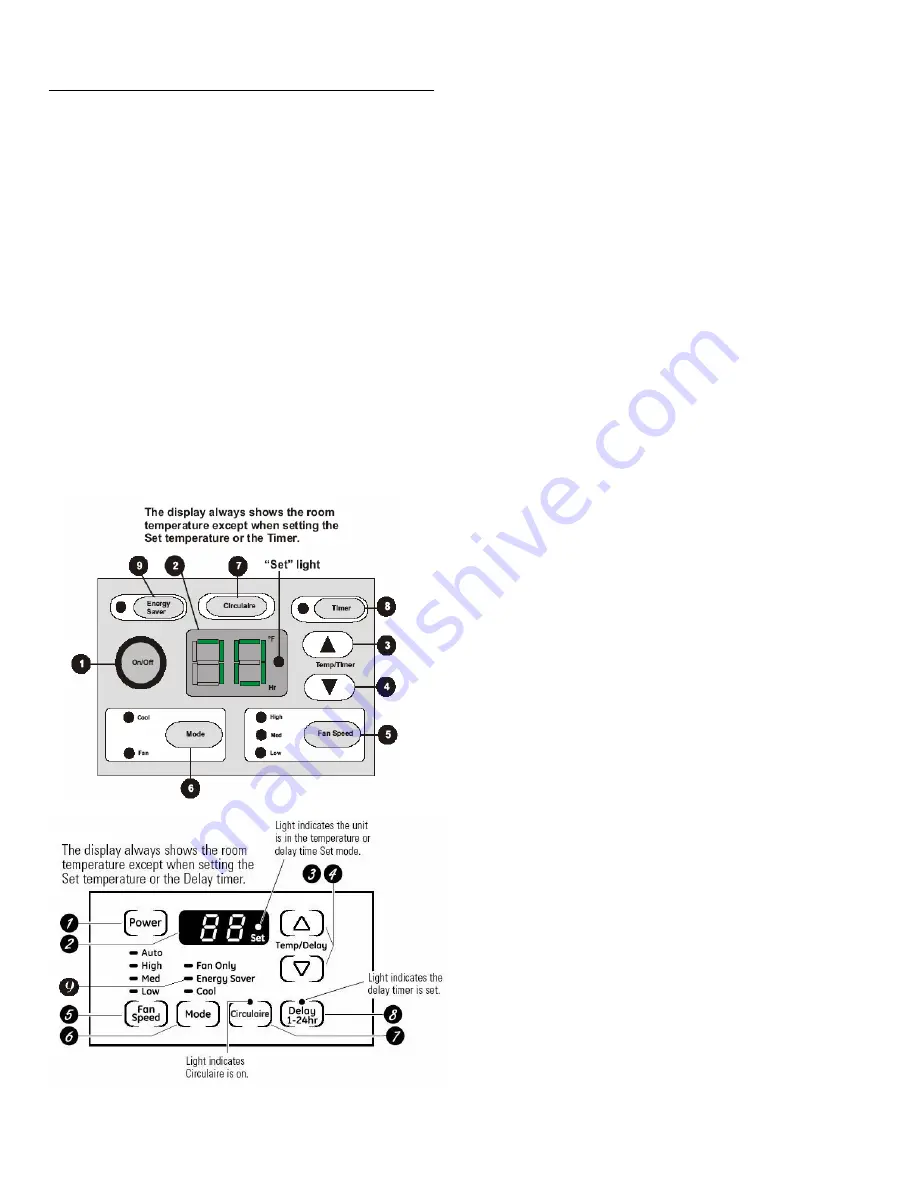
Touch Control Panel
Lights next to the touch pads on the air conditioner
control panel indicate the selected settings.
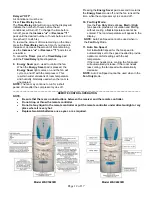
Model WAC18230R
Model WAC24230R
Air Conditioner Controls
1.
Power
pad
–
Turns the air conditioner on and
off. When turned on, the display will show the
room temperature.
2. Display
– Shows the room temperature or time
remaining on the Delay timer. Shows the
Set
temperature while setting the temperature in
Cool
or
Energy Saver
modes. The
Set
light will
turn on while setting.
NOTE:
The display will change to show the room
temperatures after settings have been made. To
recall the
Set
temperature, press the
Temp Increase
or
Decrease
pads.
3. Increase
“
▲
”
pad
– Used to increase set
temperature when in
Cool
or
Energy Saver
mode. The
Set
light will turn on while setting.
Used to increase the delay time when using the
Timer
function.
4. Decrease
“
▼
”
pad –Used to decrease set
temperature when in
Cool
or
Energy Saver
mode. The
Set
light will turn on while setting.
Used to decrease the delay time when using the
Timer
function.
5. Fan
Speed
pad – Used to select the fan speed.
The lights marked “
High
”, “
Med
”, or “
Low
” will
illuminate to indicate which fan speed is
selected.
6. Mode
pad – Used to select between
Fan
only or
Cool
mode of operation. In the
Fan
only mode,
since
Fan
only settings do not provide cooling, a
Set
temperature can not be entered. The display
will indicate the room temperature.
7. Circulaire
pad – Used to turn on the side-to-side
air circulation. For fixed side-to-side air direction,
turn on until the desired air direction is obtained,
then turn off.
8. Timer/Delay
pad – Used to select the amount of
time before the air conditioner turns off (when
on), or the amount of time before the air
conditioner turns on (when off). Programmable in
1 hour increments from 1 to 24 hours.
How to set the Timer:
Delayed “ON”;
Air Conditioner must be off.
Press the
Timer/Delay
button.
The
Timer/Delay
light will turn on and the display will
indicate the number of hours before the air
conditioner will turn on. To change the time before
turn on, press the
Increase “
▲
”
or
Decrease “
▼
”
pads until the desired number of hours before turn on
is reached (1 to 24 hrs).


