background image

9

10

简体中文 /

日本語 /

Русский /

Italiano /

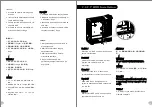
1. Tirare il pulsante del pannello anteriore

Русский /

     per sganciarlo dallo chassis. 

1. 

Потяните за нижнюю часть передней 

2. Rimuovere il coperchio in plastica 

    панели, чтобы отсоединить ее от кор

    dell’alloggiamento dell’unità da 5,25”.

    пуса. 

3. Spingere all’interno e verso l’alto per 

2. Снимите пластмассовую заглушку 

    sboccare la clip tool-free nel  

    отсека 5,25-дюймового дисковода.

    contenitore HDD da 5,25”.

3. 

Для разблокировки фиксатора, не 

4

. Inserire il dispositivo da 5,25” nel vano 

    требующего применения инструмент

    unità e spingere verso l’interno e in 

    ов, на каркасе для 5,25-дюймовых же

    basso per bloccare la clip tool-free.

    стких дисков нажмите на каркас и 

    приподнимите его.

繁體中文

 /

4. Вставьте 5,25-дюймовое устройство 

1.

 拉面板底部,將面板從底盤拆下。 

    в отсек дисководов и нажмите на отс
    ек и опустите его для блокировки фи

2.

 拆下 

5.25"

 磁碟機槽的塑膠蓋。

    ксатора, не требующего применения 

3

.

 向內部的上方壓下,以解除鎖定 5.25" 

    инструментов.

    硬碟盒上的免用工具扣具。

4

.

 將 5.25" 磁碟機插入磁碟機槽,向內部

    的下方壓下以鎖定免用工具扣具。

Türkçe


/

1. Ö

n paneli alt k

ı

sm

ı

ndan çekerek asadan 

    ay

ı

r

ı

n. 

简体中文 /

2. 5.25” sürücü bölmesinin plastik 

1. 拉面板底部,

将其从底板卸下。 

    kapağ

ı

n

ı çı

kar

ı

n.

2. 卸下 5.25” 驱动器槽的塑料盖。

3. 5.25” 

HDD kafesindeki araçs

ı

3. 向

内部上方压 5.25” 硬盘盒上的免用工具

    kelepçenin kilidini içeri ve yukar

ı 

doğru 

    扣具,以将其解除锁定。

    iterek aç

ı

n.

4. 将 5.25” 设备插入驱动器槽中,并向内部

4. 5.25” ayg

ı

t

ı

n

ı 

sürücü bölmesine 

    下方压免用工具扣具以将其锁定。

    yerleştirin ve araçs

ı

z kelepçeyi içeri ve 

    aşa

ğ

ı 

doğru iterek kilitleyin.

日本語 /

1. 

フロントパネルの下部を引っ張って、

    シャーシから取り外します。 

2. 5.25”ドライブベイのプラスチックカバ
    ーを取り外します。

3. 

内側および外側に押して5.25” 

HDD

ケー

    ジの工具不要クリップをアンロックしま
    す。

4. 5.25”デバイスをドライブベイに差し込
    み、上下に押して工具不要クリップをロ
    ックします。

2.3 3.5” HDD Installation

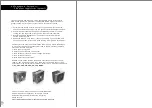
English /

1. Squeeze and pull out-ward the tool-free 

clip.

2. Insert HDD by sliding HDD into the icage.

3. Secure HDD by tightening screw to HDD.

4. Squeeze and push in-ward the tool free 

clip to secure the icage.

Deutsch /

1. 

Drücken Sie die Klemme von Hand (kein 

Werkzeug erforderlich) zusammen, 

ziehen Sie sie heraus. 

2. Setzen Sie eine Festplatte ein, indem Sie 

sie in den iCage-Festplattenkäfig 

schieben.

3. Sichern Sie die Festplatte durch 

Festdrehen der Schraube.

4. Drücken Sie die Klemme von Hand (kein 

Werkzeug erforderlich) zusammen, 

schieben Sie sie zur Befestigung des 

iCage-Festplattenkäfigs hinein. 

Français /

1. Appuyer pour extraire le clip sans outil.

2. Insérer le HDD en le glissant dans l'iCage.

3. Fixer le HDD en serrant la vis.

4. pour fixer l'iCage, presser et insérer le clip-

sans-outil .

Español /

1. 

Presione por los extremos y tire hacia fuera 

de la fijación sin herramientas.

2. 

Inserte el HDD deslizando la unidad HDD 

hacia dentro en la carcasa iCage.

3. 

Fije la unidad HDD enroscando los tornillos 

en la unidad HDD.

4. 

Presione por los extremos y empuje hacia 

dentro el clip libre de herramientas para fijar 

la carcasa iCage.

4

2

3

1

Summary of Contents for Element V Black Edition VL200K1W2Z

Page 1: ...rks belong to their respective companies www thermaltake com Tested To Comply With FCC Standards FOR HOME OR OFFICE USE Create for eSports User s Manual Benutzerhandbuch Mode d emploi Manual del usuar...

Page 2: ...ce Model Case Type Net Weight Dimension H W D Cooling System Drive Bays Accessible Hidden Material Color Expansion Slots Motherboards I O Ports LCS Upgradable PSU Removable PSU Bridge Adjustable PSU B...

Page 3: ...d passe pas 155 mm Limite de longueur de la carte compl mentaire VGA V rifiez que la longueur de votre carte compl mentaire VGA ne d passe pas 335 mm Limitaci n de altura del refrigerador de CPU Aseg...

Page 4: ...vissez les vis au dos du bo tier 4 Tirez le panneau lat ral de droite comme la fl che l indique Espa ol 1 Para extraer el panel lateral izquierdo extraiga los tornillos de mano de la parte trasera de...

Page 5: ...lock the tool free clip Deutsch 1 Ziehen Sie am unteren Rand der Vorderseitentafel um sie vom Geh use zu entfernen 2 Entfernen Sie die Plastikabdeckung des 5 25 Zoll Schachts 3 Dr cken Sie einw rts u...

Page 6: ...y sliding HDD into the icage 3 Secure HDD by tightening screw to HDD 4 Squeeze and push in ward the tool free clip to secure the icage Deutsch 1 Dr cken Sie die Klemme von Hand kein Werkzeug erforderl...

Page 7: ...lemek i in alet gerektirmeyen klipsi s k t r n ve i e 1 do ru ittirin 2 iCage 3 4 iCage 1 2 HDD iCage 3 iCage HDD 4 iCage 2 4 2 5 HDD Installation English Deutsch 2 5 Fran ais Espa ol 2 5 T rk e Itali...

Page 8: ...s vis 2 Fixez le bloc alimentation dans le bon emplacement et securisez le avec des vis 1 G kayna birimini uygun konuma tak n ve vidalarla sabitleyin Instale la unidad de fuente de 2 PSU yu uygun konu...

Page 9: ...Operation English 1 LED Light Control Press to switch LEDs color Blue Green Red and Single LED Flash 2 Fan Speed Control Turn clockwise for higher fan speed 3 Fan Speed Control Turn counter clockwise...

Page 10: ...i in saat y n nde d nd r n 3 Fan H z Denetimi Fan h z n d rmek i in saatin ters y n nde d nd r n 2 9 Water Bottle Cage Installation optional English Deutsch Fran ais Espa ol Italiano T rk e Tighten th...

Page 11: ...R PORT1 L BLUE PORT2 L SENSE_SEND KEY PURPLE GREEN ORANGE BLACK AUDIO AZALIA Function 3 0 Leads Installation Guide Guide d installation des fils Connexion des voyants du bo tier Sur la face avant du...

Page 12: ...Channel Audio Signal Rear Right Channel Audio Signal R RET NC BROWN RED MIC IN MIC POWER Front Microphone Power Front Microphone input Signal KEY BLUE NC BLUE L OUT Front Left Channel Audio Signal Fr...

Page 13: ...unutmay n aksi takdirde ayg t lar n z zarar g r r Kasa k ba lant s AUDIO AC 97 Function GROUND Front Audio Ground L RET Rear Left Channel Audio Signal Rear Right Channel Audio Signal R RET NC BROWN R...

Page 14: ...ti graphic cards mode The functions can assure all Thermaltake Power Supply meets the balance in noise control and heat exhausted All power supply provides complete protection function as follow 1 Ove...

Reviews: