DK
I ns ta l l a ti on
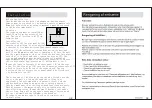
B ef o re in sta l lat i on
Check that the cooker hood is undamaged. Any transport
damage must be reported to the haulage carrier immediately.
Damaged, defective or missing components must be reported
to the dealer immediately.
L oc a tion
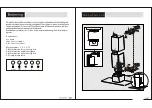
The cooker hood must be installed at
least 30 cm from the surface of the
hob. The ideal location is 65-75 cm
from the hob.
In s t allatio n
The cooker hood flue pipe must be led
outside the building, or alternatively
a charcoal filter must be fitted (purchased separately).
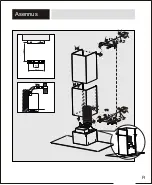
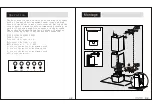
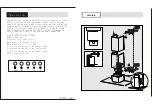
Mark up (1) the enclosed retaining bracket on the wall and
drill four Ø8 mm holes and insert rawlplugs (2) into the wall.
See the small diagram at the top. Screw the bracket into place
such that it is level and then tighten the screws (3). The
screws and rawlplugs must be able to support a weight of
approximately 40 kg, and it is therefore essential to choose
the correct rawlplugs (plaster wall, hollow brick, etc.).
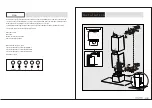
Mount the lower telescopic flue cover panel (8) on the rear
side, Fit the flex pipe (10) onto the counter-pressure valve (7)
which is located on the top of the cooker hood. The top
section of the telescopic cover panel should be fitted into
the bottom section (8).
The other end of the flex pipe can then be fitted onto the
vent in the wall or led up through the ceiling (not
applicable for systems with a charcoal filter) and the
cooker hood can then be hung on the retaining bracket.
Check to make sure that the cooker hood functions properly.
Then disconnect the mains supply before continuing the
installation process. Mount the small bracket just under
the ceiling. Now pull up the upper cover panel section and
fit the two small screws (12) into the bracket.
Re c o nn ec t th e powe r s uppl y in or der t o c o m p l e t e t he
in s ta ll at io n.
UK
24


