background image


Summary of Contents for Nicolet 4700

Page 1: ......

Page 2: ...ights reserved No part of this publication may be stored in a retrieval system transmitted or reproduced in any way including but not limited to photocopy photograph magnetic or other record without the prior written permission of Thermo Electron Corporation For technical assistance please contact Thermo Electron Corporation 5225 Verona Road Madison WI 53711 4495 Telephone 800 642 6538 or 608 276 ...

Page 3: ...Spectra 14 Checking the purge 15 Smart Purge settings 16 Checking the desiccant 17 Turning on the system components 18 Cooling the detector 19 Starting OMNIC 20 Selecting an experiment 21 Your First Experiment 23 The OMNIC window 24 Spectral window 24 Menu bar 25 Experiment drop down list box 25 Bench Status indicator 26 Toolbar 26 Collecting a sample spectrum 27 Installing the standard sample hol...

Page 4: ...r panel 55 Turning on the spectrometer power 56 Using a light source 58 Using beamsplitters and detectors 60 Selecting the right beamsplitter and detector 60 Improving the quality of your spectral data 64 How to collect data in the visible spectral range 70 About the moving mirror velocity 71 Spectrometer Options 72 Using the filter wheel 72 Using the energy screen wheel 75 Using the internal pola...

Page 5: ...g OMNIC 119 Other questions 120 Quick Answers to Your Questions About Using the Spectrometer 123 Maintenance and Service 128 Running diagnostic tests on spectrometer components 129 Maintaining your spectrometer 130 Aligning the spectrometer 130 Aligning an accessory 132 Checking spectrometer performance 132 Servicing your spectrometer 134 Troubleshooting Software Problems 135 Troubleshooting Hardw...

Page 6: ... ...

Page 7: ...l ranges The system integrates advanced hardware features with the power and flexibility of Thermo Electron s OMNIC software If you have not used the spectrometer before view the Spectrometer Tour and Getting Started With OMNIC tutorial available through Getting Started in the Help menu of OMNIC Some dedicated systems use other Thermo Electron software packages Nicolet FT IR User s Guide 1 ...

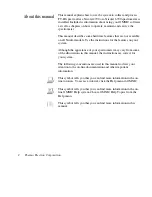
Page 8: ...hough the appearance of your spectrometer may vary from some of the illustrations in this manual the instructions are correct for your system The following conventions are used in this manual to draw your attention to the on line documentation and other important information This symbol tells you that you can find more information in the on line tutorials To access a tutorial click the Help menu i...

Page 9: ...ger Indicates an imminently hazardous situation which if not avoided will result in death or serious injury S Questions or concerns In case of emergency follow the procedures established by your facility If you have questions or concerns about safety or need assistance with operation repairs or replacement parts use the information below to contact Thermo Electron Outside the U S A contact the loc...

Page 10: ...recommend Intel Pentium II 400 MHz minimum Random access memory RAM 256 megabytes recommended 128 megabytes minimum If you plan to use a microscope 1 gigabyte recommended 512 megabytes minimum Disk drives 5 0 gigabytes recommended hard disk drive 2 0 gigabytes minimum hard disk drive 1 44 megabyte floppy disk drive for 3 5 inch floppy disks Quad speed CD ROM drive Video 15 inch SVGA 4 megabytes of...

Page 11: ...oscope Two additional serial ports if you plan to use a Continuµm microscope with a motorized stage Two additional serial ports and one additional USB 2 0 connection not a hub if you plan to use a Continuµm XL microscope One additional PCI slot if you plan to use a microscope with video capability Installing OMNIC If you purchased your computer from Thermo Electron your software is already install...

Page 12: ...NIC window using the toolbar and tool palette creating and using spectral libraries creating your own experiment files and using on line laboratory notebooks to create and save reports Spectrometer Tour When you finish this tutorial you will be familiar with the major components in your spectrometer The tutorial is available through Getting Started in the Help menu Beginner s Guide to FT IR Run th...

Page 13: ...mail and web site addresses The Library Creation Wizard prompts you step by step through creating a user library of spectra The wizard appears when you click the Create Library button in Library Manager available in the Analyze menu in OMNIC On line Help Choose the Help Topics that interest you from the Help menu to display that Help system It lets you quickly find answers to your questions about ...

Page 14: ...ick the How To button to display a step by step procedure for using the item or the dialog box or window that contains the item The left pane in each help window lists the topics available in that help system Here is an example of a help window showing the contents of some of the books in the system 8 Thermo Electron Corporation ...

Page 15: ...ra chapter Turning on the system components How do I start the software Before You Collect Spectra chapter Starting OMNIC How do I prepare the software for data collection Collecting a Spectrum available through Learning OMNIC Preparing the Software How can I learn how to use the software View the tutorials listed when you point to Getting Started or Learning OMNIC OMNIC Help Topics includes compl...

Page 16: ...arted How do I purge the system Spectrometer Help Topics Installing purge controls in Installing optional hardware How do I use Smart Purge Spectrometer Help Topics Setting the Smart Purge controls in Installing optional hardware How do I change beamsplitters Spectrometer Help Topics Changing beamsplitters in Setting up experiments Selecting a beamsplitter detector and source in Setting up experim...

Page 17: ...periments Collecting spectra Which beamsplitter and detector should I use Spectrometer Help Topics Selecting a beamsplitter detector and source in Setting up experiments See the tables showing the compatibility of sources beamsplitters and detectors Spectrometer Basics chapter Selecting the right beamsplitter and detector in Using beamsplitters and detectors How do I install a sample Spectrometer ...

Page 18: ... Spectrometer Tour available through Getting Started Accessories Accessories chapter How do I install an accessory Spectrometer Help Topics Installing optional hardware Step by step instructions and in many cases on line videos help you install accessories If your accessory is not covered on line use the printed instructions 12 Thermo Electron Corporation ...

Page 19: ...ance and Service chapter What should I do if there is a problem with the system Contact Thermo Electron technical support Outside the U S A contact the local Thermo Electron sales or service representative Phone 1 800 642 6538 U S A or 608 273 5015 worldwide Fax 608 273 6883 worldwide E mail Techsupport analyze thermo com World Wide Web http www thermo com spectroscopy Nicolet FT IR User s Guide 1...

Page 20: ...imes with the needed components already installed you can keep it ready to use with a minimum of preparation Keeping the system on also improves its stability and gives you more consistent results All the things you need to check before collecting spectra are listed below each of these items is discussed in a section of this chapter By the time you have run through these items once or twice in the...

Page 21: ...e follow the instructions in Setting the purge gas controls in the Setting up experiments book in Spectrometer Help Topics Warning Never use a flammable gas to purge the spectrometer The purge gas must be free of moisture oil carbon dioxide and other reactive or infrared absorbing materials Use dried air or nitrogen to purge the spectrometer Other gases even inert gases such as argon can damage th...

Page 22: ...equired depending on the flow rate supplied by your purge gas source See the following table for details Flow Rate Tank Required Comments less than 50 scfh yes Some purge gas and pure air generators provide a flow rate of less than 50 scfh 50 99 scfh optional Using the tank will improve performance 100 scfh or greater no A flow rate of 100 scfh gives the best results Flow rates greater than 50 scf...

Page 23: ...og box If the level exceeds the factory specified limit a message informs you Be sure to change the desiccant so that the optics will be protected If your spectrometer is in storage check the round blue indicator on the desiccant holder under the beamsplitter compartment cover monthly Change the desiccant if the indicator has turned pink Keep all covers closed tightly while the spectrometer is in ...

Page 24: ...necting to AC power in the Powering up unit for information about connecting the power supply 2 Turn on any accessories you plan to use This includes accessories such as a gas chromatograph a GC interface or an infrared microscope Warning Always follow the safety precautions described in this manual and in the Spectrometer Safety Guide that came with your system S 3 Turn on the spectrometer by pre...

Page 25: ...rn off the spectrometer 4 Turn off the accessories Cooling the detector Some detectors such as an MCT or InSb detector require cooling with liquid nitrogen In Spectrometer Help Topics view Cooling a detector in Setting up experiments for instructions Warning Liquid nitrogen is extremely cold and therefore potentially hazardous Avoid contact with skin Wear protective clothing and follow standard la...

Page 26: ...ck the Start button on the Windows taskbar point to Programs All Programs in Windows XP point to the Thermo Nicolet folder and then click the OMNIC program Depending on how the program has been configured dialog boxes may appear asking for a user name and password Type the requested information and then choose OK The OMNIC window appears This window is described in the next chapter and in the Gett...

Page 27: ... toolbar and in the Collect menu You can also use Experiment Setup to set up and save your own experiments or to check or change the parameter settings after you select an experiment If you install a Smart Accessory the correct experiment is selected automatically or a list of appropriate experiments is made available for your selection In the tutorial in the next chapter the Default Transmission ...

Page 28: ...pter of this manual If you need to change a source or detector view Replacing the source or Replacing the detector in the Servicing your spectrometer book in Spectrometer Help Topics Note The most commonly used hardware configuration for mid IR experiments includes a KBr beamsplitter an ETC source and a DTGS detector You may need to change the settings of the example experiment if your hardware co...

Page 29: ...d print a report containing the spectrum You can learn all these things and more by running the on line tutorials provided with OMNIC Start with the Spectrometer Tour and Getting Started With OMNIC available through Getting Started Follow the instructions in the preceding chapter to prepare the system and start OMNIC before using this chapter Note If you have a dedicated system such as an ECO RS t...

Page 30: ...n the OMNIC window is a spectral window which you can use to display and manipulate spectra When a spectrum is displayed in a spectral window you can use OMNIC commands to perform operations on it For example you can change the spectrum s format or search it against a spectral library to identify it 24 Thermo Electron Corporation ...

Page 31: ...s or the OMNIC Help system Experiment drop down list box Below the menu bar is the Experiment drop down list box It lists all of the experiment files you have opened plus the default experiment file and an experiment file for any Smart Accessory module you have installed By selecting an experiment with this feature you can quickly set the software parameters for the type of experiment you want to ...

Page 32: ...ss information about correcting it Note If you want to view the on line videos to help troubleshoot a problem put the spectrometer s Tutorial CD into the computer s CD ROM drive S Toolbar At the left side of the window is the toolbar You can use Edit Toolbar in the Edit menu to position the toolbar at the top or right side of the OMNIC window as well Each button in the toolbar represents a command...

Page 33: ...he peaks in the final spectrum are due solely to the sample Here is a typical mid IR background spectrum For most applications you don t need to collect a new background spectrum for each sample spectrum if you haven t changed the software parameters To obtain good results however collect a new background regularly perhaps once every four hours You can obtain the best results by collecting a new b...

Page 34: ...ompartment baseplates for different accessories and sample holders you can quickly switch baseplates to install the sample holder For information about using Snap In baseplates view Removing the Snap In baseplate in Setting up experiments in Spectrometer Help Topics If your sample holder is mounted on a Smart baseplate the Transmission E S P experiment is automatically selected when you install th...

Page 35: ...r remove the sample To install a sample or filter slide the sample or filter into one pair of slots If the accessory support is currently installed in the slot you want to use remove the support before installing the sample or filter see the first illustration in this section Replace the support when you are finished using the slot Do not discard the support it is needed for installing slide mount...

Page 36: ...pening one of these files lets you quickly set a number of software options 2 Select the DEFAULT CON file and then choose OK This file was provided with your OMNIC software for setting the options for this procedure 3 If it is not already selected select the Default Transmission experiment or the Transmission E S P experiment Both of these experiments set the parameters correctly for collecting a ...

Page 37: ...e of them the first time the experiment will appear in the Experiment drop down list for future selection You can also set up and save your own experiments 4 Press the Sample button on top of the spectrometer to start sample data collection You can also click the Collect Sample button in the toolbar or choose Collect Sample from the Collect menu The Collect Sample window appears and then a dialog ...

Page 38: ...e collected before every sample a message appears asking you to prepare to collect a background spectrum This means that you need to remove any sample from the sample holder so that the beam path is clear When you then collect a background spectrum the result is a measurement of the response of the spectrometer alone that is without absorptions due to a sample 32 Thermo Electron Corporation ...

Page 39: ...your spectrometer has the Smart Purge option Open the sliding door remove the sample and then slide the door until it is open about 1 cm When you hear the purge flow rate return to normal close the door all the way and choose OK If your spectrometer is sealed and desiccated Open the sliding door remove the sample close the sliding door and then choose OK A background spectrum appears in the Collec...

Page 40: ...sliding door install the sample close the sliding door and then wait 1 minute before choosing OK If your spectrometer has the Smart Purge option Open the sliding door install the sample and then slide the door until it is open about 1 cm When you hear the purge flow rate return to normal close the door all the way and choose OK If your spectrometer is sealed and desiccated Open the sliding door in...

Page 41: ...s data are collected the sample spectrum in the Collect Sample window is updated Here is an example The progress of the collection is indicated by the gauge below the spectrum The number of scans collected so far and the total number of scans for the collection are displayed to the right of the gauge Nicolet FT IR User s Guide 35 ...

Page 42: ...placed into a new spectral window automatically S 8 Press the OK Enter button to add the sample spectrum to the spectral window Choosing No would end the procedure without saving the spectrum Choosing More Scans would return you to the Collect Sample window allowing you to collect more scans with the More button Choosing View Collect Status would display information about the collection including ...

Page 43: ...a problem with the quality of the spectrum After correcting the problem collect the spectrum again To view information about the collection including a list of any problems that have occurred click the Collect Status indicator during or after the collection You can also click the View Collect Status button in the message that may appear when the collection is finished see step 7 of the procedure i...

Page 44: ...ars asking whether to replace the existing file Choose No and then use a different filename to save the spectrum Converting the spectrum s units The sample spectrum you collected is in absorbance units Since many of OMNIC s data manipulation commands work best on spectra in absorbance units it is often useful to convert a spectrum to absorbance by using the Absorbance command In this example you w...

Page 45: ...u to convert spectra to several other units as well These units are discussed in detail in the OMNIC on line Help system In OMNIC Help Topics find converting spectrum in the Index and go to the topic that deals with the units you are interested in Nicolet FT IR User s Guide 39 ...

Page 46: ...palette contains six tools that let you select a spectrum or spectral region change how spectra are displayed in a spectral window find the height or area of a peak or label a peak The names and appearance of the palette tools indicate their functions Peak height Selection Region Spectral cursor Peak area Annotation Only one tool can be used at a time To use a tool first select it by clicking it A...

Page 47: ...polystyrene spectrum 1 Select the annotation tool by clicking it The annotation tool lets you label peaks with their frequency locations X values or other information When the annotation tool is selected and you move the pointer into the spectral display the pointer looks like this You can label a peak by clicking above it with the annotation tool This displays the label text above the peak with a...

Page 48: ...using the annotation tool To modify a newly created label edit the selected text before pressing Enter To modify an existing label click it and then type a new label and press Enter To delete an existing label click it and then press the Delete key In OMNIC Help Topics find tool annotation in the Index and go to Annotation tool for more information about the annotation tool In the next section you...

Page 49: ...er the sample matches a library spectrum Note If you were unsure of the composition of the sample you could perform a spectral search using a search library In that case the software would search the library and then display a list of the library spectra that best matched the unknown spectrum S Follow these steps to perform a QC comparison 1 Select the spectrum by clicking it 2 Choose Library Setu...

Page 50: ...list of directories if it is not already in the list This is the directory that contains the provided Polystyrene Quality Control Sample library To add the directory to the list choose Add Directory In the dialog box that appears locate and select the LIBS directory and then choose OK 4 Click the QC Libraries tab to display the available QC libraries The available QC libraries appear in the Availa...

Page 51: ...x to start the comparison You can also close the Library Setup dialog box and begin a QC comparison at any time by choosing QC Compare from the Analyze menu When you begin a comparison the QC Compare window appears At the bottom of the window a gauge shows the progress of the comparison When the comparison is finished the sample spectrum and the library spectrum that best matches it are displayed ...

Page 52: ... window by choosing Close In OMNIC Help Topics find QC comparison in the Index and go to Performing a QC comparison if you want more information about comparing sample spectra with QC libraries 46 Thermo Electron Corporation ...

Page 53: ... in the Index and go to the Creating a user library topic for more information Adding a spectrum to a user library Once you have created a user library you can use the library to store spectra you have collected To do this select the spectrum and then choose Add To Library from the Analyze menu To move a copy of a spectrum you have collected from one user library into another use Library Manager i...

Page 54: ...mplate file a preview image of the template appears at the right This feature allows you to see what different templates look like so that you can pick one with the items you need for your report You can view the image as a graphical layout by selecting the Layout option This shows you how the printed report will look on paper You can also view the image with template items labeled by selecting th...

Page 55: ...dex and go to Selecting editing or creating a report template for more information about using reports 4 Choose Preview Print Report from the Report menu A preview of the report appears showing the report items filled in with information about your spectrum Your report should look similar to this You can click the Zoom button to see an enlarged image of the report Collection time The preview lets ...

Page 56: ...nected to the computer choose Print to print the report The Print dialog box appears allowing you to set some parameters that affect printing 6 Choose OK The report is printed on your system printer 50 Thermo Electron Corporation ...

Page 57: ...nel and Inside the spectrometer for complete descriptions of your spectrometer s internal and external components Spectrometer components The following illustration identifies some major components visible on the outside of a typical Nicolet 6700 spectrometer Some components may not be present on your spectrometer Data collection buttons Status indicators Detector fill ports Detector compartment S...

Page 58: ...le an accessory section of the Accessories chapter Using the data collection buttons The buttons on the top of the spectrometer let you quickly perform some basic operations with the spectrometer without using your keyboard or mouse OMNIC must be running 52 Thermo Electron Corporation ...

Page 59: ...or more information Press the OK Enter button to respond affirmatively for example to a software prompt during data collection This has the same effect as choosing OK or other affirmative response such as Yes within the software Press the Stop button to respond Cancel or No to a software prompt during data collection This has the same effect as choosing Cancel or No within the prompt Press the Mac...

Page 60: ...itter storage Fixed mirror or optional emission optics External emission port Passport optics optional External beam port Filter wheel optional Energy screen wheel optional Aperture Infrared source Source select optics optional Sample compartment Sample holder SabIR port Fixed mirror or optional SeaPort optics Polarizer optional Near IR source optional In the Spectrometer Tour available through Ge...

Page 61: ...Auxilliary and or dual channel connectors on the rear panel Danger Avoid shock hazard Always power off the spectrometer and disconnect the power supply from the wall outlet or power strip before disconnecting the power supply from the back of the spectrometer In the Spectrometer Tour available through Getting Started view The back panel for complete descriptions of the rear panel components Nicole...

Page 62: ...n on the spectrometer by pressing the power switch I O on the external power supply When you turn on the spectrometer the four status indicators Power Scan Laser and Source flash in various sequences as the system runs through its diagnostic routines When the routines are finished the Power Laser and Source indicators stay lighted The Scan indicator flashes with each scan of the interferometer Not...

Page 63: ...Scan light stays on continuously Any data collection activity will cause the interferometer to begin scanning Exiting OMNIC also activates stand by mode S Note If the Power Laser or Source indicators flash or will not light at all or if the Scan indicator will not light the Bench Status indicator will show a red X and troubleshooting tips will appear on the screen If you cannot resolve the problem...

Page 64: ...proves the consistency of your spectral data by ensuring that the infrared energy level reaching your samples is constant The source operates in Normal mode unless you configure it to enter Turbo or Rest mode at specific times or the spectrometer is in sleep mode Turbo mode Use this mode if you are analyzing a sample such as a thick film that requires greater infrared energy This increases the out...

Page 65: ...internal sources simply by changing the Source setting on the Bench tab of the Experiment Setup dialog box This option lets you collect spectra in the mid IR to far IR range or in the visible to near IR range The spectral range is determined by the source beamsplitter and detector you are using Nicolet 6700 spectrometers with the emission accessory can use an external source if one is available Th...

Page 66: ...performance of beamsplitters and detectors In Spectrometer Help Topics view the appropriate lesson in Setting up experiments if you need to install or change a beamsplitter or detector Selecting the right beamsplitter and detector There are two considerations when selecting a beamsplitter detector combination compatibility and spectral range Combinations are considered compatible if they provide a...

Page 67: ...X X X X X X X X X X X X X Best Best Best Best OK OK OK OK Best Best OK OK OK X X OK OK OK Best Best OK Best Best Optimum beamsplitter detector combination OK Compatible beamsplitter detector combination X Incompatible beamsplitter detector combination A ZnSe beamsplitter may also be used as a mid IR beamsplitter in extremely humid environments Valid for room temperature and thermoelectrically cool...

Page 68: ...0 ETC white light PbS TEC with SabIR 10 000 4 200 ETC white light InGaAs 12 000 3 800 ETC white light CaF2 MCT A 11 700 1 200 ETC white light MCT B 11 700 1 200 ETC white light InSb 11 500 1 850 ETC white light PbSe 13 000 2 000 ETC white light PbS TEC with SabIR 10 000 4 200 ETC white light InGaAs 12 000 3 800 ETC white light XT KBr MCT A 11 000 600 ETC white light MCT B 11 000 400 ETC white ligh...

Page 69: ...ETC Notes This spectral range reflects the combination of the ranges of the ETC and white light sources as well as the limits of the beamsplitter detector combination The range achieved using one of these sources will not be as broad as the total range shown Si detectors can be used only with a white light tungsten halogen source These detectors must be cooled with liquid nitrogen before use InSb ...

Page 70: ...ure the signal to noise ratio is high enough to let you distinguish spectral features from the noise inherent in all experimental data This prevents the signals containing spectral information from being lost among the signals generated by the random movement of electrons building vibrations light source fluctuations and other such sources The next sections explain several ways you can optimize Th...

Page 71: ...nals can distort quantitative data Check the background and sample interferograms If you see a substantial difference in their sizes photometric accuracy could be a problem To solve these problems you can use the following options to modify the infrared beam Use a bandwidth limiting filter Use an energy screen Adjust the aperture on a Nicolet 6700 In Spectrometer Help Topics view Setting up experi...

Page 72: ...ending on the types of detectors you use your system may include a set of four energy screens These metal screens help prevent detector saturation and signal distortion by blocking out a portion of the energy at all frequencies of the infrared beam If your experiments deal with information from a broad range of frequencies these screens may be the most effective means of reducing the light level T...

Page 73: ...iameter opening that controls the angular size of the infrared beam and thus the amount of radiation that reaches the sample Using an aperture has these advantages It lets you use more sensitive detectors It helps prevent infrared energy saturation so the response of the detector is more linear It improves wavenumber accuracy and resolution by acting as a point source of infrared radiation In gene...

Page 74: ...See the preceding section for information about the correct energy screen to use for each detector type The settings in the table are based on the physical size of the detector elements and maximize the amount of infrared energy that reaches the sample To correct linearity and photometric accuracy problems you can reduce the setting but you will pay a price in terms of the signal to noise ratio De...

Page 75: ... higher Resolution setting Another method is to use an energy screen that transmits more light or no screen at all In this case the resulting spectrum might be distorted and accuracy and stability could be reduced Checking the single beam baseline in the region below the low end cutoff will give you a rough idea of how much distortion is occurring If the distance from the baseline to 0 is more tha...

Page 76: ...lters that are installed in the spectrometer For example if you use an optional quartz beamsplitter a silicon detector and a white light source the sampling range is extended to 25 000 cm 1 Since silicon detectors are very sensitive you will also need to install an energy screen or bandwidth limiting filter to prevent the detector from being saturated during the experiment The following table list...

Page 77: ... mirror velocity While a wide range of moving mirror velocities are available on Nicolet 4700 and Nicolet 6700 spectrometers some velocity settings cannot be used for collecting data at certain combinations of spectral range and resolution If you are collecting data over a spectral range above 7899 cm 1 velocity settings faster than 2 53 cm s are not available To specify the velocity and spectral ...

Page 78: ...eam entering the sample compartment Using the filter wheel The optional filter wheel accessory available for the Nicolet 6700 only lets you automatically insert optical filters band pass low pass or high pass into the beam path This lets you reduce the amount infrared light that reaches the detector in a spectrally selective way This is particularly useful for studies of small spectral regions or ...

Page 79: ...e provided to secure 1 mm filters in position In Spectrometer Help Topics view Installing an optical filter in the automated filter wheel in the Setting up experiments book for instructions for installing filters in the wheel Once you have installed your filters enter their descriptions into OMNIC using the Filter Wheel table on the Configure tab of the Experiment Setup dialog box Be descriptive I...

Page 80: ...filter just one filter or a combination of two filters For example you could install and select a band pass filter to block out frequencies in both the high and low ends of the spectral range resulting in a spectrum with absorptions only in the middle of the range You also could accomplish mid range data collection using a high pass filter installed in one wheel and a low pass filter installed in ...

Page 81: ...signal distortion For more information about using energy screens see When to use energy screens in the Spectrometer Basics chapter The wheel can be moved to any of four positions an open position for collecting spectra without a screen in the beam path and 3 screen positions As shipped from the factory the screen positions are populated with 30 10 and 3 screens The Screen Wheel parameters in Expe...

Page 82: ...t menu In OMNIC Help Topics find energy screen wheel in the Index and go to Controlling the energy screen wheel for complete instructions After you have moved a screen into the beam path you can see its effect on the signal intensity in the live display on the Bench tab This helps you select the optimum screen for a particular sample 76 Thermo Electron Corporation ...

Page 83: ...ide in the wheel If you use the 1 screen or one of your own be sure to change the description of the screen position on the Configure tab In OMNIC Help Topics find energy screen wheel in the Index and go to Specifying the energy screens in the energy screen wheel for more detailed instructions Nicolet FT IR User s Guide 77 ...

Page 84: ... plate This option is useful for performing polarization studies of thin films and other sample types Note The polarizer cannot be installed on spectrometers with sample compartment windows S In Spectrometer Help Topics view Installing optional hardware for detailed information about installing the polarizer In these experiments a unique background is required for each polarization position used F...

Page 85: ... beam spectra at each polarizer angle required by your experiment Save each background spectrum with a unique descriptive name such as Background 0 Background 90 Once the background spectra are collected and saved you can begin to collect sample spectra Sample data may be collected and saved as single beam spectra Once data collection is complete use the appropriate background file to reprocess th...

Page 86: ...and run the macro Use the Macro for Macro button field on the Advanced tab in Experiment Setup dialog box available through Experiment Setup in the Collect menu to specify the macro to run You may browse to locate the macro file or type the full path and file name into the text field If you have OMNIC Series you can display the series of spectra collected in this way To create a series SRS file fr...

Page 87: ...ailed tutorials for installing operating and maintaining each Smart Accessory are provided on line To start a Smart Accessory tutorial click Sampling Techniques in the Help menu and then click the accessory name Smart ARK This is a horizontal ATR attenuated total reflection accessory with high stability complete purge capabilities tool free alignment and high performance specifications It includes...

Page 88: ...Smart DuraScope combines the benefits of a diamond ATR element with video enhancement to create an analysis tool for a wide range of sample types from large hard materials to small inclusions and contaminants You can position the sample while looking through the diamond ATR element This helps you manipulate micro samples to achieve optimum contact with the crystal resulting in superior quality spe...

Page 89: ...y designs It is the best choice for routine analysis of strong infrared absorbing samples This accessory is ideal for rapid quantitative and qualitative analyses since sample preparation is usually not necessary Smart OMNI Sampler This single reflection ATR accessory features a spherical crystal that lets you measure a wide variety of sample types The unique tower design automatically applies the ...

Page 90: ...e 80 degree angle of incidence for this reflection absorption accessory allows sensitive measurements of films as thin as 0 1 nm Smart SpeculATR This single bounce horizontal ATR specular reflection accessory allows versatility in measurement where a range of sample morphologies may need to be analyzed Smart SplitPea This horizontal ATR microsampling accessory is designed for fast analysis of soli...

Page 91: ...ometer Help Topics Note Additional Snap In sample compartment baseplates are available for use with each accessory to make changing accessories easier S Call Thermo Electron if you are interested in ordering any of the following sampling accessories Absolute transmission accessory This accessory allows for the measurement of absolute transmission of samples with reflective surfaces The design prev...

Page 92: ...allows you to select from the experiments you have saved for the baseplate Detector interface kit A variety of accessories that were specifically designed for Nicolet FT IR spectrometers contain detectors that are automatically recognized by your spectrometer The detector interface kit allows your spectrometer and OMNIC software to recognize other detectors including non Thermo Electron detectors ...

Page 93: ...a gas chromatograph GC You can then analyze IR spectra from GC experiments using the OMNIC Series software Liquid Analysis System This system lets you collect and process quantitative analysis data for liquid samples It uses OMNIC Integra software which contains methods for quantifying components in specific types of liquids Microplate accessory This accessory allows you to collect transmission or...

Page 94: ...experiment draws power right from the spectrometer and includes an on line tutorial Polarizer This accessory lets you control the orientation of the electric field vector of the infrared beam as it enters the sample compartment This is particularly useful for characterization of monolayers thin films and other sample types See Using the polarizer in the Spectrometer Options chapter for more inform...

Page 95: ...from TGA experiments using the OMNIC Series software The TGA interface is usually mounted in the sample compartment of an AEM the TGA module is usually installed on the side of the spectrometer leaving the AEM or spectrometer sample compartment free for other experiments and accessories Transmission E S P accessory Transmission is the oldest and most efficient sampling technique in FT IR spectrosc...

Page 96: ... from damage or malfunction due to voltage dropouts transient spikes frequency shifts or other disturbances in your electrical service Pure air dryer If you have difficulty controlling moisture in your laboratory the pure air dryer provides additional protection for the hygroscopic elements of your spectrometer This accessory is also useful if your laboratory air supply is contaminated with volati...

Page 97: ...ccessory or from the accessory to the connectors on the front of the spectrometer The instructions that came with the accessory contain specific information about connecting that accessory Pass through connectors Your spectrometer may be equipped with pass through connectors for use with special accessories These connectors allow you to make accessory cable connections through the spectrometer Thi...

Page 98: ...r motor to this standard connector This is not a pass through connector See Detector Motors connector for information about using this connector to connect custom hardware Auxiliary Six pins on this optional connector can be used for passing DC power input or other signals from the Auxiliary 1 and Auxiliary 2 connectors on the front panel to an accessory For example the automatic sample wheel and ...

Page 99: ...ry to three pins on the Auxiliary connector inside the sample compartment This connector could be used for example to attach the DC output of an AC to DC converter to provide DC power to an accessory in the sample compartment Auxiliary 2 This connector passes signals to three pins on the Auxiliary connector inside the sample compartment This connector could be used for example to allow an accessor...

Page 100: ...m accessory using these connectors Do not pass signals that exceed 15 VDC through these connectors You must also limit the current to a maximum of 800 mA Thermo Electron is not responsible for damage or injury resulting from improper or unsafe cabling S The following diagram shows schematically which pins of the Auxiliary connector inside the sample compartment are connected internally to pins of ...

Page 101: ...e to your accessory and may create a safety hazard Only qualified persons should connect a cable to the Detector Motors connector Do not use this connector for signals that exceed 15 VDC Limit the current to a maximum of 800 mA Thermo Electron is not responsible for damage or injury resulting from improper or unsafe cabling S The following table shows pinout information for the Detector Motors con...

Page 102: ... 7 Used by the sample compartment detector for digital communication 8 Positive 5 volts 9 Used for sample compartment digital communication 10 Used by the sample shuttle motor positive 11 Positive 12 volts 12 Analog ground 13 Used by the sample compartment detector for positive analog input 14 Negative 12 volts analog 15 Used by the sample compartment detector for digital communication 96 Thermo E...

Page 103: ...ectra You can set the software in one step by selecting a stored experiment from the Experiment drop down list box below the OMNIC window menu bar To set the experiment parameters individually use Experiment Setup in the Collect menu If you install a Smart Accessory the system automatically sets the software parameters or a list of appropriate experiments is made available for your selection and y...

Page 104: ...ollecting a sample spectrum or Collecting a background spectrum How do I specify the Y axis unit for collecting spectra Choose Experiment Setup from Collect menu and then set Final Format on the Collect tab You can change the format of a collected spectrum by using Absorbance Transmittance or Other Conversions in the Process menu See the question and answer in the next section for a description of...

Page 105: ...ectra Save interferograms if you think you may want to restore the original data after it has been processed or if you want to keep an archive of your original data Collecting a Spectrum available through Learning OMNIC Preparing the Software In OMNIC Help Topics find saving interferograms in the Index and go to File handling What does the Collect Sample window show The window displays the live sp...

Page 106: ...lity checks Spectrum checks Parameter checks Background checks Interferogram checks When OMNIC performs a check and detects a problem the Collect Status indicator is displayed as a yellow circle or a red X Click the indicator or click the View Collect Status button at the end of data collection to see a summary of data collection problems encountered during the collection and other information abo...

Page 107: ...hem for spectra collected using a reflection technique serves to identify the technique Using log 1 R units for spectra collected using a reflection technique is useful for quantitative comparisons since there is often a linear relationship between the concentration of a component and its log 1 R value Collecting a Spectrum available through Learning OMNIC Typical IR Transmission Spectrum In the O...

Page 108: ...tain the best search results If the baseline of the spectrum is sloped curved or shifted vertically correct it using Baseline Correct in the Process menu In OMNIC Help Topics find baseline in the Index and go to Correcting a baseline manually If the spectrum has totally absorbing bands eliminate them by using Blank in the Process menu Be careful not to blank regions that contain other important sp...

Page 109: ...tra In OMNIC Help Topics find ATR correction in the Index and go to ATR correction If the spectrum has water or carbon dioxide peaks use Other Corrections to remove these peaks In OMNIC Help Topics find water in the Index and go to H2O and CO2 correction Only those portions of the spectrum which are within the selected region or displayed region if no region is selected and within any of the regio...

Page 110: ...to verify the composition of a sample If you create a scrapbook library you can find spectra in it by searching for text but not by spectral searching When you create a library you determine the kinds of information that will be saved with it In OMNIC Help Topics find library in the Index and go to Creating a user library and Adding spectra to a user library How can I display a library spectrum in...

Page 111: ... box to find library spectra by searching for text in any field included in the library For example some libraries have fields for molecular weight boiling point or manufacturer In OMNIC Help Topics find extended search in the Index and go to Using extended search What is the easiest way to collect sample spectra and add them to a spectral library If you are using OMNIC use the Collect Spectrum bu...

Page 112: ...menu locate the spectrum or spectra you want to open select the filenames of the spectra and then choose OK You can hold down the Control key to select multiple files In OMNIC Help Topics find spectrum in the Index and go to Opening spectra How can I save my collected spectra automatically Choose Experiment Setup from the Collect menu and turn on Save Automatically on the Collect tab Save Automati...

Page 113: ...ctrum to a user library Note When you add a spectrum to user library whose resolution is lower the spectrum is deresolved For this reason it may be better in some cases to save your sample spectra as files on the hard disk and consider the copies of them added to a user library to be for searching purposes only S We recommend that you create descriptively named folders directories on your hard dis...

Page 114: ...lect with the selection tool and then release the Control key Spectral groups are saved with the extension SPG In OMNIC Help Topics find saving spectra in the Index and go to Saving a group of spectra How can I delete stored spectra Choose Delete Files from the File menu to display the Delete Files dialog box Locate and select the spectral data files with the extension SPA or SPG for spectral grou...

Page 115: ...ify a printer for printing information Use Printer Setup in the File menu See your Windows documentation for details on setting the printer parameters In OMNIC Help Topics find printer in the Index and go to Setting up the printer How can I create and print reports of my work Use the commands in the Report menu First use Template to select edit or create a template for the report Then use Preview ...

Page 116: ...orking with If the report is displayed as you want it to appear on paper you can print it by using the Print button In OMNIC Help Topics find template in the Index and go to Selecting editing or creating a report template or find report previewing or printing and go to Previewing or printing a report Displaying spectra How can I select more than one spectrum at a time After selecting the first spe...

Page 117: ...m the View menu Click the desired color in the color array and then choose OK When the spectra are no longer selected such as after you select a different spectrum they will be displayed in the color you clicked In OMNIC Help Topics find spectra in the Index and go to Selecting a color for the currently selected spectra What is the difference between the Display Setup parameters and the Window opt...

Page 118: ...ompare the band intensities of different spectra Match Scale changes the Y scale of the spectra to be the same as that of the selected spectrum The selected spectrum s scale is not changed This allows you to compare the band intensities of different spectra Offset Scale shifts the spectra vertically so that they overlap less making them easier to see When you use these commands keep in mind that t...

Page 119: ...ions markers in the view finder to display a smaller spectral region You can press and hold down the mouse button during these operations to continuously expand or contract the display To expand and contract the spectra horizontally about the center use the view finder s Horizontal Expand Contract buttons left most To expand and contract the spectra vertically about the center use the Vertical Exp...

Page 120: ...e spectrum from one spectral window to another A copy of the spectrum appears in the second window and the original spectrum remains in the first window You can also copy or cut the spectrum using Copy or Cut in the Edit menu and then paste it into another spectral window using Paste In OMNIC Help Topics find spectrum in the Index and go to Selection tool or find pasting spectrum and go to Pasting...

Page 121: ...baseline used for the measurement The corrected measured above the baseline and uncorrected height values appear in the readout above the palette In OMNIC Help Topics find peak in the Index and go to Peak height tool How can I find the area of a peak Use the peak area tool to drag across the peak Then drag the baseline handles to adjust the baseline used for the measurement The corrected measured ...

Page 122: ...n Problems with IR Spectra In OMNIC Help Topics find baseline in the Index and go to Correcting a baseline manually Subtracting adding multiplying and dividing spectra How can I subtract a spectrum from another spectrum Use Subtract in the Process menu whenever you want to subtract one spectrum from another Subtract is commonly used to remove spectral features of solvent residues or pure component...

Page 123: ... commonly used to remove spectral features of solvent residues or pure components from the spectrum of a mixture of compounds When you use Subtract the software calculates data point by data point the difference between the two Spectral subtraction is useful in a variety of situations for example Eliminating solvent peaks in a spectrum of a sample that is dissolved in a solvent Separating componen...

Page 124: ...rforms the operations on the Y values of the data points in the spectrum or spectra and then displays the result spectrum When you choose the command the Spectral Math window appears allowing you to type the desired operations in the Operation text box You can also select one of the example operations provided in the Operation drop down list box View Using Spectral Math available through Learning ...

Page 125: ...tomized settings in a configuration file You can then open the file later to reset OMNIC to your preferences in one step Collecting a Spectrum available through Learning OMNIC Preparing the Software In the OMNIC Help Topics Index Find options and go to Customizing OMNIC by setting options Find menu and go to Customizing a menu Find toolbar and go to Customizing a toolbar Find configuration and go ...

Page 126: ... as the Find Peaks window Click the Close button if available in the upper right corner of the window You can also double click the button at the left end of the window s title bar if the window is not maximized or the button at the left end of the menu bar if the window is maximized In OMNIC Help Topics find task window in the Index and go to Task windows How can I select a spectral region for an...

Page 127: ...and then specify the types of information you want displayed by turning on options in the Sampling Information box In OMNIC Help Topics find displaying sampling information in the Index and go to Displaying sampling information How can I copy a spectrum and paste it into a text document Select the spectrum and choose Copy from the Edit menu This places the spectrum on the Clipboard in the form of ...

Page 128: ...scussion button to display a complete discussion of the feature or the dialog box or window that contains the feature Click the How To button to display a step by step procedure for using the feature or the dialog box or window that contains the feature You can press the F1 function key at any time to see a discussion topic for the currently displayed or selected feature dialog box or window If a ...

Page 129: ... Si MCT A or InSb detector and your experiment deals with information from a broad range of frequencies you may wish to use an energy screen to prevent the detector from becoming saturated or producing a distorted signal Spectrometer Help Topics Installing an energy screen in Setting up experiments When do I need to open the spectrometer cover You need to open the spectrometer cover to change sour...

Page 130: ...lowing situations The ambient temperature has changed by at least 5 Celsius degrees about 9 Fahrenheit degrees You are about to perform a spectrometer validation with Val Q or other software This ensures that the validation is run with the best possible interferometer and electronics settings The spectrometer power was turned off for more than a few minutes and has now been on for one hour Note We...

Page 131: ...Does my detector need to be cooled with liquid nitrogen Detectors that have a dewar need to be cooled Dewar detectors are fairly large metal cylinders with a hole in the top These include MCT and InSb detectors To determine if your detector requires cooling open the detector compartment cover and see if the detector has a dewar If during a work session you find that the detector signal intensity i...

Page 132: ...mpartment cover monthly Change the desiccant if the indicator has turned pink See Ordering parts in Spectrometer Help Topics to find the part number for ordering desiccant bags The desiccant holder under the beamsplitter compartment cover holds one bag Which source should I use Use the source that is appropriate for the spectral range of your experiment determined by the ranges of the beamsplitter...

Page 133: ...and ordering and replacing parts Note If you want to view the on line videos to help you in troubleshooting a problem put the Spectrometers Tutorials CD in the computer S You can also make a more thorough check on a spectrometer component by choosing Advanced Diagnostics from the Collect menu This starts the Bench Diagnostics program which provides information about the status of the component as ...

Page 134: ...hapter If there are other problems contact Thermo Electron at one of the numbers below Outside the U S A call your local sales or service representative Telephone numbers for all Thermo Electron Customer Support offices are provided with your system Phone 1 800 642 6538 U S A or 608 273 5015 worldwide Fax 608 273 6883 worldwide E mail techsupport analyze thermo com World Wide Web http www thermo c...

Page 135: ...nu bar of the OMNIC window See The OMNIC window in the Your First Experiment chapter for more information S Follow these steps to run the spectrometer diagnostic tests 1 Make sure the main sample compartment is empty Remove any samples and sampling accessories except a transmission sample holder 2 Choose Experiment Setup from the Collect menu or the toolbar The Experiment Setup dialog box appears ...

Page 136: ...nce tests View Maintaining your spectrometer in Spectrometer Help Topics for instructions for other common maintenance procedures such as changing desiccant cleaning the purge filter and cleaning the outside of the spectrometer Aligning the spectrometer To ensure optimum system performance high signal intensity low noise and good sensitivity you should align the spectrometer at least once a week u...

Page 137: ...Bench tab to 1 Important Do not use Autogain S 5 Click the Align button on the Diagnostic tab When you click the Align button the system begins to optimize the detector signal for maximum energy throughput Alignment should take 2 to 4 minutes The live display of the detector signal changes as each interferogram is collected The positive peak and negative peak intensities are shown next to Max and ...

Page 138: ... the accessory When you manually adjust an accessory watch the largest interferogram peak in the live display on the Bench tab The larger this peak the better is the signal intensity Note The largest interferogram peak can be positive or negative S If you are unable to see the display turn on Tone on the Bench tab before adjusting the accessory The tone reaches its highest pitch when the signal is...

Page 139: ...hooting Hardware Problems chapter for more information about running the diagnostics software 4 Click the Performance Tests button and then follow the instructions that appear on the screen Note If the noise readings are greater than normal or have changed significantly call the Thermo Electron Technical Support for assistance Outside the U S A call your local service representative Telephone numb...

Page 140: ...acing parts choose Spectrometer Help Topics from the Help menu S If the source laser module electronics module or power supply must be replaced refer to the replacement parts list made available when you choose Spectrometer Help Topics from the Help menu Call 800 642 6538 or 608 276 6373 to order the replacement assembly If you are outside the U S A contact your local Thermo Electron office Teleph...

Page 141: ...spectrum is lower higher numerical value than that of the library The spectrum is from a commercial library Collect the spectrum at the same resolution as the library first set Resolution on the Bench tab of the Experiment Setup dialog box and then add it to the library Only spectra you collect can be added to a user library Commercial libraries cannot be altered and the spectra contained in them ...

Page 142: ... not want to overwrite it Then open the experiment in the FACTORY directory whose filename is same as the original experiment and save it in the OMNIC PARAM directory The desired experiment does not appear in the Experiment drop down list box The experiment was installed with the software but has not yet been opened If the experiment was designed for a Smart Accessory install the accessory the exp...

Page 143: ...rmation about correcting it If the indicator is a red X the spectrometer has failed a diagnostic test and requires corrective action A message appears explaining the problem and allowing you to access information about correcting it This chapter lists some simple troubleshooting measures you can take to solve problems with the spectrometer The Bench Diagnostics software is described at the end of ...

Page 144: ...ter power off and check the data cable connections Align the spectrometer using the Align button on the Diagnostic tab of the Experiment Setup dialog box Click the laser indicator on the Diagnostic tab of the Experiment Setup dialog box to check the laser operation Call Thermo Electron to order a replacement laser if necessary See the Ordering parts and Servicing your spectrometer books in Spectro...

Page 145: ... the Experiment Setup dialog box Use the Bench Diagnostics software to check the laser levels for proper balance If the levels are out of tolerance align the spectrometer using the Align button on the Diagnostic tab of the Experiment Setup dialog box If the levels remain out of tolerance call Thermo Electron for service Make sure the conditions meet the requirements given in the Environmental Cons...

Page 146: ...pply Make sure the lock ring is tightened finger tight Make sure the power cord is securely connected to the power supply and a working outlet or power strip Make sure the power cord is appropriate for your AC power source In Spectrometer Help Topics see Miscellaneous parts in the Ordering parts book for power cord descriptions and part number information Replace the power cord In Spectrometer Hel...

Page 147: ...n the Diagnostic tab of the Experiment Setup dialog box Set Velocity on the Bench tab of the Experiment Setup dialog box to a lower velocity If the Source status indicator is off click the source indicator on the Diagnostic tab of the Experiment Setup dialog box to check the source current and voltage If the Source indicator is on check the interferogram on the Bench tab of the Experiment Setup di...

Page 148: ... installed properly or is not aligned Detector and beamsplitter are not compatible Make sure the cooling vents on the back of the spectrometer are not blocked Make sure the ambient temperature is between 16 and 27 C 60 and 80 F Make sure the accessory is installed correctly and if necessary align it See the instructions that came with the accessory Make sure that selected detector and beamsplitter...

Page 149: ...meter Help Topics view Replacing sample compartment windows in Replacing parts to find part number ordering and installation instructions Check the laser signals by clicking the laser indicator on the Diagnostic tab of the Experiment Setup dialog box For a Nicolet 6700 replace the beamsplitter if necessary For a Nicolet 4700 contact technical support Align the spectrometer using the Align button o...

Page 150: ...or The insulating vacuum chamber of the dewar has begun to leak If you suspect your detector has a vacuum leak view Detector does not stay cooled in the Troubleshooting book in Spectrometer Help Topics You encounter problems when selecting external detectors on an AEM GC interface or microscope A custom detector is selected on the Bench tab of the Experiment Setup dialog box The detector cable is ...

Page 151: ...eter using the Align button on the Diagnostic tab of the Experiment Setup dialog box Turn off the power to the computer and the spectrometer Leave the power off for 15 seconds Turn on the spectrometer and wait until the start up diagnostics finish Then turn on the computer and restart OMNIC Click the laser indicator on the Diagnostic tab of the Experiment Setup dialog box to check the laser operat...

Page 152: ...ugh the indicator click the indicator to view information about the laser operation If the laser frequency is outside the specified range call Thermo Electron to have the electronics module replaced If the laser voltage or current is outside the specified range replace the laser View Replacing the laser in the Servicing your spectrometer book in Spectrometer Help Topics for instructions Make sure ...

Page 153: ...The light source is not working An MCT detector is not cooled The interferogram peak is not located at 1024 16 data points on the Bench tab of the Experiment Setup dialog box The beam path is obstructed The data cable between the spectrometer and the computer is not properly connected The detector and beamsplitter are not compatible Check the source indicator on the Diagnostic tab of the Experimen...

Page 154: ...ometer Get information about replacement parts Check the spectrometer configuration Get troubleshooting tips Follow these steps to run the diagnostics 1 Make sure the main sample compartment is empty Remove any samples and sampling accessories except a transmission sample holder 2 Start the Bench Diagnostics software To do this choose Advanced Diagnostics from the Collect menu You can also close O...

Page 155: ...on in a window you can use the navigation buttons to return to earlier windows Click this button to return to the previous window Click this button to return to the main Diagnostics window To exit the Bench Diagnostics software click the Close button at the far right end of the title bar Nicolet FT IR User s Guide 149 ...

Page 156: ...hooting measures you can take to solve data collection problems with the spectrometer If the action does not solve the problem call your Thermo Electron service office In OMNIC Help Topics find troubleshooting in the Index and go to Troubleshooting for more information Problem Possible Cause Solution A spectrum contains fringes or channeling The sample has parallel highly reflective sides that cau...

Page 157: ...llecting the spectrum Install an appropriate purge gas source and optional purge kit Contact Thermo Electron for details Replace the air dryer with one that removes carbon dioxide or use nitrogen to purge the spectrometer Contact Thermo Electron for more information A spectrum contains water peaks that interfere with your data The desiccant cannot absorb any more water vapor The spectrometer is no...

Page 158: ...e appropriate tutorial available through Sampling Techniques in the Help menu Put the microscope in infrared mode and collect the spectrum again Make sure the sample is held evenly and has good contact with the crystal Set Resolution on the Collect tab of the Experiment Setup dialog box to a value that lets you see small peaks Use a lower numerical setting to achieve higher resolution A spectrum c...

Page 159: ...ine The spectrometer has not been on long enough to reach thermal equilibrium The spectrometer is not properly purged Be sure to press the pellet properly Remove the sample holder and collect the background again Use the Align button on the Diagnostic tab of the Experiment Setup dialog box to align the spectrometer For best results allow the spectrometer at least one hour to stabilize after turnin...

Page 160: ...og box Reduce the resolution use a higher numerical setting on the Collect tab of the Experiment Setup dialog box Check the pressure regulator it should be set between 0 7 and 1 4 bar 70 and 140 kPa or 10 and 20 psig Check the flowmeter it should read 15 scfh about 0 4 m3 hr Adjust the flow rate if necessary Add a bandwidth limiting filter or an energy screen to reduce the signal strength Set Velo...

Page 161: ... 81 82 83 84 ATR correction 103 ATR sample contact 154 Auxiliary 1 connector 93 Auxiliary 2 connector 93 Auxiliary connector 92 auxiliary experiment module 86 b Background button 53 background spectrum collected with sample holder in beam 153 collecting 32 53 defined 27 too old 151 when to collect 27 bandwidth limiting filter 65 baseline correcting 102 116 not flat 153 not stable 139 sloped 153 ba...

Page 162: ...ample compartment 92 contaminants identifying with subtraction 117 cooled detector aperture size for 67 cooling detector 19 125 copying spectrum 121 correcting baseline 102 116 spectrum 102 custom accessories 94 cuvette 87 d data collection 9 14 default configuration 30 default experiment 30 deleting report notebook 109 spectrum 108 depth of penetration 103 desiccant 139 151 changing 130 checking ...

Page 163: ...ost on detector 144 FT IR 6 e full scale 112 electronics module 145 g defective 146 replacing 134 gain 99 e mail 3 7 for collecting data in visible spectral range 70 energy screen 66 69 154 gas cells 87 detectors typically used with 66 GC interface 87 energy passed with 66 Getting Started tutorial 1 for collecting data in visible spectral range 70 grazing angle accessory 84 optional wheel 86 resol...

Page 164: ...9 library spectrum interferometer displaying 104 stand by mode 145 linearity 64 IUPAC 64 Liquid Analysis System 87 k liquid nitrogen for cooling detectors 125 log 1 R units 101 KBr pellet improperly pressed 153 Kramers Kronig correction 103 152 m Kubelka Munk units 101 macro 53 l Macro button 53 maintenance 13 128 130 labeling peak 120 matched scale 112 laser math burned out 147 subtracting 116 de...

Page 165: ...acoustic accessory 88 customizing 119 photoacoustic units 101 Help 7 122 photometric accuracy 65 66 installing 5 pinouts learning 6 7 Auxiliary connectors 94 preparing for data collection 97 Detector Motors connector 96 starting 9 20 polarizer 78 88 wizards and tutorials 6 power OMNIC window 24 accessory 92 Open Configuration 30 power cable defective 140 opening power cord 140 configuration 30 Pow...

Page 166: ...sis 64 65 66 135 connectors 92 r windows fogged 143 sample film rear panel 55 in ATR experiment 152 region sample holder selecting 120 installing 28 regions installing sample or filter in 29 specifying for library search 103 sample shuttle 89 remote diagnostics 90 sample spectrum Remote Start accessory 88 adding to spectral library 105 replacing parts in spectrometer 127 adding to spectral window ...

Page 167: ...ry 102 and velocity 71 selecting detector beamsplitter 62 experiment 21 30 for library search 103 report template 109 selecting 120 spectral regions 120 visible 70 spectrum 110 spectral window 24 service 13 128 134 spectrometer signal intensity 131 aligning 130 low 141 142 143 components 10 51 signal to noise ratio 66 69 cover 139 increased by bandwidth limiting filter 65 data collect buttons 52 s...

Page 168: ...ide allowed range 139 collecting 12 23 27 30 53 98 TGA interface 89 color 111 TGA module 89 comparing with QC library spectra 43 tool copying and pasting 121 annotation 120 correcting 102 peak area 115 correcting baseline of 116 peak height 115 creating report containing 48 region 120 deleting 108 selection 114 derivative shaped peaks in 152 spectral cursor 115 distorted 69 toolbar 26 fringes or c...

Page 169: ...etafile 121 units 98 wizards 6 used for spectrum 38 101 library creation 7 user library adding spectrum to 47 x creating 47 saving spectra in 107 X value 115 user name 20 y v Y value 115 validation wheel 90 Y axis 112 Val Q 90 velocity z and spectral range 71 moving mirror 71 zoom too high 141 Expand Contract button 113 too high for detector 154 in on spectrum 113 visible spectral range 70 Zoom bu...

Page 170: ... 164 Thermo Electron Corporation ...

Reviews: