17
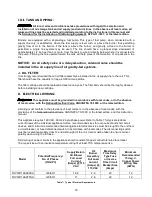
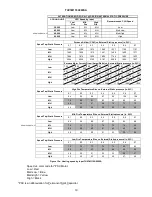
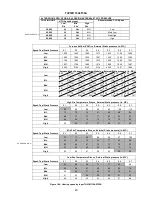
Wire size selections in Table 7 are based upon Table 310-16 of the National Electrical Code for three
copper conductors, with insulation rated for 75 degrees Celsius, contained in raceway at 30 degrees
Celsius. For other wire insulation temperature ratings and ambient conditions, refer to the National
Electrical Code for the minimum wire sizing requirements.
NOTICE:
Before the unit is started, the installer and/or electrician must check the following items:
1. Review wiring diagram for proper routing and connection of all field wiring. Ensure
that all wires and connectors are firmly secured.
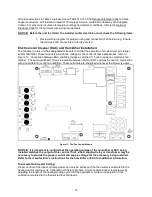
Electronic Air Cleaner (EAC) and Humidifier Installation:
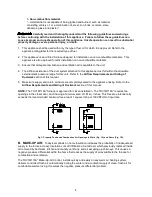
The fan timer on this unit has designated terminals to control the operation of an electronic air cleaner
and/or humidifier. These terminals provide line voltage for the control of these accessories, refer to
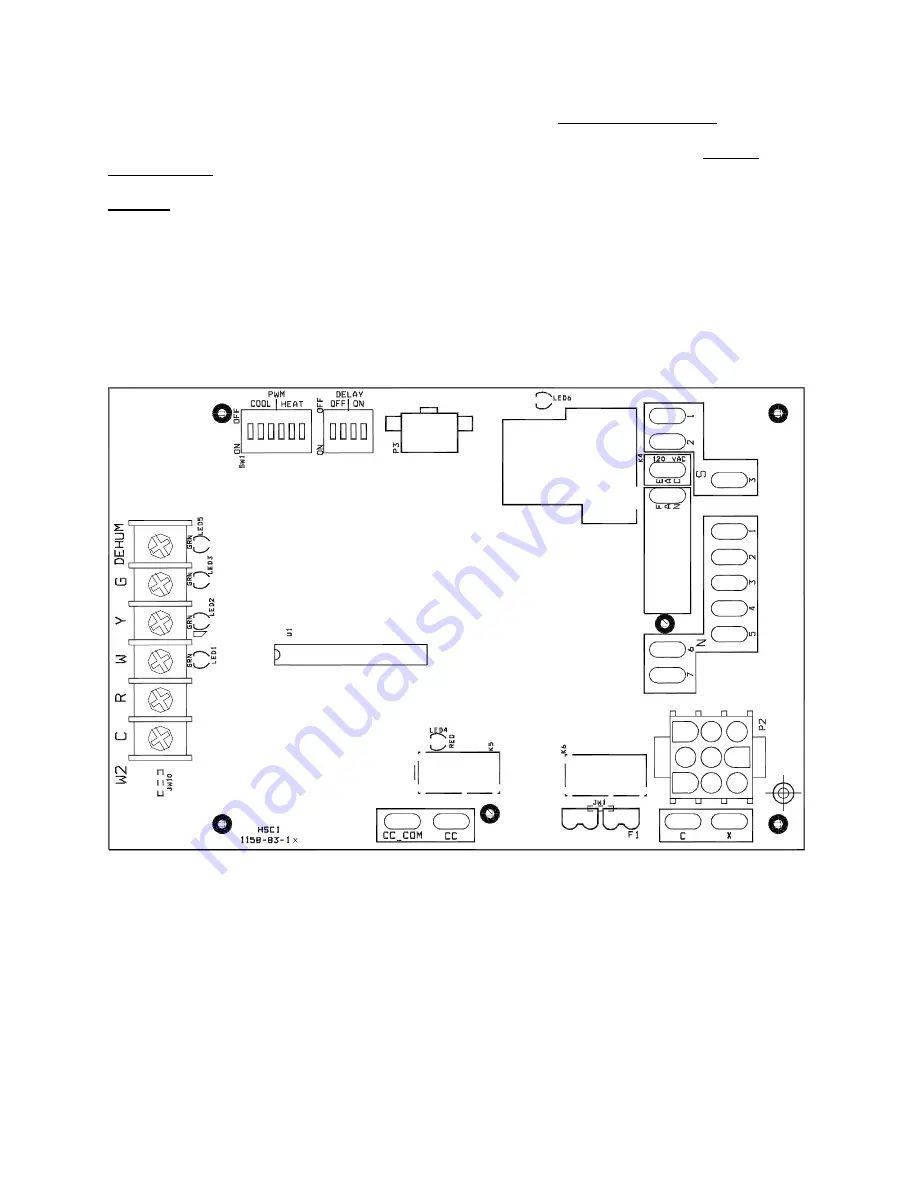
Figure 13. Connection between EAC and N6 provides a switched 115 vac to power an electronic fan
cleaner. The same-switched 115 vac is available between FAN and N7 and may be used in conjunction
with a humidistat to control a humidifier. These terminals are energized whenever the blower is active.
Figure 13: The Fan Control Module
NOTICE: It is important to confirm that the operating voltage of the humidifier or EAC being
installed matches the output of this control. If not, a field supplied relay or transformer may be
necessary to provide the proper control and supply voltage for the accessory being installed.
Refer to the manufacturer’s instructions for the humidifier or EAC for additional information.
Thermostat Anticipator Setting:
Proper control of the indoor air temperature can only be achieved if the thermostat is calibrated to the
heating and/or cooling cycle. Calibration will help to produce a more constant indoor temperature by
adjusting the length of the heating/cooling cycle to fit the application. A vital consideration of this
calibration is related to the thermostat heat anticipator.
Summary of Contents for THV1M119A960SA
Page 2: ......
Page 4: ......
Page 6: ...2...
Page 36: ...32 V Sequence of Operations Flow Chart...
Page 37: ...33...
Page 38: ...34 VI Trouble Shooting Flow Chart...
Page 39: ...35...
Page 40: ...36...
Page 41: ...37...
Page 42: ...38...
Page 44: ...40 Appendix A Replacement Parts for THV1M119A...
Page 45: ...41...
Page 46: ...42 Appendix B THV1M119A960SA PSC Wiring Diagram...

