8600 Series
A -3
Appendix A
Handling Liquid Nitrogen
Use proper transfer equipment.
Use a phase separator or special filling funnel to prevent splashing and
spilling when transferring liquid nitrogen into or from a dewar or
refrigerator. The top of the funnel should be partly covered to reduce
splashing. Use only small, easily-handled dewars for pouring liquid. For
the larger, heavier containers, use a cryogenic liquid withdrawal device to
transfer liquid from one container to another. Be sure to follow
instructions supplied with the withdrawal device. When liquid cylinders
or other large storage containers are used for filling, follow the instructions
supplied with those units and their accessories.
Do not overfill containers.
Filling above the bottom of the necktube (or specified maximum level) can
result in overflow and spillage of liquid when the necktube core or cover is
placed in the opening.
Never use hollow rods or tubes as dipsticks.
When a warm tube is inserted into liquid nitrogen, liquid will spout from
the top of the tube due to gasification and rapid expansion of liquid inside
the tube.
Warning
Nitrogen gas can cause suffocation without warning!
s
Store and use liquid nitrogen only in a well-ventilated place.
As the liquid evaporates, the resulting gas tends to displace the normal air
from the area. In closed areas, excessive amounts of nitrogen gas reduce
the concentration of oxygen and can result in asphyxiation. Because
nitrogen gas is colorless, odorless and tasteless, it cannot be detected by the
human senses and will be breathed as if it were air. Breathing an
atmosphere that contains less than 18% oxygen can cause dizziness and
quickly result in unconsciousness and death.
Note
The cloudy vapor that appears when liquid nitrogen is exposed to
the air is condensed moisture; not the gas itself. The issuing gas is
invisible.
s
Never dispose of liquid nitrogen in confined areas or places where others
may enter.
Disposal of liquid nitrogen should be performed outdoors in a safe place.
Pour the liquid slowly on gravel or bare earth where it can evaporate
without causing damage. Do not pour the liquid on pavement.
Thermo Scientific
Summary of Contents for Forma 8600 Series
Page 55: ...8600 Series 8 1 Thermo Scientific Section 8 Spare Parts...
Page 75: ...8600 Series 9 1 Thermo Scientific Section 9 Refrigeration Schematics...
Page 76: ...9 2 8600 Series Thermo Scientific Section 9 Refrigeration Schematics...
Page 77: ...8600 Series 9 3 Thermo Scientific Section 9 Refrigeration Schematics...
Page 78: ...9 4 8600 Series Thermo Scientific Section 9 Refrigeration Schematics...
Page 79: ...8600 Series 9 5 Thermo Scientific Section 9 Refrigeration Schematics...
Page 80: ...9 6 8600 Series Thermo Scientific Section 9 Refrigeration Schematics...
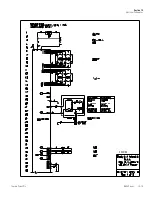
Page 81: ...8600 Series 10 1 Thermo Scientific Section 10 Electrical Schematics...
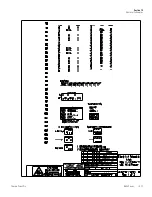
Page 82: ...10 2 8600 Series Thermo Scientific Section 10 Electrical Schematics...
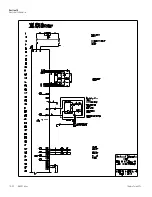
Page 83: ...8600 Series 10 3 Thermo Scientific Section 10 Electrical Schematics...
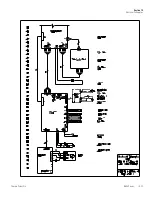
Page 84: ...10 4 8600 Series Thermo Scientific Section 10 Electrical Schematics...
Page 85: ...8600 Series 10 5 Thermo Scientific Section 10 Electrical Schematics...
Page 86: ...10 6 8600 Series Thermo Scientific Section 10 Electrical Schematics...
Page 87: ...8600 Series 10 7 Thermo Scientific Section 10 Electrical Schematics...
Page 88: ...10 8 8600 Series Thermo Scientific Section 10 Electrical Schematics...
Page 89: ...8600 Series 10 9 Thermo Scientific Section 10 Electrical Schematics...
Page 90: ...10 10 8600 Series Thermo Scientific Section 10 Electrical Schematics...
Page 91: ...8600 Series 10 11 Thermo Scientific Section 10 Electrical Schematics...
Page 92: ...10 12 8600 Series Thermo Scientific Section 10 Electrical Schematics...
Page 93: ...8600 Series 10 13 Thermo Scientific Section 10 Electrical Schematics...
Page 94: ...10 14 8600 Series Thermo Scientific Section 10 Electrical Schematics...
Page 95: ...8600 Series 10 15 Thermo Scientific Section 10 Electrical Schematics...
Page 96: ...10 16 8600 Series Thermo Scientific Section 10 Electrical Schematics...
Page 97: ...8600 Series 10 17 Thermo Scientific Section 10 Electrical Schematics...
Page 98: ...10 18 8600 Series Thermo Scientific Section 10 Electrical Schematics...
Page 99: ...8600 Series 10 19 Thermo Scientific Section 10 Electrical Schematics...
Page 100: ...10 20 8600 Series Thermo Scientific Section 10 Electrical Schematics...
Page 101: ...8600 Series 10 21 Thermo Scientific Section 10 Electrical Schematics...
Page 102: ...10 22 8600 Series Thermo Scientific Section 10 Electrical Schematics...
Page 103: ...8600 Series 10 23 Thermo Scientific Section 10 Electrical Schematics...
Page 104: ...10 24 8600 Series Thermo Scientific Section 10 Electrical Schematics...

