MaxQ 5000 Shaker 4-3
Thermo Scientific
Section 4
Unpacking and Installation
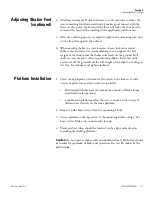
4. Add load and speed. If unit continues to rock, continue to adjust the
non-contacting foot downward until it makes good contact with the
floor. At this point, friction with the floor will make the foot hard to
turn and the unit will be standing with equal load on all four feet.
5. After the adjusting process is complete, tighten the remaining jam nuts
on the front feet against the cabinet.
6. When moving shaker to a new location, loosen locknuts around
shaker’s feet and raise feet until adjoining casters support the full
weight of the shaker and the shaker rolls freely on the ground. Roll
shaker to new location. After repositioning shaker, lower feet until
casters are off the ground and the full weight of the shaker is resting on
the feet. Level shaker and tighten locknuts.
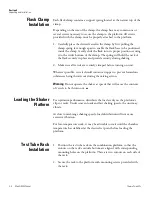
1. Select the appropriate platform for the vessels to be shaken. A wide
variety of platforms and accessories are available:
• Dedicated platforms have the maximum number of flask clamps
attached for safe operation.
• Combination platforms allow the user to shake a wide variety of
different sized vessels on the same platform.
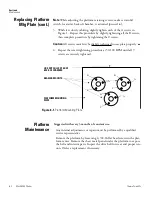
2. Remove 4 flat-head screws from the mounting blocks.
3. Secure platform, sold separately, to the mounting blocks using 4 flat-
head screws. Make sure countersinks face up.
4. Flasks and test tubes should be inserted in the clips and racks after
installing the shaking platform.
Caution
Do not operate shaker with an unbalanced load. Platforms should
be loaded for optimum stability and operation. Do not lift shaker by the
platform.
s
Adjusting Shaker Feet
(continued)
Platform Installation

