4
5.
INSTALLATION
WARNING
INSTALLATION SHOULD BE COMPLETED
BY QUALIFIED PERSONNEL ONLY.
5.01
Location -
The most uniform operating
conditions will be obtained by placing the oven in
an area remote from drafts, ventilating outlets,
radiators, and other rapidly changing ambient
conditions. To assure proper ventilation allow a
minimum of three (3) inches of clearance between
the rear, top and sides of the oven and adjacent
walls. If two or more ovens are to be placed side by
side, then allow six (6) inches between them. The
four legs on the bottom of the oven can be turned
to raise or lower the corners so that it sits level on
the table.
5.02 Electrical Connections -
1.
The 14EG, 25EG and 25EM are provided
with a 120V, 15 amp, three-prong (grounding)
plug. The 45EG and 45 EM come equipped with
a 120V, 20 amp, three-prong (grounding) plug.
Both plug configurations are industry standard,
and mate with standard three-prong grounding
wall receptacles to minimize the possibility of
electric shock hazard from this apparatus. If in
doubt the user should have the wall receptacle
and circuit checked by a qualified electrician to
make sure the receptacle can provide adequate
current and is properly grounded.
WARNING
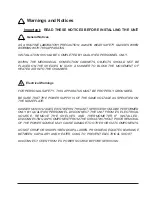
FOR PERSONAL SAFETY THIS APPARATUS
MUST BE PROPERLY GROUNDED.
2.
Where a standard two-prong wall
receptacle is encountered, it is the personal
responsibility and obligation of the user to have
it replaced with a properly grounded three-prong
wall receptacle.
DO NOT, UNDER ANY
CIRCUMSTANCES, CUT OR REMOVE THE
THIRD (GROUND) PRONG FROM THE
POWER CORD. DO NOT USE A TWO-
PRONG ADAPTER PLUG.
5.03
Determine the total amount of current
being used by other apparatus connected to the
circuit that will be used for this apparatus. It is
critical that the added current demand (see
nameplate) of this and other equipment used on
the same circuit does not exceed the rating of
the fuse or circuit breaker.
CAUTION
BE SURE THAT THE POWER SUPPLY IS
OF THE SAME VOLTAGE AS SPECIFIED
ON THE NAMEPLATE.
6.
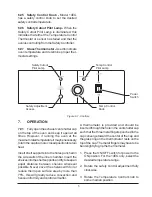
EXPLANATION OF CONTROLS
6.01 On/Off Switch -
The on/off switch controls
the flow of all electric power to the oven. The
blower motor in the mechanically convected
models will always be in operation with the
power switch ON.
6.02 Three-Heat Switch -
Model 14EG has
a three heat switch. This switch also functions as
the main "on/off" switch. With this switch it is
possible to supply maximum wattage to the unit
for initial heat-up and then reduce the wattage
when operating temperature is reached. Low
setting may be used for temperatures up to
approximately 115°C, medium setting from
115°C to 175°C and high setting above 175°C.
Most uniform control is achieved when setting is
just high enough to maintain desired
temperature.
6.03 Temperature Control Knob
- The
Temperature Control knob is used to set the
operating temperature. Numerical graduations
do not refer to any specific temperature but are
simply for reference. As you become familiar
with operating your oven, record dial settings
which correspond to your preferred operating
temperatures.
6.04 Temperature Control Pilot Lamp -
When the lamp above the Temperature Control
is illuminated, this indicates electric current is
being applied to the heater. It is normal for this
lamp to cycle on and off during the operation of
the oven.


