


Installation, use and maintenance guide
CASING CHIC
– CHIC SUPREME
Page 9
ENG
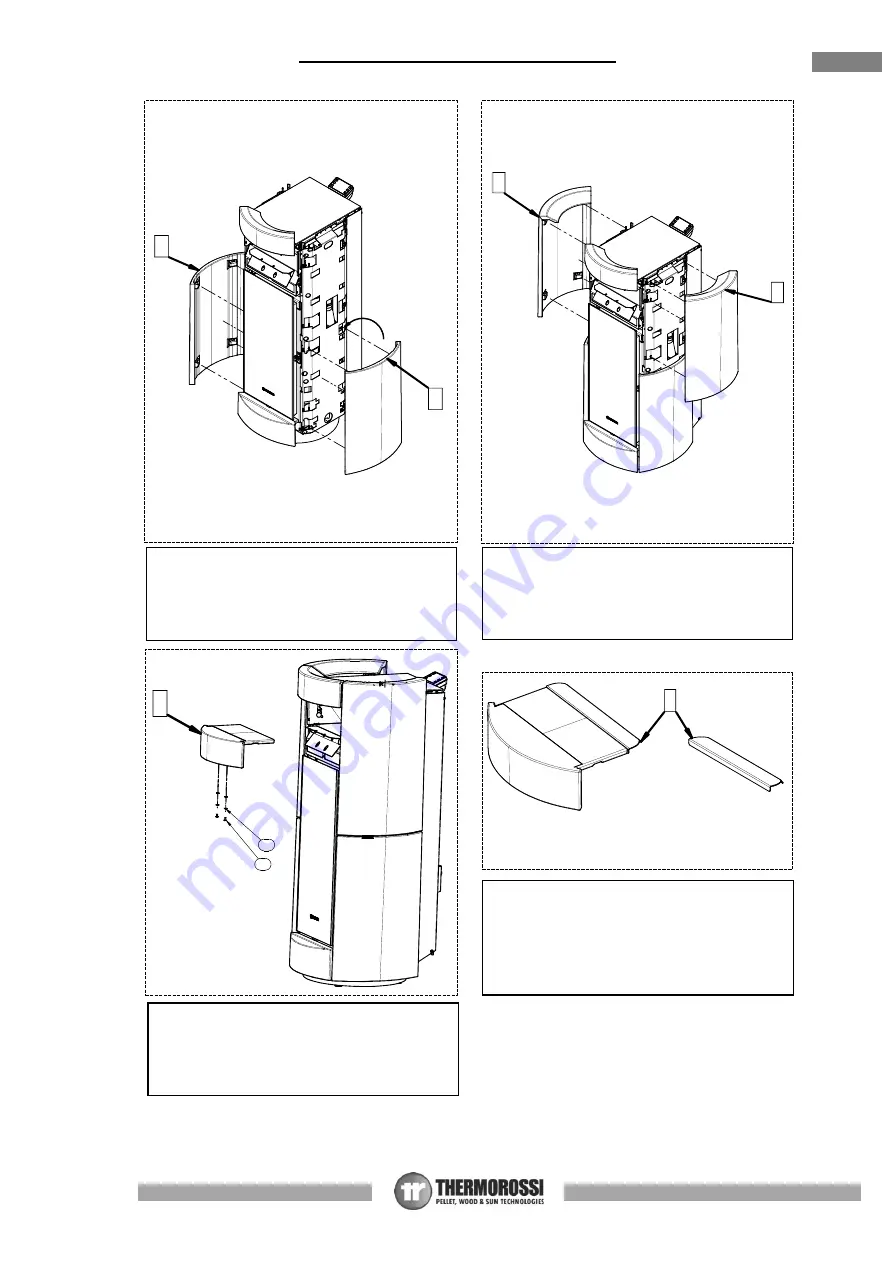
7
– Insert the central majolica (F) as indicated in
the figure (only for air products). Fix it with
screws (4) and washers (3).
D
D
E
E
8
–
ATTENTION
:
The compensating bracket (L) has to be applied
only in those cases where the appliance body is
deeper than the central majolica (F) in order to
close the remaining gap.
5 - Insert the lower side panel (D) on the teeth
provided. Slightly bend the teeth so as to firmly
secure the majolica to the body. Carry out the
same procedure on the opposite side.
6 - Insert the upper side panel (E) on the teeth
provided, as in the previous point. Slightly bend
the teeth so as to firmly secure the majolica to
the body. Carry out the same procedure on the
opposite side.
F
3
4
L
F
3
4
L


