background image


Manuale d'installazione, uso e manutenzione 


 PKOKKOLAPLUS – PMOODPLUS 




‘

ݣ

›

œ“’

 
The appliance is programmed to communicate 7 fundamental alarms. The alarms are listed below: 
 

ALPE


This  message  appears  when  the  temperature  drops  below  the  preset  threshold  while  in  the  WORK  mode:  this  means  that  the 
appliance  is  shutting  down  or  has  shut  down  due  to  lack  of  pellets.  To  reset  the  alarm  simply  press  the 

Flame  Button

:  The 

appliance  will  begin  a  new  start  up  phase.  It  is  mandatory  to  empty  and  clean  the  brazier,  and  then  to  fill  the  pellet  tank  before 
repeating the START phase. 

 
ALAC


Appears once the START phase has finished if the smoke does not reach a certain temperature. To reset the alarm simply press 
the 

Flame Button

: the appliance will begin a new start up phase. It is mandatory to empty and clean the brazier before repeating 

the START phase: pellets emptied from the brazier must not be fed into the tank. 


ALOP


This occurs when the smoke outlet is partially blocked. To reset the alarm the power to the appliance must be switched off then on 
by turning the switch 0-1 located in the power panel. Before restarting the appliance check for any irregularities such as blocked flue 
outlet, open firebox door, etc. and solve the problem. 


AL T max


Appears  when  the  temperature  of  the  appliance  body  exceeds  125°C.  Once  the  causes  for  the  overtemperature  have  been 
identified  and  remedied  unscrew  the  plastic  cover  from  the  thermostat  located  on  the  power  panel  and  press  the  button  (the 
temperature of the appliance must lower considerably). To reset the alarm the power to the appliance must be switched off then on 
by turning the switch 0-1 located on the power panel.


AL SMOKE TEMP SENSOR


Appears when the smoke thermocouple is damaged, disconnected or absent. Call technical assistance. 
 

AL SMOKE FAN


It trips when the smoke suction unit revolution sensor detects a very low rotation speed: clean the opening A3, the flue pipes and 
the flue outlet (see para. 8). If the problem persists contact the technical assistance service. 
To reset the alarm, it is necessary to turn the electrical power off and back on by means of the switch 0-1 installed on the power 
supply panel; if necessary, call the technical assistance. 


AL SMOKE RPM SENSOR

: trips when the smoke suction unit revolution sensor fails to detect any rotation; the smoke suction unit 

is not working, call the technical assistance service. 


Summary of Contents for KOKKOLA

Page 1: ......

Page 2: ...Manuale d installazione uso e manutenzione PKOKKOLAPLUS PMOODPLUS ...

Page 3: ...ANEL 15 5 2 DESCRIPTION OF THE POWER PANEL 16 5 3 DATE TIME SETTING THE DATE AND TIME 16 5 4 CHRONO ON OFF PROGRAMMING 17 5 5 LEVEL OPERATING LEVEL SETTING 19 5 6 THERMOCOMFORT CONNECTION WITH THE HANDHELD RADIO CONTROL OPTIONAL 19 21 6 1 INDICATORS OF THE HANDHELD CONTROL 21 6 2 USE OF THE HANDHELD CONTROL 22 6 3 TRANSMISSION CODES SETTINGS 23 6 4 CARE AND MAINTENANCE OF THE HANDHELD CONTROL 23 2...

Page 4: ...M COMPONENTS 34 10 3 3 CONTROLS PRIOR TO INSTALLING THE APPLIANCE 34 11 ALARMS 36 12 ELECTRICAL WIRING 37 13 INFORMATION FOR THE SKILLED TECHNICIAN 38 13 1 MAIN COMPONENTS AND THEIR OPERATION 38 13 2 REQUIREMENTS FOR CORRECT INSTALLATION AND OPERATION 38 13 3 TROUBLESHOOTING CAUSES SOLUTION 39 14 SPARE PARTS 41 14 1 SPARE PARTS PKOKKOLAPLUS 1 3 41 14 2 SPARE PARTS PKOKKOLAPLUS 2 3 42 14 3 SPARE PA...

Page 5: ...Manuale d installazione uso e manutenzione PKOKKOLAPLUS PMOODPLUS ...

Page 6: ...cause serious injury to persons using the appliance DAMAGE TO PROPERTY This safety symbol identifies messages or instructions that are fundamental for the generator to function well To avoid serious damage to the appliance adhere strictly to these instructions INFORMATION This symbol indicates important instructions for good functioning of the generator If this information is not correctly observe...

Page 7: ...e Fire Department Mandatory signalling and safety distances and the Note concerning installation of heaters issued by the Association of Cantonal Fire Agencies VKF AEAI ATTENTION it is mandatory to earth the appliance If this instruction is not observed serious damage which is not covered by warranty will result to the body of the appliance Have an electrician check the earthing There must be no e...

Page 8: ...5 5 5 5 Smoke flow at reduced power g s 4 4 4 4 Efficiency at rated power 90 20 90 20 Efficiency at reduced power 84 00 84 00 CO emissions with 13 O2 at rated power mg m3 188 0 188 0 CO emissions with 13 O2 at reduced power mg m3 716 0 716 0 Power supply voltage and frequency V Hz 230 50 230 50 Max electrical consumption A W 1 17 270 1 17 270 Min electrical consumption A W 0 23 70 0 23 70 Heatable...

Page 9: ...Manuale d installazione uso e manutenzione PKOKKOLAPLUS PMOODPLUS 554 522 488 1143 522 554 91 391 126 946 158 O 80 O 80 O 50 ...

Page 10: ...iding the warranty 3 3 THE FEEDBOX The feedbox is situated in the top part of the appliance The load capacity specified in the technical data can vary according to the specific weight of the pellets Take special care when loading the tank of the screw feeder at its base Only pellets that comply with the specifications listed above must be fed into the tank Never insert foreign objects into the tan...

Page 11: ...llowing documents a Report containing the type of materials utilised b Project as defined in Article 5 of Ministerial Decree n 37 22 January 2008 c Drawing of the finished installation d References to existing partial or previous declarations of conformity e g electrical wiring e Copy of the certificate of recognition of the professional technical qualifications These documents must by law be kept...

Page 12: ...NECTING THE APPLIANCE TO THE FLUE OUTLET Connection of the appliance to the flue outlet must be carried out in strict compliance with the instructions contained in this use and maintenance guide To obtain the minimum overall rear distance indicated in the figures below it is necessary to use the TEE provided by us code no 70022350 Using a standard TEE will increase the overall rear distance moreov...

Page 13: ...l panel damage which is not covered by warranty PKOKKOLAPLUS PMOODPLUS If for aesthetic reasons you wish to position the small control panel in the centre follow these instructions to move it 1 Remove the 2 screws D from the control panel H Figure 2 2 Move the small panel H to the central position then tighten the screws D that you removed previously Figure 3 3 Pay particular attention when assemb...

Page 14: ...e back of the appliance Figure 1 using a hacksaw Connect the air intake on the appliance to the exterior of the building with suitable piping The maximum length of the piping is 40 cm 4 5 HANDLE Your appliance is supplied with a handle for opening the firebox door this tool must be used for opening the door to permit carrying out cleaning operations see dedicated paragraph The handle when not bein...

Page 15: ...Manuale d installazione uso e manutenzione PKOKKOLAPLUS PMOODPLUS PKOKKOLAPLUS PMOODPLUS ...

Page 16: ...stance It is strictly prohibited to disconnect the appliance from the electrical power mains during normal operation 5 1 DESCRIPTION OF THE CONTROL PANEL The control panel is managed by a microprocessor The control buttons and the various displays are described below The control buttons are Clock button Press this button to activate deactivate the programming see para 5 4 Ventilation button Press ...

Page 17: ... status of the appliance appears below these dashes that is START OFF or WORK And the current time set by the user appears below this word The presence in the display of the clock symbol indicates that the CHRONO programming has been enabled if this symbol does not appear it means that the CHRONO programming has been disabled see para 5 4 5 2 DESCRIPTION OF THE POWER PANEL The components of the po...

Page 18: ...ssing the Flame Button When scrolling the ON1 values the OFF1 values will scroll as well this is to avoid setting a shut off time that is earlier than the start up time Once confirmed the selector shifts to the minute section of ON1 Press the Scroll Buttons to set the minutes for the first start up Confirm the value by pressing the Flame Button 4 Now press the Scroll Buttons to select the hour at ...

Page 19: ...onfirmed the selector shifts to the minute section of OFF3 Press the Scroll Buttons to set the minutes for the third shut off Confirm the value by pressing the Flame Button At this point the third and final ON OFF cycle for the selected day has been set Alternatively if you wish to copy the exact same programming for the ON OFF cycles set for a particular day to the next day simply press the Venti...

Page 20: ...am is called LEVEL 1 However if you are using pellets with a higher than normal incidence of residues after combustion in the brazier it is possible to select alternative levels LEVEL 2 is an operating program that accelerates the speed of the smoke suction unit in proportion to all the combustion power levels This level must be set when the user notices a weak high and very dark flame Attention t...

Page 21: ... the THERMOCOMFORT function and select ON in the previous screen if the appliance detects the radio control signal It is therefore recommended to ensure that the radio control is energised and within close vicinity of the appliance 3 To confirm the activation of the THERMOCOMFORT function or to exit the screen simply press the Menu Button to return to the initial screen The THERMOCOMFORT symbol wi...

Page 22: ...power 6 1 INDICATORS OF THE HANDHELD CONTROL 1 Flame button 2 Ventilation button 3 DOWN key 4 UP key 5 Displays the room temperature detected by the radio control sensor 6 Ventilation power indicator 7 Combustion power indicator 8 Target room temperature indicator use buttons 3 and 4 to change the value 9 Area of the display where the operating program is displayed 10 Battery charge level 11 Main ...

Page 23: ...n power and on the display you will see the bars disappear in sequence vice versa to increase the ventilation power press the Up arrow 4 The ventilation power changes with each press of DOWN key 3 and UP key 4 Attention it is possible that due to radio interference or sending commands too close together the changes will not be implemented With this program you can also use the infrared control sup...

Page 24: ...oceed as follows The appliance must be energised and the main switch O I in the I position 1 Disable the Thermocomfort function see para 5 6 2 Switch off the Thermocomfort radio control using the main switch 11 3 To change the transmission codes open the battery cover and act as indicated in the figure below 4 To change the frequency simply change the order of even only one of the four switches sh...

Page 25: ...wear such as batteries keypads lodging compartments small compartment parts are guaranteed for 6 months from the purchase date The guarantee does not apply if the defect is caused by non conforming use and or if the instructions and guidelines described above are not observed to the letter Devices or parts returned for replacement become the property of Thermorossi S p A The presence of any irregu...

Page 26: ...epeatedly to set the desired combustion power which will only activate at the end of the START cycle which takes roughly 20 minutes In this stage any level of combustion power set by the user is ignored to meet the correct power values set by the manufacturer Press the Ventilation button repeatedly to set the six fan speeds the fan will only activate once the smoke has reached the preset temperatu...

Page 27: ...liance that could be damaged by the heat due to possible incorrect positioning of the channelling lever Prescriptions for correct channelling Use pipes with smooth inner surfaces capable of resisting continuous temperatures higher than 150 C It is prohibited to use plastic or internally corrugated pipes It is prohibited to position sections with a downward slope Reduce the number of bends as much ...

Page 28: ...ed to automatically start the appliance with programming from the CRONO ATTENTION Use N O normally open contacts for the connection to the additional room temperature thermostat The thermostat must have a thermal hysteresis that is higher than 2 C 8 2 OPERATING WITH THE ADDITIONAL CHRONOTHERMOSTAT not supplied As an alternative to the room temperature thermostat a chonothermostat can be installed ...

Page 29: ...rt this danger ATTENTION Use N O normally open contacts for the connection to the chronothermostat ATTENTION In the event of connections to the chronothermostat Thermorossi S p a shall not be held responsible for the appliance not starting up smoke leaks or breakage of the lighting component In the event of a programmed cycle on always ensure that the brazier is clean and seated correctly in its l...

Page 30: ...rrectly To open and close the door use the special handle provided To guarantee correct operation of the appliance carefully clean the area around the spark plug ATTENTION make sure before every start up that the brazier is clean If necessary clean it more thoroughly with an ash vacuum EVERY 3 DAYS Lift and drop the tube scraper rods several times Figure 3 to access the tube scraper rods you must ...

Page 31: ...arry out the necessary maintenance or if only partial maintenance is carried out will affect the correct functioning of the appliance Any problems resulting from total or partial lack of cleaning or maintenance will immediately void the warranty ATTENTION if the appliance remains inactive and or unused for more than one month it is necessary to clean the entire appliance thoroughly as well as the ...

Page 32: ...charge of the batteries they must be charged for at least 24 hours lower charge times could reduce the duration and life of the batteries It is completely normal during the battery recharge process for symbols and or lines to appear haphazardly on the display The optimal battery autonomy is achieved after several battery charge discharge cycles During periods of non use over one week of the handhe...

Page 33: ...then the battery needs replacing Undo the two screws 1 that can be reached from the rear of the appliance remove the control panel and remove the protective cover To remove the cover simply press your fingers towards the centre in order to press the two tabs A and B as illustrated in the following two figures Pull the cover outwards and replace the battery The dead battery must be disposed of in c...

Page 34: ...e the section of the ventilation openings must be enlarged by at least 50 9 2 2 VENTILATION OF THE ADJACENT ROOMS The air flow can also be obtained from an adjacent room as long as the adjoining room is equipped with direct ventilation in compliance with the paragraphs described above only appliances connected to the exhaust pipe are installed in the room that is ventilated the adjoining room is n...

Page 35: ...t crosses the roof and chimney cap to protect against bad weather conditions If you decide to use the classic masonry exhaust provide a union tee with inspection cap and suitable supporting brackets If the flue outlet is too big it is necessary to insert a stainless steel or porcelain coated steel tube KEY KEY CHIMNEY CAP AND FLUE OUTLET ACCORDING TO UNI 10683 STANDARD CHIMNEY CAP AND FLUE OUTLET ...

Page 36: ...be made from suitable materials such as for example porcelain coated steel tubes and the various fittings sealed with red silicone resistant to 350 C The outer casing of the tube must be made with insulating material mineral wool ceramic fiber or use pre insulated tubing THE FLUE OUTLET MUST BE USED ONLY FOR THE APPLIANCE It must be possible to inspect and remove all the smoke tube sections for cl...

Page 37: ...nel Before restarting the appliance check for any irregularities such as blocked flue outlet open firebox door etc and solve the problem AL T max Appears when the temperature of the appliance body exceeds 125 C Once the causes for the overtemperature have been identified and remedied unscrew the plastic cover from the thermostat located on the power panel and press the button the temperature of th...

Page 38: ...OSTATO 95 C THERMOSTAT 95 C MOTORIDUTTORE SPIA VERDE GEARMOTOR GREEN INDICATOR LIGHT PRESSOSTATO PRESSURE SWITCH TERMOSTATO RIARMO RESET THERMOSTAT ASPIRATORE FUMI SMOKE SUCTION UNIT VENTILATORE AMBIENTE ROOM FAN RESISTENZA ACCENSIONE LIGHTING HEATER FUSIBILE 6 3A FUSE 6 3A FUSIBILE 500MA FUSE 500MA ENCODER ENCODER PANNELLO COMANDI CONTROL PANEL SONDA FUMI SMOKE SENSOR ...

Page 39: ...ce the causes for the overtemperature have been identified and remedied the appliance can be reactivated by unscrewing the plastic cover of the thermostat located on the power panel and pressing the button the appliance temperature must have considerably dropped GLOW PLUG It is activated in the START phase Heats the air to 800 C which assist the first combustion of the pellets present in the brazi...

Page 40: ...PELLETS THE APPLIANCE LEAKS SMOKE INTO THE ROOM OCCURS THE FIRST TIME THE APPLIANCE IS SWITCHED ON AS THE SILICONE PAINT IS BEING BAKED RUN THE APPLIANCE AT HIGH POWER LEVELS FOR A FEW DAYS THE SMOKE EXHAUST IS NOT SEALED CORRECTLY CHECK THE TIGHTNESS OF THE FLUE OUTLET AND IN PARTICULAR THE CONDITION OF THE EXHAUST PIPES AND THE GASKETS IF THE APPLIANCE STARTS TO SMOKE AFTER 25 MINUTES DIRTY BURN...

Page 41: ...APPROPRIATE MODIFICATIONS THE TIME DOES NOT REMAIN IN THE MEMORY THE BUFFER BATTERY INSTALLED IN THE CONTROL PANEL IS EXHAUSTED REPLACE THE BATTERY THE HOURLY PROGRAM IS NOT COMPLIED WITH THE USER HAS NOT ENABLED IT PRESS THE CLOCK BUTTON TO ENABLE IT AS INSTRUCTED IN THIS USE AND MAINTENANCE GUIDE THE BUFFER BATTERY INSTALLED IN THE CONTROL PANEL IS EXHAUSTED REPLACE THE BATTERY AN ERROR HAS BEEN...

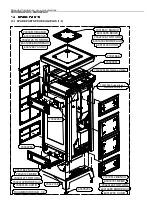
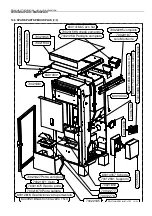
Page 42: ...O 70018510 BIANCO 60012698 BEIGE 70023125 TORTORA 60012696 BORDEAUX 60012697 CUOIO 70021862 BIANCA 70023120 BEIGE 70023121 TORTORA 70023122 BORDEAUX 70023123 CUOIO 70018512 BIANCO 60012701 BEIGE 70023124 TORTORA 60012699 BORDEAUX 60012700 CUOIO RICAMBI KOKKOLA 1 3 70021866 70022158 70022254 Montante estetico 60005254 70021891 70022250 70022250 70022255 Supporto per montante estetico ...

Page 43: ...rmo 60011656 Interruttore 0 1 60014357 Scheda 70012937 70012931 Supporto 70022165 70021850 70012276 70012277 70021881 70021827 Porta completa 70021871 Vetro 70021875 Gancio porta 70021870 Porta saldata 60010831 70022295 completo 70022187 solo Montante 70023158 Pannello completo 70023159 Scheda comando 60012818 Guarnizione vetro porta stufa 60009218 Nastro fibra vetro 15x3 RICAMBI KOKKOLA 2 3 60014...

Page 44: ...10185 60011428 70010325 60010102 60011793 60014240 70010234 70022183 70022162 70013845 70022251 70022252 70022181 70018484 60013984 60013138 70013635 60004229 60011630 60013339 60011428 70016831 60011428 70022146 60010188 70010403 60011630 70022174 Completo 60013555 60013342 70021946 Ventilatore 60005553 Griglia 60009218 Guarnizione 70021847 Completo ...

Page 45: ...Manuale d installazione uso e manutenzione PKOKKOLAPLUS PMOODPLUS 14 4 SPARE PARTS PMOODPLUS 1 3 60005254 70021932 70022191 70021935 70021934 70022152 70022163 70022190 RICAMBI MOOD 1 3 ...

Page 46: ...to 60011750 Termostato riarmo 60011656 Interruttore 0 1 60014357 Scheda 70012937 70012931 Supporto 70022165 70021850 70012276 70012277 70021881 70021827 Porta completa 70021871 Vetro 70021875 Gancio porta 70021870 Porta saldata 60010831 70022295 completo 70022187 solo Montante 70023158 Pannello completo 70023159 Scheda comando 60014166 Cavo flat 60012818 Guarnizione vetro porta stufa 60009218 Nast...

Page 47: ...010185 60011428 70010325 60010102 60011793 60014240 70010234 70022183 70022162 70013845 70022251 70022252 70022181 70018484 60013984 60013138 70013635 60004229 60011630 60013339 60011428 70016831 60011428 70022146 60010188 70010403 60011630 70022174 Completo 60013555 60013342 70021946 Ventilatore 60005553 Griglia 60009218 Guarnizione 70021847 completo ...

Page 48: ...a saldata Welded door Guarnizione vetro porta stufa Stove door glass seal Nastro fibra vetro15x3 Glass fibre tape 15x3 Completo Complete Solo Montante Just bar RICAMBI KOKKOLA 3 3 SPARE PARTS KOKKOLA 3 3 Guarnizione Gasket Griglia Grate Ventilatore Fan Completo Complete LEGENDA PMOODPLUS KEY TO PMOODPLUS RICAMBI MOOD 2 3 SPARE PARTS MOOD 2 3 Cavo flat Flat cable Scheda comando Control board Pannel...

Page 49: ...Manuale d installazione uso e manutenzione PKOKKOLAPLUS PMOODPLUS Code 70023162 Rev A 09 2016 ...

Reviews: