Page 14
lation, use and maintenance guide
DAYS
DATA
MON
2
3
5
4
7
6
1
8
00 : 00
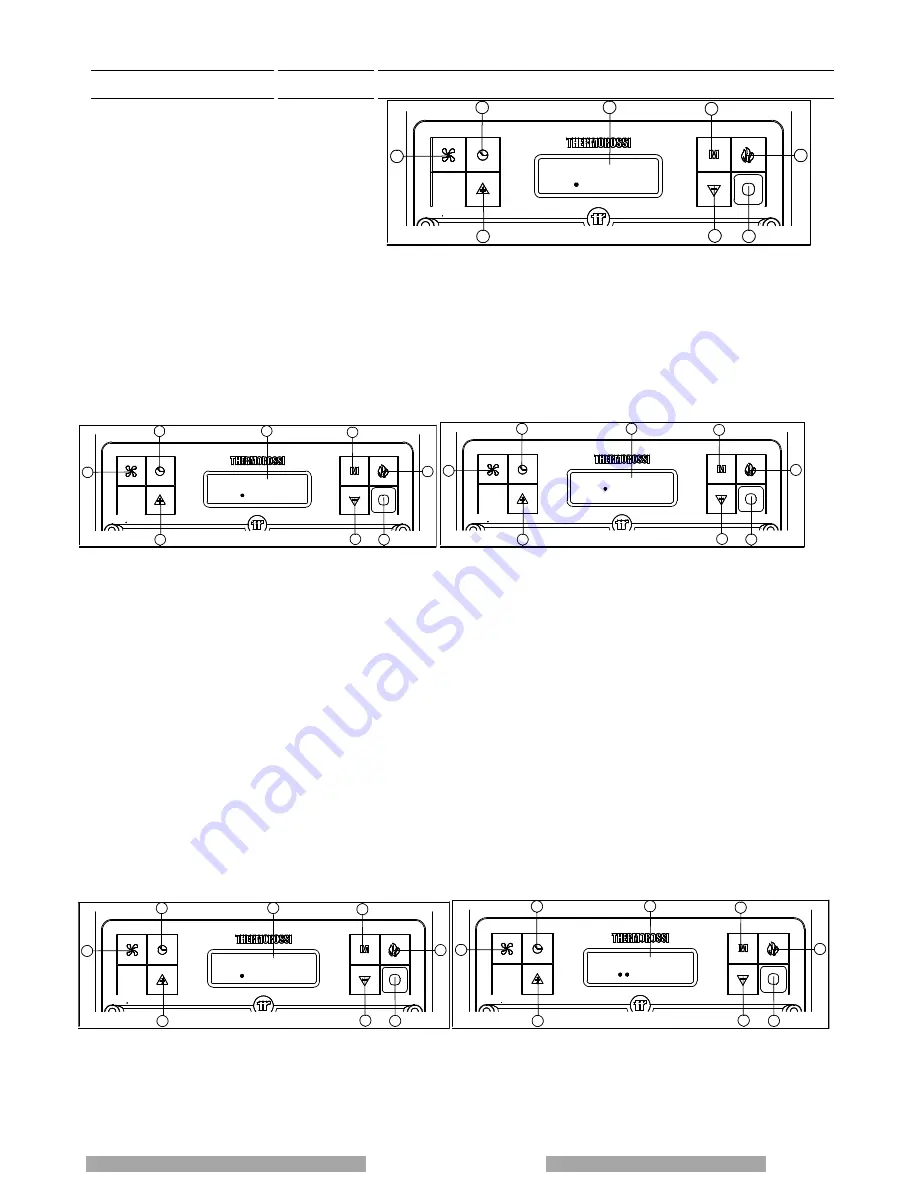
5.2 DAY AND TIME SETTING
The appliance must be energised and the rear
switch in position "1". The words START or WORK
or OFF could be present on the display (7). To set
the time and the day of the week carry out the
procedures described below. Press button (6) once;
the word DATA will appear on the display followed
by the words illustrated in the figure on the left. To
set the day press arrow button (3) and/or (4)
repeatedly until the desired day appears: (MON and
one dot for Monday -- TUE and two dots for Tuesday -- WED and 3 dots for Wednesday -- THU and 4 dots for Thursday -- FRI and
5 dots for Friday -- SAT and 6 dots for Saturday -- SUN and 7 dots for Sunday). Then confirm the day by pressing the key (1). The 2
digits representing the hours will start flashing in the display: it is possible to select the present hour using the arrow keys (3) and/or
(4), the selection must be confirmed by pressing key (1). The 2 digits indicating the minutes will start flashing: it is possible to select
the present minutes using the arrow keys(3) and/or (4), the selection must be confirmed by pressing the key (1). The day and time
setting is now completed.
5.3 ON/OFF PROGRAMMING
The generator must be energised and the rear switch in position "1". The words START or WORK or OFF could be present on the
display (7).
DAYS
CRONO
MON
3
2
5
4
8
1
7
6
DAYS
CRONO
MON
3
2
5
4
8
1
7
6
00: 00
ON 1
It is possible to carry out the weekly programming by setting up to 3 on/off cycles for each day from Monday to Sunday. To program
the heater press button (6) twice until the word CRONO appears followed by the words illustrated in the figure above on the left.
Now you can begin programming the first day of the week - Monday - by pressing button (1). Press the arrow button (3) and/or (4)
to choose another day to be programmed, to confirm the selection press button (1) again. The words ON1 will appear on the display
followed by 2 blinking digits indicating the hours (figure above right). Press button (3) and/or (4) to enter the hour of the first cycle
start time. To confirm the selection press the button (1). The 2 digits indicating the minutes will start flashing. Press button (3)
and/or (4)to enter the minutes of the first cycle start time. To confirm the selection press button(1).The first start up time for the
selected day has now been set. Then the inscription OFF1 will appear in the display and the two digits representing the hours will
turn on. When the (3) and/or (4) button is pressed the hour of the first off-cycle is entered. To confirm the selection press the button
(1). The 2 digits indicating the minutes will start flashing. By pressing the button (3) and/or
(4) the minutes for the first off-cycle will be entered. To confirm the selection press the button (1). This concludes the setting of the
first on-off cycle for the selected day. Later, it is possible to set the second on-off cycle (e.g. Monday) (shown with the display of
ON2 and OFF2) and the third Monday’s on-off cycle (shown with the display ON3 and OFF3). Next the display appears as
illustrated in the figure above on the left. Press the arrow button (3) and/or (4) to choose another day to be programmed, to confirm
the selection press button (1) again.
If you wish to copy all the on-off programs, for example the Monday settings, to the other days of the week, proceed as follows:
press button(6) until the word "CRONO" appears followed by the screen illustrated in the figure below on the left. Next press button
(2) and the display appears as illustrated in the figure below on the right: the program for Monday has been copied to Tuesday.
Press button (2) again to copy the program to Wednesday, Thursday ....
In the programming menu if you wish, for example, to edit the programming for Sunday press button (3) and/or (4) to go to Sunday
and then press button (1) . If the second on-off cycle is not required simply set the ON2 time as 00:00 and the OFF2 time as 00:00 .
DAYS
CRONO
MON
3
4
8
2
5
7
6
1
DAYS
CRONO
TUE
Copy
3
4
8
2
5
7
6
1


