background image

9

Steam generator maintenance

Removal of calcium deposits in the boiler

MAINTENANCE

Steam ready 06D

CAUTION:

 WE RECOMMEND CLEANING THE BOI-

LER ONLY AFTER THE APPLIANCE HAS COOLED 
DOWN, i.e. IF IT WAS SWITCHED OFF AT LEAST 5 
HOURS BEFOREHAND (WITH THE PLUG  DISCON-
NECTED). 

The True Temp Technology makes it possible to use 
distilled or osmosis water in the Thermostar (contrary 
to many other commonly available steam cleaners). It 
is therefore not necessary to decalcify the appliance. If 
you use calcium-free water and the maintenance dis-
play indicates “CALC”, you can simply switch off this 
display (see *1).
The appliance is equipped with a maintenance alert 
system which activates if “CALC” is displayed alterna-
ting with the temperature. You can continue to work if 
this appears. Then disconnect the plug and allow the 
appliance to cool down for at least 5 hours. Follow the 
aforementioned steps to ensure that no steam or pres-
sure is present in the boiler interior.
1  Switch off the appliance. (Disconnect plug)
2  Fill water reservoir (1) with water.

3   Place a suitable small tub underneath the appliance 

or position it on top of the kitchen sink and remove 
the discharge cover (04) from under the appliance. 
Allow all the water and calcium deposits to drain 
from the boiler. Shake the appliance a little to com-
pletely remove all the calcium deposits. 

4   Replace the discharge cover (04) and refi ll the appli-

ance with water (1).

5   Then switch on the appliance and allow the pump to 

run for approx. 2 to 3 minutes until the water from 
the bottom tank fi lls the boiler completely (until the 
pump stops making noise). The appliance is now 
ready to use again!

The boiler button/heater (06B) must remain off 
during the entire decalcifi cation process. Do not 
turn the machine upside down or calcium may 
enter into the valves!
If you are using water with a high calcium con-
tent, it is recommended to refi ll the appliance 
with water and repeat the aforementioned steps.

*1 RESETTING THE MAINTENANCE INTERVALS CALC 

Switch on the appliance by pressing buttons (2) and (06A), then press and hold button (06A) for 
approx. 10 seconds. “CALC” will not appear until the next time maintenance is due.

Hour counter

This appliance is equipped with two hour counters. In 
order to read the number of hours, switch off the appli-
ance using button (06A) and then activate button (06F 

and 06G). Pressing this button will alternatively show 
the hours for counter 1 and/or 2.

Summary of Contents for Dry Steam Cleaner

Page 1: ...Operating Maintenance Manual Dry Steam Cleaner...

Page 2: ...part of your household Please read the user guide carefully before operating the machine Please also note the safety instructions given in the guide We hope you enjoy your new Thermostar Products for...

Page 3: ...es that operate with high temperatures and pressures beginning at approx 320 F and approx 87 psi 6 bar pressure Larger heating elements and comprehensive safety features are generally necessary in ord...

Page 4: ...rd disconnected 7 This appliance is not intended to be used by child ren or people with restricted physical sensory or mental abilities or without sufficient experience and or knowledge unless they ar...

Page 5: ...ials and should therefore be taken to appropriate collection sites Electrical and electronic appliances batteries oil and similar substances may not be disposed of in the environment Please separate t...

Page 6: ...COMPONENTS 6 6...

Page 7: ...icator light for hot water injection and water shortage 12 Steam connection 13 Drain cap 15 Nylon brush 28mm 16 Brass brush 28mm 17 Rectangular brush 17A Attachment clip for micro fiber cloths 18 Larg...

Page 8: ...isplay shows T OFF mode deactivated If the Power Save Mode is activated the appliance responds as follows 7 Steam ironing or use with kit July if steam is not used du ring a period of 1 hour the appli...

Page 9: ...of the kitchen sink and remove the discharge cover 04 from under the appliance Allow all the water and calcium deposits to drain from the boiler Shake the appliance a little to com pletely remove all...

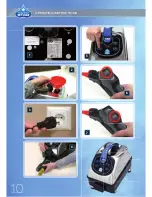
Page 10: ...2 OPERATING INSTRUCTIONS 2 10 2 1 3 4 5 6 7...

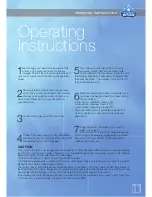
Page 11: ...appliance does not have any damage Check if the volt and ampere ratings of your power source match the data on the appliance sticker 2 Remove the tank cover 1 from the appliance and fill the reservoi...

Page 12: ...ular 18 or rectangular 17 bru shes with an attached micro fiber cloth place a steam buffer 31 32 between the brush and the cloth to expand the cleaning area and to thus achieve optimum effect 7When cl...

Page 13: ...nimum steam for leather and Alcantara Oven Use the round nylon brush 21 with the stainless steel wool 25 to clean ovens To remove stubborn dirt move the brush back and forth forcefully and for a sligh...

Page 14: ...ith an attached cloth or even the small or large round nylon brushes 21 22 in case of stubborn dirt For plastic furniture place a micro fiber cloth between the brush and the surface to be cleaned to p...

Page 15: ...ngular brush 17 18 and an attached micro fiber cloth 34 Always test in a concealed area to verify that the surface is colorfast For sensitive mate rials apply steam with the steam nozzle 20 from a dis...

Page 16: ...luminium Since it could oxidize we recom mend using a Teflon base 30D which is suitable for ironing all types of materials Always place the iron after use on the rubber mat 30C provided The steam mop...

Reviews: