background image

Installation Manual  3

Assemble the Enclosure

Make sure that the enclosure is the correct size:

Make sure the floor is solid and level:

- The floor must extend the full width and depth of the enclosure.

- The floor must be able to support the weight of the refrigerator and its contents.

Make sure that there are no adjacent heat sources such as a furnace vent, etc. 

Make sure any exterior vents are blocked.

Ventilation Requirements

This refrigerator is made for a built-in installation.  Correct ventilation is necessary for the correct operation of the refrigerator 

and to increase the life of the refrigerator cooling system.

Ventilation allows the natural air flow that is necessary for good refrigeration.  Cooler air comes in under the refrigerator, goes 

around the refrigerator coils where it removes the excess heat from the refrigerator components, and goes out through an 

upper exhaust vent.  If this air flow is blocked or decreased, the refrigerator will not cool correctly.  

 The refrigerator has a built-in vent at the top and clearance at the bottom.  Make sure that the flow of air through 

these vents is not blocked in any way. Blockage of air through these vents can cause:

- shortened life of the refrigerator cooling unit.

- poor cooling performance of the refrigerator.

- continuous operation of the refrigerator.

- fast battery discharge.

- void of the refrigerator warranty.

CAUTION

!

- For 

T1

2

74

 models – 

1521-1524


mm 

high x 

597-600 mm 

wide x 

610 mm 

deep.

-

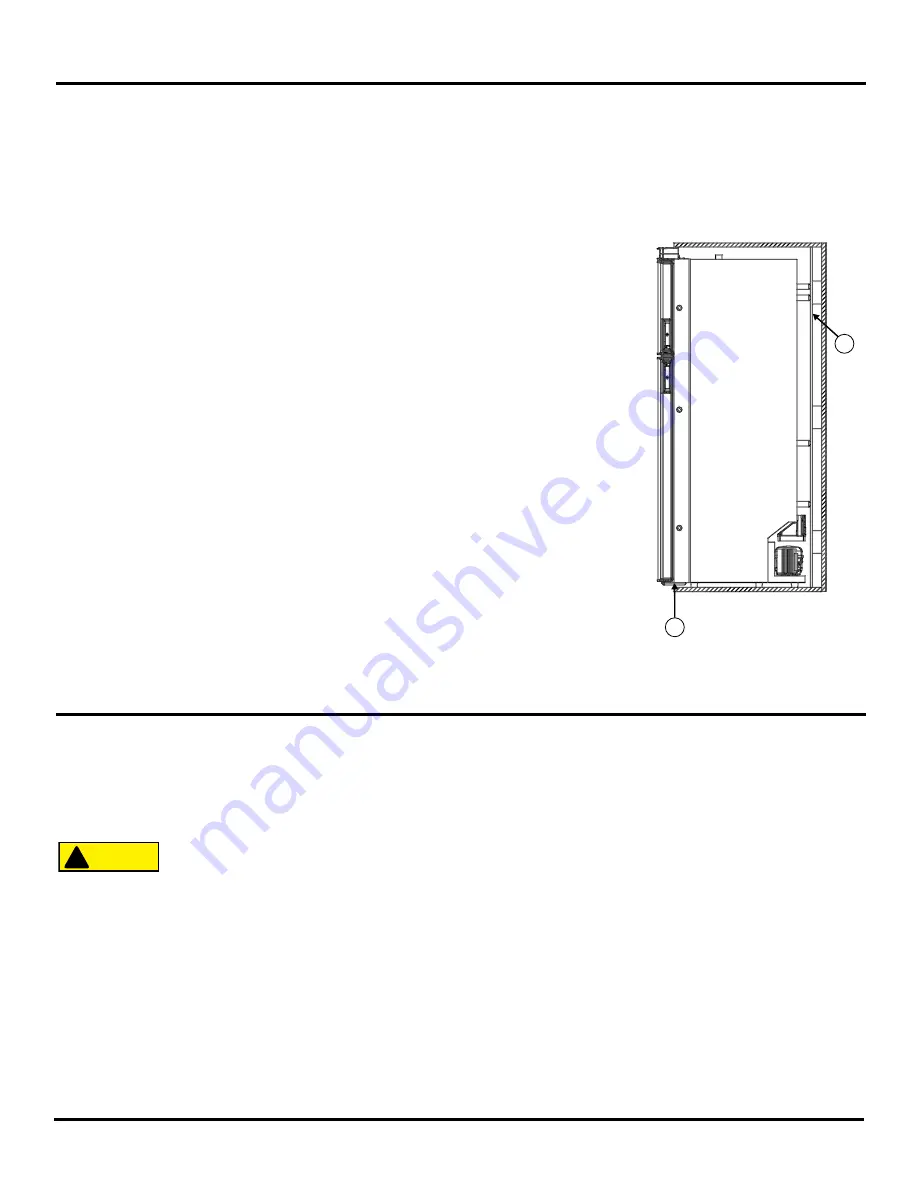
For enclosures deeper than 610 mm ensure that the refrigerator is inserted into the enclosure only to the depth of the breaker

 (2)

This


ensures that the door latches can be assessed, and the doors can be opened to the maximum extent without interference from 

the


sides of the enclosure. (See ART02756)

-

If the enclosure is deeper then 635 mm, the refrigerator's performance may be optimized by

installing a 

fire retardant

 baffle (1) in the rear of the enclosure


to make

the enclosure depth 610 mm.

-

Make sure that the back of the solid box baffle is perpendicular to the bottom of the enclosure.

-

Make sure that the solid box baffle is the full width and height of the inside of the enclosure.

ART 02756

1

2

Summary of Contents for T1274

Page 1: ...Installation Manual For Australian refrigerator models T1274 Part No 202176 08 2019 ...

Page 2: ...lations which need an electric outlet that is energized by an external power source the refrigerator must be electrically grounded as written in local codes or the National Electrical code NFPA 70 Incorrect installation adjustment alteration or maintenance of this refrigerator can cause personal injury property damage or both Obey the instructions in the Ventilation Requirements section of this ma...

Page 3: ...ctly The refrigerator has a built in vent at the top and clearance at the bottom Make sure that the flow of air through these vents is not blocked in any way Blockage of air through these vents can cause shortened life of the refrigerator cooling unit poor cooling performance of the refrigerator continuous operation of the refrigerator fast battery discharge void of the refrigerator warranty CAUTI...

Page 4: ...sary See Art02741 Refrigerator cabinet width 592 mm 1 Refrigerator cabinet height 1521 mm 2 Refrigerator top to control top 53 mm 3 Enclosure depth 610 mm 4 Refrigerator bottom feet to middle handles 1034 mm 5 Refrigerator bottom to bottom of feet 22 mm 6 Enclosure front to door front 75 mm 7 2 1 3 4 5 6 7 ART 02741 ...

Page 5: ...crew driver pop the handle out of the housing of each door Remove 2 screws and handle housing catch and spring from each door On the other side of the door remove one screw and remove the pocket cover Move the lower handle to the upper door and the upper handle to the lower door Attach each door handle and pocket cover with the screws 5 Lay the refrigerator on its side to access the bottom hinge S...

Page 6: ... 6 provided mounting screws 3 on each side Install hole plugs to cover screw holes Install the Refrigerator ART 02736 121 Safety Strap Mounting optional One of the screws 1 fastening the control bracket may be removed and reinstalled to fasten the strap or cable See Art02757 Alternatively a screw may be driven into the breaker in the specified 76 mm 3 0 inch by 38 mm 1 5 inch area shown Any strap ...

Page 7: ...e To connect the DC power supply wires it is recommended to install 1 4 insulated female spade terminals or Stocko connector W2041 100G to the connecting wire See Art 02740 Alternatively the connector may be cut off and the connection can be wired via closed end connectors bell cap or crimp connectors If the factory connector is cut off proper care should be taken by the OEM to assure that the con...

Page 8: ...rcuit at the refrigerator power supply leads to protect the controls of the refrigerator This amp should only be replaced with a 25A automotive fuse 3 Connect the DC power supply wires If the DC power supply leads are attached incorrectly the refrigerator will not operate Connect the positive DC power supply lead to the red wire 99 of the refrigerator Connect the negative DC power supply lead to t...

Page 9: ...ndby mode after 5 seconds Touch the NIGHT MODE 7 button to set the refrigerator to night mode Night mode will turn off automatically after 8 hours or if you push the night mode button again to turn the blue indicator light off This 8 hours can be changed by pressing the night mode button for 3 seconds After the 3 seconds the default 8 hour hours will be shown in the display To change this setting ...

Reviews: