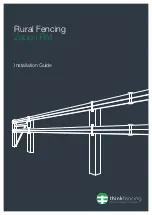


Zappa Rail | Installation Guide
4
Getting Started
Zappa Rail is an innovative fencing solution featuring two
high tensile wires built into the top and bottom of a flat
rail. This remarkable rail can be easily electrified using a
standard electric fence energiser.
Congratulations on your new Think Fencing
Zappa Rail Fence System.
Zappa Rail Fencing Features:
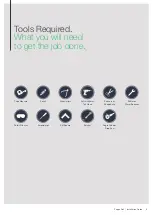
Installation Tips
We recommend a 4m post spacing. Zappa rail can
accommodate up to a 6m spacing.
We recommend stopping Zappa Rail and starting it again at
every corner to acieve the best result when tensioned.
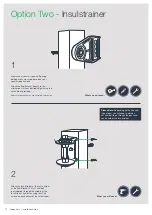
When planning your Zappa Rail layout it is important to
construct suitable strainer assemblies. This can be done
using a conventional timber end assembly, pre-made steel
braced end stays or using Think Fencing’s end assembly kit.
End assemblies need to be included anywhere that the
fence changes in direction by over 45 degrees and where
end brackets or insulstrainers are attached.
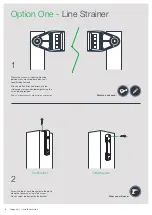
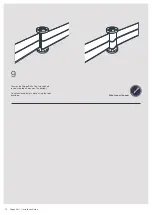
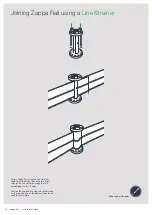
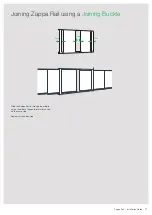
If you need to join the Zappa Rail you can achieve this by
purchasing a Zappa Rail Joining Buckle or a Line Strainer
can be used.
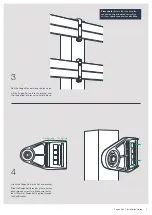
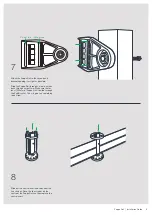
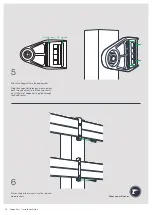
Screwing the brackets in too hard can cause damage and
make it difficult for the Zappa Rail to slide through the
brackets.
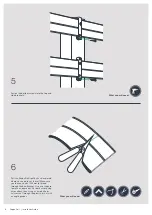
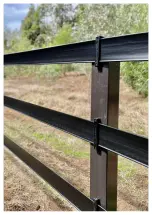
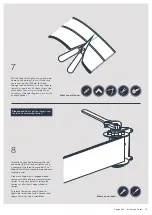
When unrolling, Zappa Rail can appear wavy.
When tensioned it will straighten.
Zappa Rail is easier to install on a warmer day. We also
recommend re-tensioning the rail on the first warm day after
installation, to eliminate any warps or twists.
DIY
Installation
Lifetime
Warranty
Eco
Friendly
Australian
Made
Electrifiable
UV
Resistant
Electrifying
The black strip on the white Zappa Rail is the electrified side.
The black Zappa Rails electrified side is glossier than the
rest of the rail.
When you receive your Zappa Rail roll there is a sticker
pointing to the electrified side. Take note of this.
A standard electric fencing Energiser will work on Zappa Rail.
Expose a section of the electrifiable wire large enough to
enable you to connect an electric fence terminal lug. This
can be done with a sharp knife.
To electrify Zappa Rail when stopping and starting, expose
the electrifiable wire and use a connecting wire to join the
two together. This will ensure the conductivity continues.


