background image

35

If you set this feature to 

OFF

, the screen will be kept on, and the power consumption of the product will 

increase. 

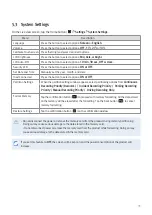
5.3   System Settings


Menu


Description

Language

Press the button to select options: 

Korean 

or 

English.

Volume

Press the button to select options: 

OFF, 1/3, 2/3 

or 

3/3.

Calibrate Touchscreen

Press [Setting] and select required options.

LCD Brightness

Press the button to select options: 

Mid, Dark, or Bright.

LCD Auto-Off

Press the button to select options: 

10 min

30 sec

OFF

 or Clock.

Security LED

Press the button to select options: 

ON or OFF.

Set Date and Time

Manually set the year, month, and date

Inavi Connected

Press the button to select options: 

ON or OFF.

Partition Settings

Format Memory

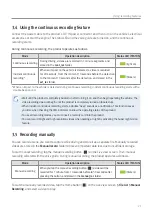
On the Live view screen, tap the Home button (

>

 Settings 

>

 System Settings.

When the partition setting window appears, select partitioning options from 

Continuous 

Recording Priority (Recomm.) /  Incident Recording Priority  /  Parking Recording 
Priority / Manual Recording Priority /  Driving Recording Only.

Restore Settings

Tap the confirmation button (       ) on the confirmation window. 

Tap the confirmation button (        ) to proceed with memory formatting. All the data stored 
on the memory will be erased after the formatting. Tap the back button (        ) to cancel 
memory formatting. 

 Do not disconnect the power or remove the memory card from the product during memory partitioning. 

Doing so may cause serious damage to the data stored in the memory card.

 Do not disconnect power or remove the memory card from the product while formatting. Doing so may 

cause serious damage to the data stored in the memory card.  

Summary of Contents for QXD5000

Page 1: ...is product records videos while the vehicle is operating Read and follow the instructions in this guide to properly use and maintain the product QHD RECORDER Format Free 2 0 User Guide 2Channel Dash C...

Page 2: ...of an accident Depending on the vehicle s configuration or operating conditions such as the installation of remote door lock devices ECU settings or TPMS settings some product features may not be supp...

Page 3: ...nce could void your authority to operate the equipment Information to user RSS 247 This device complies with Industry Canada s licence exempt RSSs Please be cautioned the changes or modifications not...

Page 4: ...feature 21 3 5 Recording manually 21 3 6 Using parking mode 22 3 7 Using the Super Night Vision 23 3 8 About the screen layout 24 3 8 1 Live view screen 24 3 8 2 Home screen 25 3 9 Playing the videos...

Page 5: ...or battery depletion Ensure that the product is out of the reach of children and pets If the product breaks it may result in fatal damage Do not expose product to direct sunlight or intense light The...

Page 6: ...oduct box 1 1 1 Standard items 1 1 2 Optional items Front camera main unit Mount 12V Power Cable OBD II Cable Adhesive cable holder MicroSD memory card with adapter MicroSD Card is inserted in the fro...

Page 7: ...ector Used to connect the mount Radar connector Speaker Outputs the voice guide and buzzer sounds to indicate the product s status Security LED Indicates that the video is being recorded Front camera...

Page 8: ...Recording LED Indicates the recording status Gently touch the screen to make inputs on the touchscreen The screen may be damaged if you apply excessive force to the screen or if you touch the screen w...

Page 9: ...en push the memory card into the slot until you hear a click Before inserting the memory card ensure that the metal contacts on the memory card are facing toward the lens of the product Ensure that th...

Page 10: ...f a GPS navigating device installed on the dashboard is present its GPS reception may be affected depending on the dashboard camera s installation location Adjust the installation location of the GPS...

Page 11: ...he product to the mount and then slide it into the locking position until you hear a click The product may fall and be damaged during vehicle operation if it is not firmly fixed to the mount If you ne...

Page 12: ...e cigar jack into the vehicle s power socket The location and specifications of the power socket may differ by vehicle make and model Use the authentic THINKWARE car charger If you use another manufac...

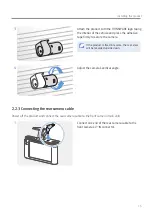
Page 13: ...e with camera operation The adhesive part of the rear camera should not touch the defrost grid 2 2 2 Securing the rear camera Refer to the following instructions to secure the product to the installat...

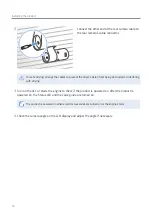
Page 14: ...to secure the camera If the product is fixed in reverse the rear view will be recorded upside down 4 Adjust the camera s vertical angle 2 2 3 Connecting the rear camera cable Power off the product and...

Page 15: ...on from being obstructed or interfering with driving 3 Turn on the ACC or starts the engine to check if the product is powered on After the product is powered on the Status LED and the voice guide are...

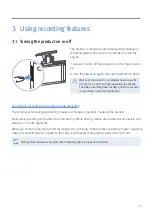
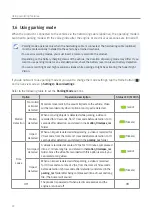
Page 16: ...cording does not begin until the product is completely turned on booted up Continuous recording and parking mode recording The continuous recording and parking modes are the basic operation modes of t...

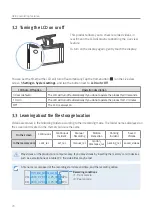
Page 17: ...for 10 minutes OFF The LCD is always on 3 3 Learning about the file storage location Videos are stored in the following folders according to their recording mode The folder names displayed on the scre...

Page 18: ...the product is completely turned on booted up When incident continuous recording starts a double beep sounds as a notification This function saves you time when checking the LED indicators to know th...

Page 19: ...TATUS Motion detection No motion or impact detected Monitors movement in the area or impacts to the vehicle Video will be recorded only when motion or an impact is detected solid Motion detected When...

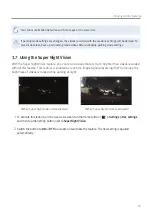
Page 20: ...can record videos that are much brighter than videos recorded without this feature This feature is enabled by real time image signal processing ISP to improve the brightness of videos recorded while...

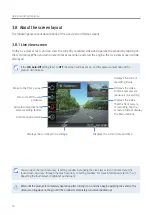
Page 21: ...rding Displays the video that the front camera is recording Tap the screen to hide or display the Menu buttons Displays the current date and time Displays the current recording status Turn on or off t...

Page 22: ...features are provided Refer to 6 Accessing the product information Move to the Live view screen Configure the system and features Refer to 5 Settings Displays the current date and time Stop your vehi...

Page 23: ...d Video files that are manually recorded by tapping the manual recording button on the Live view screen Videos that are recorded when impacts are detected during parking incident Videos that are recor...

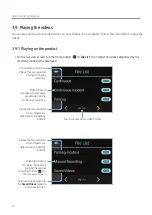
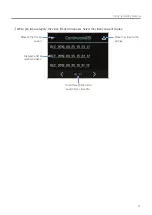
Page 24: ...en you tap a category the video file list will appear Select the video you want to play Move the video to the Archive Scroll through the list to search for a video file Move to the File list screen Di...

Page 25: ...you play videos by inserting the memory card in devices such as a smartphone or a tablet PC the video files may be lost During playback vehicle license numbers may not be identified due to the relativ...

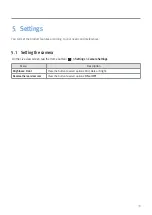
Page 26: ...mera Settings You can set the product features according to your needs and preferences 5 1 Setting the camera Menu Description Brightness Front Reverse the rear view cam Press the button to select opt...

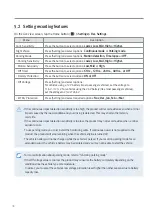
Page 27: ...ting and select required options Nov Dec Jan Feb or Mar If the continuous impact detection sensitivity is too high the product will record a video even when a minor impact caused by the road condition...

Page 28: ...Format Memory On the Live view screen tap the Home button Settings System Settings When the partition setting window appears select partitioning options from Continuous Recording Priority Recomm Incid...

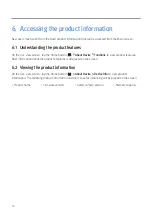
Page 29: ...n About Device Functions to view product features Brief information about the product s features is displayed on the screen 6 2 Viewing the product information On the Live view screen tap the Home but...

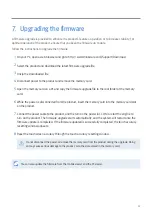
Page 30: ...f the memory card 6 While the power is disconnected from the product insert the memory card into the memory card slot on the product 7 Connect the power cable to the product and the turn on the power...

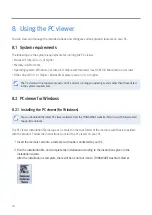
Page 31: ...other than those listed in the system requirements 8 2 PC viewer for Windows 8 2 1 Installing the PC viewer for Windows You can download the latest PC viewer software from the THINKWARE website http...

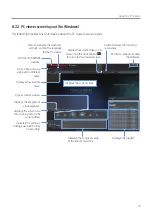
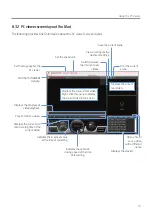
Page 32: ...Displays the current and total running time of the current video Indicates the vehicle s driving speed at the time of recording Displays the progress of video playback Play or control a video Display...

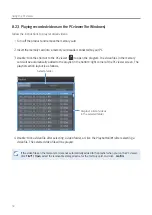
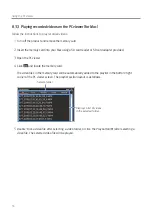
Page 33: ...will be automatically added to the playlist in the bottom right corner of the PC viewer screen The playlist section layout is as follows Select a folder Displays a list of videos in the selected folde...

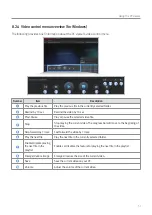
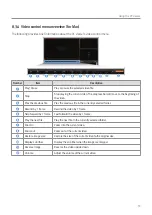
Page 34: ...he selected video file Stop Stop playing the current video The progress bar will move to the beginning of the video Skip forward by 10 sec Fast forward the video by 10 sec Play the next file Play the...

Page 35: ...on file is stored in the root folder of the memory card that is provided with the product Follow the instructions to install the PC viewer on your PC 1 Insert the memory card into your PC using a SD c...

Page 36: ...ing speed at the time of recording Play or control a video Displays the progress of video playback Switch between the front and rear videos Displays the playlist Displays the current front video Right...

Page 37: ...r provided 3 Open the PC viewer 4 Click and locate the memory card The video files in the memory card will be automatically added to the playlist in the bottom right corner of the PC viewer screen The...

Page 38: ...ay the previous file in the currently selected folder Rewind by 1 frame Rewind the video by 1 frame Skip forward by 1 frame Fast forward the video by 1 frame Play the next file Play the next file in t...

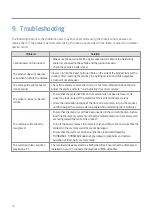
Page 39: ...stem volume The video is unclear or hardly visible Ensure that the protective film on the camera lens has been removed The video may look unclear if the protective film is still on the camera lens Che...

Page 40: ...the hardwiring cable installation Camera sensor 5 14M Pixels 1 2 8 CMOS 1440P Image sensor Sony STARVIS IMX335 Angle of view 156 based on the opposite angle Video QHD 2560 x 1440 H 264 file extension...

Page 41: ...memory card The data in the memory card may be deleted during repair Every product requested for repair is regarded as a device that has had its data backed up The customer service center does not bac...

Page 42: ...http www thinkware com Ver 1 4 July 2019...

Reviews: