background image

2-2

2. Precautions

2.  

Precautions on Use

LM Guide

2-3 


Precautions on Use

C A U T I O N

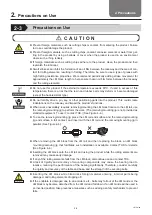
Prevent dust


z

Prevent foreign materials, such as cutting chips or coolant, from entering the product. Failure 

to do so could damage the product.


z

Prevent foreign materials, such as cutting chips, coolant, corrosive solvents or water from get-

ting in the product by using a bellows or cover when the product is used in an environment 

where such a thing is likely.


z

If foreign materials such as cutting chips adhere to the product, clean the product and then 

replenish the lubricant.


z

Small strokes can inhibit the formation of an oil film between the raceway and the area of con

-

tact for rolling elements, resulting in fretting. Therefore, be sure to use a type of grease with 

high fretting resistance properties. We recommend periodically adding stroke movement for 

approximately the LM block length to help ensure that an oil film forms between the raceway 

and the rolling elements.

Maximum temperature

80°C
Max


z

Do not use this product if the external temperature exceeds 80°C. If used in excess of this 

temperature, there is a risk that the resin and rubber parts may deform or become damaged 

(except the heat-resistant type).

Handle with care


z

Do not forcibly drive a pin, key, or other positioning parts into the product. This could create 

indentations on the raceway and impair the product's functions.


z

When work unavoidably requires removing/mounting the LM block from/onto the LM rail, use 

the removing/mounting jig to perform the work. (The removing/mounting jig is not provided as 

standard equipment. To use it, contact THK.) (See Figure 4-4.)


z

To use the removing/mounting jig, place the LM rail end surface and the removing/mounting 

jig end surface in full contact, and insert with the LM rail and the removing/mounting jig in 

parallel. (See Figure 4-4.)


z

When removing the LM block from the LM rail and then replacing the block, an LM block 

mounting/removing jig that facilitates such installation is available. Contact THK for details. 

(See Figure 4-4.)


z

Inserting the LM block onto the LM rail and using the product while the rolling elements are 

removed may cause early damage.


z

If any of the rolling elements falls from the LM block, discontinue use and contact THK.


z

A lack of rigidity and accuracy of mounting components may cause the bearing load to 

localize, reducing the performance of the bearing significantly. Therefore, consider carefully 

the rigidity and accuracy of the table and base, and the strength of the securing bolts.

Falling objects


z

Inserting the LM block while tilted risks foreign material entering, internal parts being 

damaged, and rolling elements dropping off.


z

If the endplate is damaged due to an accident, etc., balls may fall out of the LM Guide or the 

LM block may become detached from the LM rail and fall down. If an LM Guide will be used in 

an inverted position, take preventive measures such as adding a safety mechanism to prevent 

falls.

Summary of Contents for LM Guide

Page 1: ...Instruction Manual No 1030 T34667 LM Guide THK Linear Motion System...

Page 2: ...2 3 3 Marking on the Master Rail and Combined Use 3 1 3 1 Marking on the Master LM Guide 3 1 3 2 Marking on the Reference Surface 3 1 3 3 Serial Number Marking and Combined Use of an LM Rail and LM Bl...

Page 3: ...ecessary 1 2 3 Notice and Attention z z Do not handle or use this product in any way other than as described in this manual z z No part of this manual may be duplicated reproduced or loaned without pe...

Page 4: ...completely rule out product failure When using this product in equipment where failure of this product could cause a severe accident or damage install a safety device or backup device to prevent the o...

Page 5: ...a dolly or other conveyance Failure to do so could cause injury or damage the product Do not disassemble z z Do not disassemble the parts This could impair the product s functions Falling objects z z...

Page 6: ...functions z z When work unavoidably requires removing mounting the LM block from onto the LM rail use the removing mounting jig to perform the work The removing mounting jig is not provided as standar...

Page 7: ...ase is adequately integrated and dispersed z z Excess grease may spatter immediately after lubrication Wipe off spattered grease as necessary z z The properties of the grease deteriorate over time the...

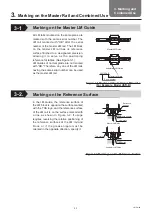
Page 8: ...sed as the master LM rail 3 2 Marking on the Reference Surface In the LM Guide the reference surface of the LM block is opposite the surface marked with the THK logo and the reference surface of the L...

Page 9: ...4 are correctly positioned When two LM Guides with connected LM rails are to be arranged in parallel to each other the two LM Guides will be manufactured so that the two LM Guides are axisymmetrically...

Page 10: ...by wiping the surface with washing oil before using the LM Guide Once the anti rust oil has been removed the reference surface is prone to getting rusted We recommend applying low viscosity spindle oi...

Page 11: ...the same level as the top face of the rail Mounting the LM Blocks 1 Gently place the table on the LM blocks and temporarily fasten the mounting bolts 2 Press the master side LM blocks against the sid...

Page 12: ...fully fasten the bolt Perform this in the proper order from one rail end to the other Figure 4 9 Mounting the Subsidiary LM Rail To mount the subsidiary LM rail in parallel with the correctly mounted...

Page 13: ...w the Master LM Rail Place the table on the LM blocks of the correctly mounted master LM rail and the temporarily fastened subsidiary LM rail and fully fasten the two LM blocks on the master rail and...

Page 14: ...to achieve straight ness of the LM rail from the rail end In this method two LM blocks must be joined together and fixed to a mea surement plate as shown in Figure 4 15 z z Using a Straight edge After...

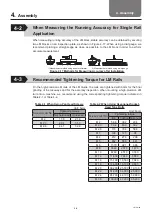
Page 15: ...are tightened with bolts for the final grinding of the raceways and for the accuracy inspection When mounting a high precision LM rail onto a machine we recommend using the corresponding tightening to...

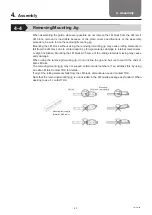
Page 16: ...nternal components or slight inclination Mounting the LM block with some of the rolling elements missing may cause early damage When using the removing mounting jig do not incline the jig and be sure...

Page 17: ...error of the LM Guide may affect the service life See the general catalog for the error allowance of the mounting surface for each model number in general use P Figure 5 1 Error Allowance in the Paral...

Page 18: ...g for the installation direction of the LM Guide Even with an LM Guide with seals the internal lubricant gradually seeps out during operation Therefore the system needs to be lubricated at an appropri...

Page 19: ...performance In such locations apply a lubricant with high viscosity kinematic viscosity approx 68 cst and high emulsification resistance and adjust the lubrication frequency or the amount of the appli...

Page 20: ...LM rail This reduces abrasion of the dust prevention seal and protects the seal When using the LM Guide in an environment where foreign materials can adhere easily to the LM rail we recommend taking m...

Page 21: ...hod With this method a given amount of lubricant is forcibly fed at set intervals using an automatic pump Figure 6 2 Although a special lubrication system using a pipe or the like needs to be designed...

Page 22: ...Appendix Revision History The instruction manual number is on the back cover Publication Date Instruction Manual No Revisions December 2017 No 1030 T34667 First edition...

Page 23: ...No 1030 T34667 Inquiries Website URL https www thk com eng Technical support site URL https tech thk com...

Reviews: