TA04864 E Page 5 of 13
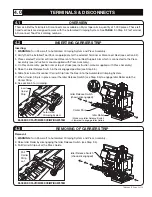
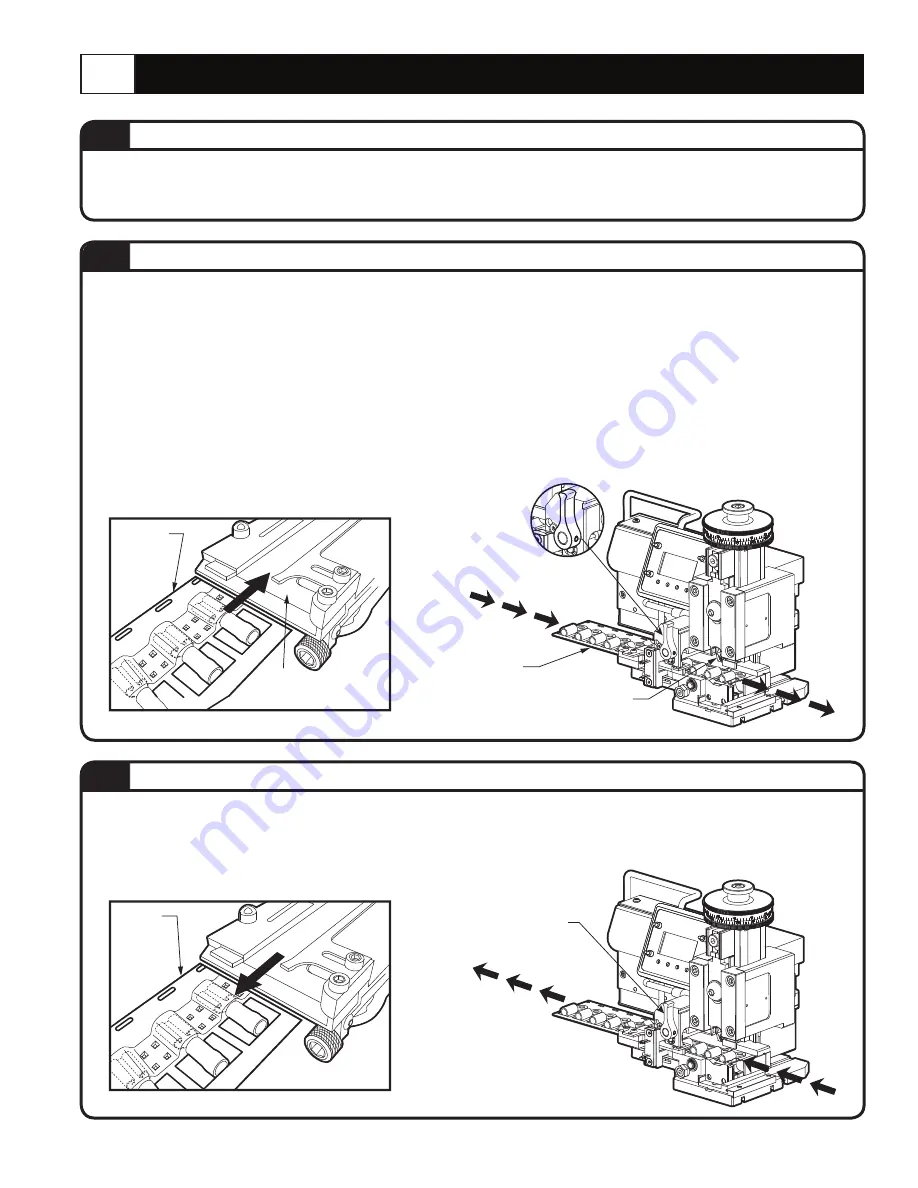
REMOVING OF CARRIER STRIP
4.3
Pull
Carrier
Strip
out
BACK END OF AUTOMATED CRIMPING SYSTEM
Removal:
1.
WARNING:
Turn Power off to Automated Crimping System and Press Assembly.
2. Raise Idler Roller by disengaging the Idler Release Switch (see Step 3.5).
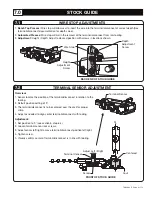
3. Pull Carrier Strip out of the Stock Guide.
Insert
Carrier
Strip
Automated
Crimping System
BACK END OF AUTOMATED CRIMPING SYSTEM
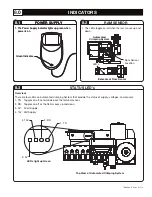
Idler Roller
(Make sure Idler Release Switch
is lowered to engage Idler Roller)
Idler Release Switch
(shown disengaged)
Carrier Strip
INSERTING CARRIER STRIP
Inserting:
1.
WARNING:
Turn Power off to Automated Crimping System and Press Assembly.
2. Verify that the installed Tool Pack is appropriate for the selected Terminal or Disconnect Reel (see section 3.2).
3. Place selected Terminal or Disconnect Reel onto Terminal Reel Support Arm which is connected to the Press
Assembly (see instruction manual supplied with Press Assembly).
4. On Press Assembly, position ram at top of stroke (see instruction manual supplied with Press Assembly).
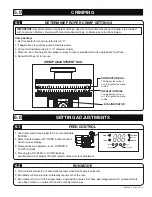
5. Raise the Idler Release Switch in the disengaged position (see Step 3.5).
6. Slide Terminal or Disconnect Carrier Strip from the Reel into the Automated Crimping System.
7. When Carrier Strip is in place, lower the Idler Release Switch (see Step 3.5) to engage Idler Roller onto the
Carrier Strip.
8. See section 5 for crimping.
Idler Release Switch
(shown disengaged)
4.2
Thomas & Betts
®
Terminals & Disconnects are available on Mylar tape rolls in quantity of 1,000 pieces. These left
hand feed reels are designed to work with the Automated Crimping System. See
TABLE I
in Step 3.2 for Terminal
& Disconnect Tool-Pack catalog numbers.
OVERVIEW
4.1
4.0
TERMINALS & DISCONNECTS


