


6
Adjustment options
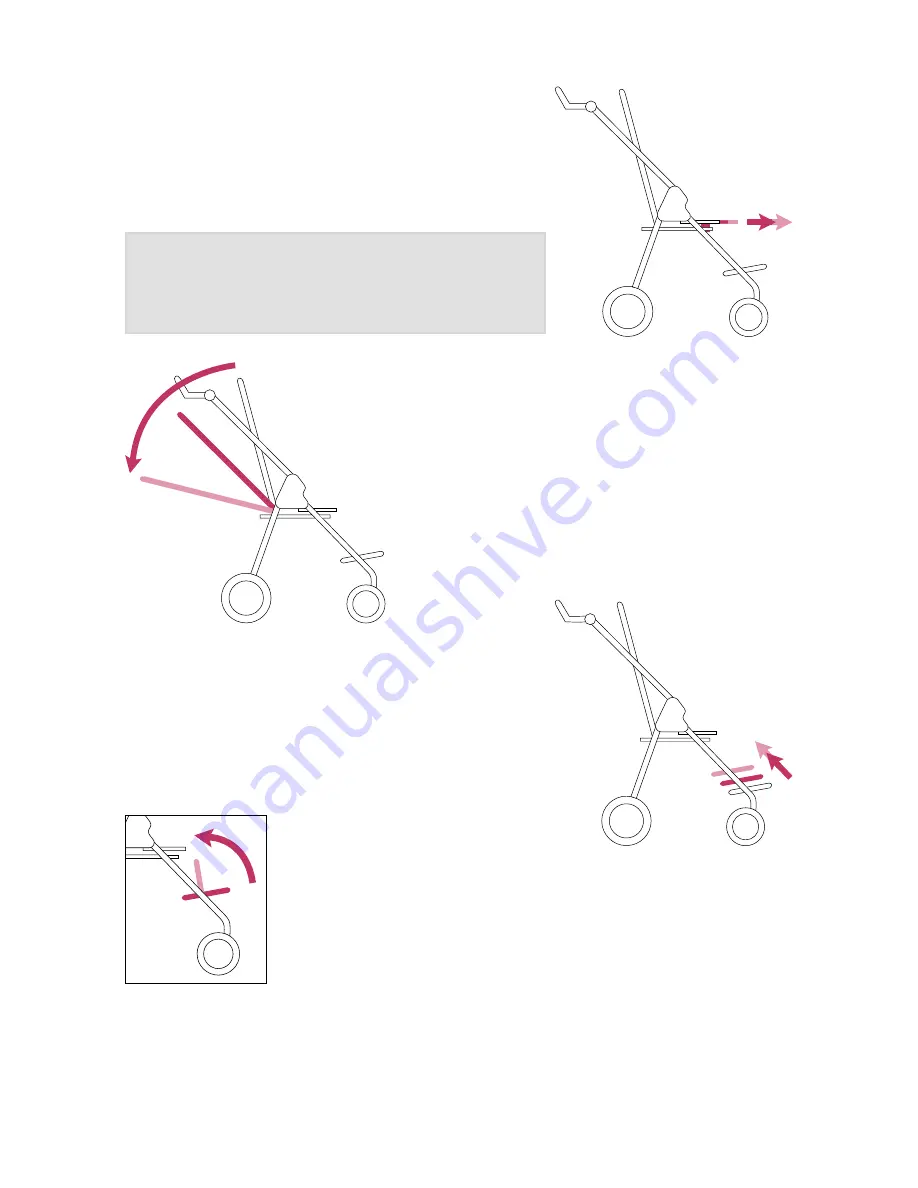
Seat depth
Unscrew the front Allen screws (3 mm) on the seat
surface, pull out the seat plate towards the front of
the buggy and then re-tighten the Allen screws.
TIP:
To make setting the seat depth easier, grasp the
front edge of the seat surface with one hand
while pressing your other hand against the
bottom centre of the backrest.
Adjusting the backrest
Release the quick-release mechanism on the back
of the buggy (using the lever), set the desired
hip angle using the lever on the back bar, then
retighten the lever.
Lower leg length
Use the supplied Allen key (3 mm) to unscrew the
Allen screws on the back of the left and right footrest
sliders, slide the footrest along the bar to the desired
position and then re-tighten the Allen screws.
Footrest
The footrest can be folded up for ease of transfer.
Parking brake function
To engage:
press down the brake bar with your foot.
To release:
Place your foot beneath the brake bar and lift it up.


