background image

14

GB

This routine will reset Volume/Mute control back to its Factory default settings.
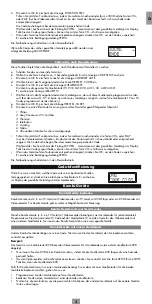
a. Press and hold Setup key until CODE SETUP is displayed (takes approximately 2–3 seconds).

b. Release Setup key.

c. Navigate to SYSTEM SETUP. Press and release Okay key. VOL/MUTE SETUP is displayed.

d. Press and release Okay key. “ VOL/MUTE. ALLE ” is displayed.

e. Navigate to VOL/MUTE RESET. Press and release the Okay key. BESTAET. RESET is displayed.

f.

Press and release the Okay key.

g. WARTEN… will be displayed briefly followed by FERTIG and the remote will exit Setup and return to normal

operation.

h. Volume/Mute control is now rest to its Factory default settings.

“Volume Reset” – Resetting Volume/Mute Control

to Factory Defaults

Time and date setting

Setting the Time of Day

To set the Time of day for normal LCD time display.:
a. Press and hold Setup key until CODE SETUP is displayed (takes approximately 2–3 seconds).

b. Release Setup key.

c. Navigate to SYSTEM SETUP. Press and release Okay key. VOL/MUTE SETUP is displayed.

d. Navigate to TIME SETUP. Press and release the Okay key.

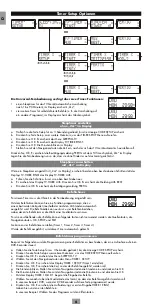
e. The ZEIT? screen is displayed showing current format (12 or 24 hour) flashing and current time. Use the

Up/Down keys to set the format (12Hr or 24Hr) then press and release the Okay key.

f. The “hours” will be flashing. Use the Up/Down keys to set the hours then press and release the Okay key.

g. The “minutes” will be flashing. Use the Up/Down keys to set the minutes then press and release the Okay key.

i. FERTIG will be displayed and the remote will remain in Setup, returning to the CODE SETUP screen.

Setting the Date

To set the Month, Date and Day:

a. Press and hold Setup key until CODE SETUP is displayed (takes approximately 2–3 seconds).

b. Release Setup key.

c. Navigate to SYSTEM SETUP. Press and release Okay key. VOL/MUTE SETUP is displayed.

d. Navigate to DATE SETUP. Press and release the Okay key.

e. The JAHR? screen is displayed with the last 2 year digits flashing. Use the Up/Down keys to set the Year then

press and release the Okay key.

f. The MONAT? screen is displayed with the Month digits flashing. Use the Up/Down keys to set the Month then

press and release the Okay key.

g. The DATUM? screen is displayed with the Date digits flashing. Use the Up/Down keys to set the Date then press

and release the Okay key.

h. The TAG? screen is displayed with the Day flashing. Use the Up/Down keys to set the Day then press and

release the Okay key.

i. “ FERTIG ” will be displayed and the remote will remain in Setup, returning to the “ CODE SETUP ” screen.

Setting the Backlighting On time

Used for setting the backlight delay following a key action.
a. Press and hold Setup key until CODE SETUP is displayed (takes approximately 2–3 seconds).

b. Release Setup key.

c. Navigate to SYSTEM SETUP. Press and release Okay key. VOL/MUTE SETUP is displayed.

d. Navigate to BELEUCHT.SETUP. Press and release the Okay key.

e. The BEL. ZEIT SEK. screen is displayed with the current Backlight On time digits flashing. Use the Up/Down

keys to set the Backlight On time in increments of 5 seconds up to a maximum of 60 seconds. The default

Backlight On time is 10 seconds. To turn the Backlighting feature off, set the time to “00” (zero). Press and

release the Okay key.

f. FERTIG will be displayed and the remote will remain in Setup, returning to the CODE SETUP screen.

Reset the LCD Remote to Factory Defaults

To reset the LCD remote back to factory default settings. All User programmed parameters e.g. code settings,

learned commands, etc., are cleared to their respective default settings.
a. Press and hold Setup key until “ CODE SETUP ” is displayed (takes approximately 2–3 seconds).

b. Release Setup key.

c. Navigate to SYSTEM SETUP. Press and release Okay key. VOL/MUTE SETUP is displayed.

d. Navigate to GERAETE RESET. Press and release the Okay key.

e. BESTAET.RESET is displayed. Press and release the Okay key.

f. WARTEN… will be displayed while all parameters are Reset then the remote will exit Setup and return to

normal operation.

Summary of Contents for 2R198457

Page 1: ...UNIVERSAL FERNBEDIENUNG Universal Remote Control Bedienungsanleitung Operating Instruction ROC8209 2R198457 8IN1 LCD...

Page 2: ...Bedienungsanleitung 01 Operating Instructions 09 Characteristics Eigenschaften Weight Gewicht Dimensions Abmessungen 190 x 48 x 15 mm 78 grammes Gramm...

Page 3: ...te control Check the polarity on the batteries and inside the compartment Insert the batteries Close the cover If the batterie are correctly inserted the LCD screen should display the active mode TV t...

Page 4: ...etzen Sie das Ger t daher keinen starken Hitzequellen aus Schlie en Sie Batterien nicht kurz Werfen Sie Batterien nicht in Feuer Wenn Sie das Ger t f r l ngere Zeit nicht benutzen nehmen Sie die Batte...

Page 5: ...isplay Modus bzw Ger t w hlen Display Setup Shift Taste Taste gedr ckt Anzeige TV Mode Bei der Auswahl TV ist keine Auswahl eines Ger tetyps m glich weil auf die Quellentaste TV nur TV Codes programmi...

Page 6: ...lbetrieb Ger tecode nach Code Liste eingeben Die Codes der entsprechenden Ger te sind der Code Liste die dieser Bedienungsanleitung beiliegt zu entnehmen a Schalten Sie das zu steuernde Ger t ein b Ha...

Page 7: ...r t den Kanal wechselt sich ausschaltet oder entsprechend reagiert Die Code Suche beginnt bei dem momentan gespeicherten Code W hrend der Suche erscheint der Eintrag SUCHEN zusammen mit dem gew hlten...

Page 8: ...eschlossen sind z B TV DVD VCR SAT CBL keine eigene Lautst rkeregelung Wenn die Universal Fernbedienung gerade ein solches Ger t steuert und die Tasten VOL Lautst rke oder Stummschaltung werden gedr c...

Page 9: ...t OK Es erscheint das VOL MUTE SETUP c W hlen Sie mit den Navigationstasten das DATE SETUP Men an und best tigen Sie mit OK d Jahr blinkt W hlen Sie mit den Navigationstasten das Jahr und best tigen S...

Page 10: ...nktion programmieren die zu einem bestimmten Zeitpunkt innerhalb der n chsten 24 Stunden automatisch ausgef hrt wird Die Befehlskette kann aus bis zu vier Befehlen bestehen wobei der erste Befehl imme...

Page 11: ...erden um Grundfunktionen am TV Ger t auszuf hren Lautst rke Stummschaltung Kanalsuche Versuchen Sie bitte nicht die Funktionen einer Original Fernbedienung die wiederum mit dem Code eines anderen TV G...

Page 12: ...layer oder Videorekorder an Es braucht nicht vorher die DVD bzw VCR Quellentaste gedr ckt zu werden Es wird immer das zuletzt gew hlte Ger t angesteuert Diese Punch Through Steuerung funktioniert nich...

Page 13: ...fire do not recharge them If you are not using the remote control for a long period of time remove the batteries Please respect the environment and prevailing regulations Before you dispose of batteri...

Page 14: ...ss Okay here to set Time Date Volume Control etc 3 TIMER SETUP press Okay here to set Timer events 4 LERNEN SETUP press Okay here to program a Mode with Learned commands 5 SETUP VERL press Okay here t...

Page 15: ...ong with its currently programmed code g Enter the 4 digit code number using the digit 0 9 keys h On the 4th digit entry FERTIG will be displayed and the remote will exit Setup and return to normal op...

Page 16: ...ange direction forward again Press and release Okay key to install the Code i FERTIG will be displayed and the remote will exit Setup and return to normal operation Code Identification Press the respe...

Page 17: ...udio codes e g CD AUDIO to use their own Volume Mute control if present If the programmed Visual code has no Volume Mute operation of its own then those keys will punch through control to the TV Mode...

Page 18: ...en is displayed with the last 2 year digits flashing Use the Up Down keys to set the Year then press and release the Okay key f The MONAT screen is displayed with the Month digits flashing Use the Up...

Page 19: ...displayed Press and release the Okay key f AUS BEST is displayed Press and release the Okay key g FERTIG will be displayed and the remote will remain in Setup returning to the CODE SETUP screen To cle...

Page 20: ...emotes while learning all the required keys for that Mode Do not attempt to Learn directly under an incandescent or low energy light as these can cause interference with the IR transmissions Keep at l...

Page 21: ...ly inserted and whether the polarity matches with the marks If the batteries are too low replace them by new ones The remote control does not work Check that you have selected the correct mode on your...

Page 22: ...Thomson is a trademark of Technicolor or its affiliates used under license to HAMA GmbH Co KG in 86652 Monheim Germany www thomson av accessories eu...

Reviews: