720p WiFi Fixed ip Hd camera
13
en
g - uSiNg ThE prOduCT WiTh A ThOMSON NETWOrK VidEO rECOrdEr
h - uSiNg ThE prOduCT WiTh A ThOMBOX
Your camera is compatible with the ONVIF protocol
and can be paired with a network video recorder.
• Connect your camera to the network or one
of the recorder network sockets and run a
camera search on the recorder.
Your network recorder needs the following
information:
• The IP address of your camera: if the recorder
cannot find the camera automatically, provide
it with the IP address discovered by the 'IP
Camera Search Tool' supplied on the CD (see
paragraph
D - 1 - ACCESS TO CAMERA
CONFIGURATION
)
• Your camera's ONVIF port: if the recorder does
not discover this automatically, the default port
number is
888
.
• A username and password: these are the same
usernames and passwords you use to connect
to your camera (default username = admin;
default password = none)
• When you have entered all the information into
the recorder, add the camera in the same way
as you would with the original cameras. After
a few seconds, your camera feed will appear
beside the feeds from your original cameras.
You will then be able to record videos onto the
recorder's hard disk and use the recorder's
motion detection, just like with the original
cameras. You can also continue to use your
IP camera as before with your smartphone or
computer.
1 - AUTOMATIC CONFIGURATION
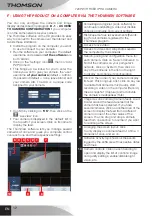
• Your camera is optimised for use with a
Thombox. Go into the interface of your
Thombox to pair your camera and click on
'Ajouter une nouvelle caméra [Add new
camera]' in the Cameras widget:
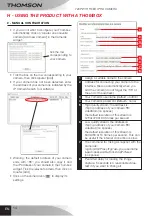
• Wait until the search for network cameras has
finished
• Do not select a camera, and close the 'Ajouter
une nouvelle caméra [Add new camera]'
window
• Your camera will be configured automatically in
the Thombox interface. Enter your username
and password:
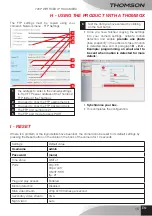
• If you want your camera to send images to the
Thombox when motion is detected, click on
the 'Copier les réglages dans la caméra [Copy
settings to camera]' button at the bottom
of the window. Your Thombox will then write
the destination for the images to the camera
settings.
•
Synchronise your box.
• This completes the configuration.
(Click on the
icon in the cameras widget on your
Thombox to display more details on the functions
and options available).
Summary of Contents for DSC-723W
Page 4: ......


