720p WiFi Fixed ip Hd camera
en
14
h - uSiNg ThE prOduCT WiTh A ThOMBOX
2 - MANUAL CONFIGURATION
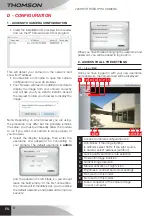
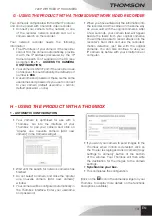
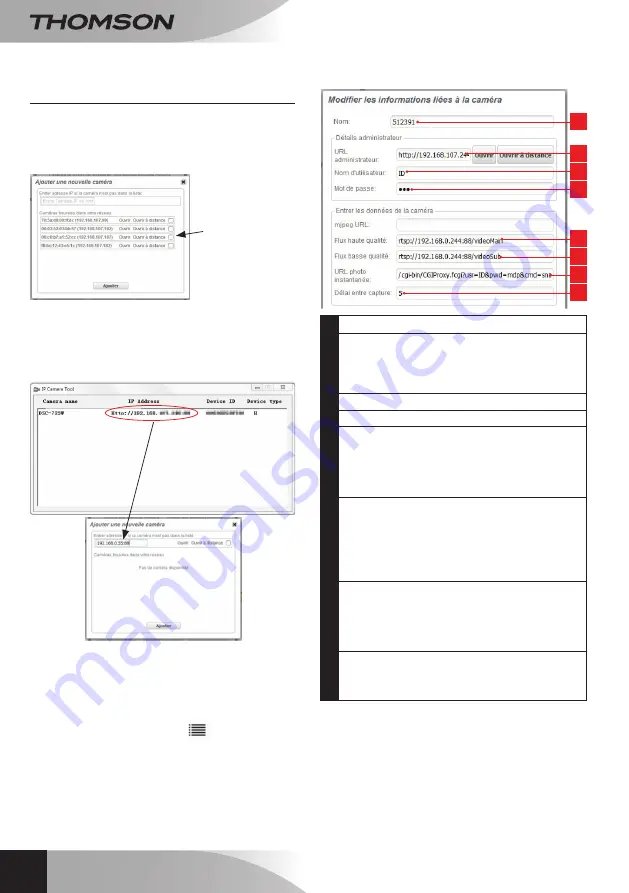
• If you do not want to configure your Thombox
automatically, click on 'Ajouter une nouvelle
caméra [Add new camera]' in the Cameras
widget:
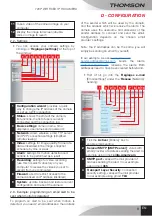
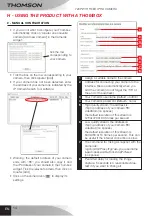
• Tick the box on the row corresponding to your
camera, then click Ajouter [Add].
• If your camera has not been detected, enter
the address of your camera as indicated by the
IP Camera Search Tool software:
• Warning: the default address of your camera
ends with ':88'; you should also copy it and
the IP address of your camera in the Thombox
widget. Tick the relevant camera, then click on
Ajouter [Add].
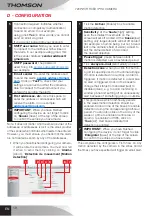
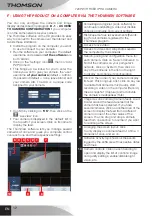
• Click on the camera icon
to display its
settings.
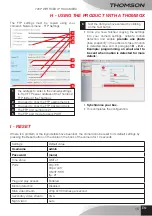
1
Assign a suitable name to the camera
2
Address for connecting your camera to the
interface, filled in automatically when you
add the camera (do not forget the ':88' at
the end of the address)
3
Your camera's username (default = admin)
4
Your camera's password (default = none)
5
High quality stream: the address is:
rtsp://ip address of your camera:88/
videoMain (no spaces)
the default resolution of this stream is
1280x720 @ 30 frames per second
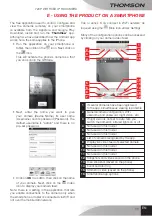
6
Low quality stream: the address is:
rtsp://ip address of your camera:88/
videoSub (no spaces)
the default resolution of this stream is
640x480 @ 15 frames per second. This can
be useful if the internet connection is slow.
7
The command for taking a snapshot with the
camera is:
/cgi-bin/CGIProxy.fcgi?usr=your username
&pwd=password&cmd=snapPicture2
(no spaces)
8
Permitted delay for loading the image
capture. 5 seconds is a reasonable value;
test it if you want to change it.
1
2
3
4
5
6
7
8
tick the row
corresponding to
your camera
Summary of Contents for DSC-723W
Page 4: ......


