DTH8005
First issue 12 / 04
To RE_INITIALIZE the recorder to factory defaults settings,
- Switch “ON” the recorder and wait until “MENU” is displayed in the front
panel display.
- Simultaneously press the “STOP” and “STANDBY / ON” keys on
the front panel until the display changes to read “INIT” and then release
the keys.
- When the recorder has been re-initialized the display will flash “INIT
OK
”
for a split second.
- Now all the previous setting will be reset to the original factory default
settings.
Wiederherstellen der Fabrikeinstellungen (Neuinitialisierung)
Schalten Sie das Gerät ein; das normale Hauptmenü erscheint.
- Drücken Sie am Gerät gleichzeitig die Tasten STOP und
STANDBY / ON bis auf dem Geräte-Display " INIT " erscheint.
- Die Neuinitialisierung des Gerätes benötigt einige Zeit.
- Wenn die Neuinitialisierung abgeschlossen ist, erscheint " INIT
OK
".
- Alle vorherigen Einstellungen sind nun auf die Fabrikeinstellungen
zurückgesetzt.
Initialisation des valeurs par défaut.
Mettre l’ appareil sous tension. Le menu principal apparait.
-Appuyer et maintenir enfoncées les touches “STOP”
et “STANDBY” / “ON” du clavier de la face avant jusqu’à
l’apparition du message " INIT " dans l’afficheur.
-L ’orsque l’initialisation est complète le message " INIT
OK
"
s’affiche. Les réglages sont initialisés aux valeurs usines.
Inizializzazione dei valori di default
-Collegare l'apparecchio alla rete e far visualizzare il menu principale.
- Premere e mantenere premuti i tasti "STOP" , e "STANDBY/ON"
del frontale fino all'apparizione del messaggio "INIT" sul display.
- Alla fine dell'operazione, verrà visualizzato il messaggio "INIT
OK
"
sul display.
Le regolazioni sono inizializzate ai valori di "DEFAULT".
Inicialización de los ajustes a los valores por defecto.
Conectar el aparato a la red. Aparecerá el menú.
- Mantener pulsadas las teclas STOP y STANDBY / ON
en el panel frontal hasta que salga el mensaje " INIT " en el display.
- En unos pocos segundos se habrán restaurado los ajustes.
- Cuando se ha completado, se verá el mensaje " INIT
OK
".
- Los ajustes habrán sido inicializados a los valores por defecto de
fábrica.
EN
FR
DE
ES
IT
Accessing the SERVICE MENU
- Connect the recorder to the mains supply and a monitor television
using a SCART lead.
- Switch “ON” the recorder and then press the “MENU” key on the RCU.
- The recorders “MAIN MENU” will now be displayed on the screen of
the television.
- Next simultaneously press the “
PLAY
” and “RECORD”
keys on the front panel depressed until the Service Menu is displayed
on the screen of the television.
Aktivierung des SERVICE-MENÜS
- Verbinden Sie den Recorder mit der Netzspannung und mittels eines
SCART-Kabels einem TV-Gerät.
- Schalten Sie den Recorder mit „ON“ ein und drücken auf der
Fernbedienung die „MENU“-Taste.
- Auf dem Bildschirm wird das Hauptmenü des Recorder angezeigt.
- Drücken Sie am Bedienfeld des Recorders gleichzeitig die Tasten
„
PLAY
“ und „RECORD“
bis auf dem Bildschirm das Service-Menü angezeigt wird.
Acceso al modo servicio.
-Conectar el aparato a la red. Un menú aparecerá.
-Seleccionar el menú principal pulsando la tecla “MENU” del
telemando
-Pulsar a la vez las teclas “PAUSE “ y “ RECORD “.
-Mantener las 3 teclas pulsadas hasta que aparezca el menú
principal del Modo Servicio
Accès au mode service.
-Mettre l’ appareil sous tension. Le menu principal apparait.
-Sélectionner le menu principal en appuyant sur la touche
“MENU” de la télécommande
-Appuyer sur les touches “
PLAY
“ et “ RECORD “.
-Maintenir enfoncées les touches ensembles jusqu’a
l’apparition du menu principal du mode service
Accesso al Service Mode
- Collegare l'apparecchio alla rete
- Premere il tasto "MENU" del telecomando per far apparire il
Menu principale.
- Premere e mantenere premuti i tasti "
PLAY
" e "RECORD" fino
all'apparizione del menu principale del service
Mode.
Service Menu
I2C BUS I OK
VERSION
ST20
A3REU_S3.01
ST9
N3_S3.02
KDB
S2.2
Gob Version 0x9
Bootloader C3-R2.00
RIC0H
V1.19
I2C BUS II OK
ODD Error 0
HDD Status N.A
HDD Error 0
EN
FR
DE
ES
IT
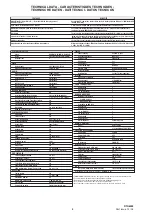
SERVICE MODE - MODE SERVICE - SERVICE MODE - SERVICE MODE
MODO SERVICIO
INITIALIZATION - INITIALISATION - NEUINITIALISIERUNG - INIZIALIZZAZIONE
INICIALIZACIÓN
CHECKS AND MEASUREMENTS - CONTRÔLES ET VERIFICATIONS
CONTROLLI E VERIFICHE - AJUSTES Y COMBROBACIONES
1Vpp
1Vpp
(Top SCART)
(Top SCART)
N•
Item
Mode & Signal
Test equipment
Test point
Description
A
CVBS PB level
Oscilloscope
AV1 pin19
None
Check for CVBS= 1Vpp
±
0.1Vpp
Select AV1
PAL / SECAM
Adjustment
point
BW125
Video Playback Output Signal check - (Disk ) Controle Video Lecture Video - Überprüfung Videowiedergabepegel - Controllo uscita Riproduzione Video
Nivel de salida de reproduccion de video
BURST = 286mVpp
±
28,6 mVpp
( DVD )
( DVD disk test )
colour bar test pattern
20 BW125 (Top SCART)
colour bar test pattern
1Vpp
N•
Item
Mode & Signal
Test equipment
Test point
Description
B
CVBS EE level
Oscilloscope
AV1 pin19
None
Check for CVBS= 1Vpp
±
0.1Vpp
Select AV1
PAL / SECAM
Adjustment
point
BW125
Video -E to E (AV input/AV output) - Video EE ( AV . Entree / Sortie AV ) - Video EE (AV-Eingang/AV-Ausgang) - Video -EE ( AV input/AV output - Video
EE (entrada / salida AV )

