background image

Remote Control

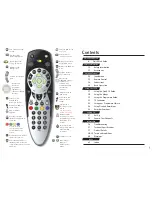
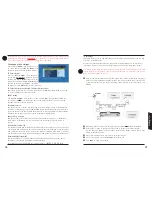
Using your DTR Remote to control your TV

The DTR remote control is capable of controlling the common functions of your TV. Locate the
“Remote control TV set-up codes ” sheet from your accessories and find your make of TV on the
list. Note the four digit number(s) applicable to your TV. On the DTR remote Press 

TV

, now press

and hold OK

and

AV

together. The 

TV

button will flash twice. Now enter the 

4

digit code relating

to your make of TV. Again the 

TV

button will flash twice. If an invalid code is entered, the 

TV

button

will only flash one long flash.

Make sure that the entered code is the right one for your TV by
pressing the ‘active’ buttons from the list below. If your TV does not
respond, repeat the sequence with the next available code in the
table. Once you are sure that the code is correct you can write it
down in the box to the right and on an identical label on the inside
battery door of your DTR remote control.  

Controlling your TV set

TV

Sets the remote control unit in TV mode (by pressing once) 
and enables you then to control your TV set.
Switches the TV set on or off

Vol. +/-

TV Volume  control.
Switches sound off or on again.

CH +/-

Switches channel or selects an AV socket.

AV

Selects an AV socket.

0 to 9

Change channel or enters digital values.

TEXT

Access Teletext pages (On /Off).

‘Play’ button

Access Teletext pages (Off)

Colour buttons

Enables you to use the Teletext function on TV  sets.

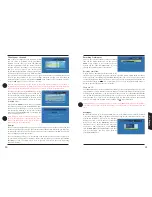
Insert the batteries into the handset as shown. Point the remote
control at the DTR and press the 

DTR

button. The 

DTR

button will

flash once to confirm that the remote control is working correctly.

Important information regarding the batteries

Do not

mix different types of batteries or new and old batteries. 

Do

not

use re-chargeable batteries. 

Do not

throw batteries into a fire,

do not recharge them. Remove the batteries from the remote control
if you are not going to use it for several weeks. Immediately remove

any leaking batteries. Take care in doing this, as leaking batteries may cause burns to the skin or
other physical injury.

Inserting the batteries

Please respect the environment and prevailing regulations.
Before you dispose of batteries ask your dealer whether they
are subject to special recycling and if they accept them back. 

12

13

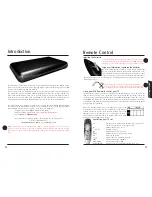
Introduction

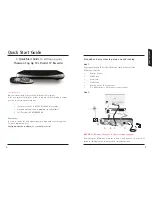
Congratulations on your choice of this state-of-the-art Digital Television Recorder (DTR). We hope
you will enjoy all the new features this technology brings to your home for many years. Your DTR
is going to revolutionise the way you watch TV. 
You can pause live TV, for example while you answer the phone and then resume watching where
you left off. You can also record two different channels at the same time. Delayed viewing, fast-
forward and rewind functions allow you to play and replay the sports action without having to
worry about the rest of the game  which is still being recorded. These features could make you lose
track of time, but fortunately the 

LIVE TV

button brings you back to the present instantly. 

Your dealer should have checked your postcode for reception, but the availability of Digital Signals
does depend on the transmitter(s) available to your receiving aerial. If you have any doubt about
this availability, please contact your dealer, or try one of the following:

• Text your postcode to 

83331

(standard rates apply)

• Visit the websites 

www.freeview.co.uk

or 

www.dtg.org.uk/consumer

• Call FREEVIEW on 

08708 809980

If you experience reception problems, check page 

35

for some suggestions 

or for more information go to 

http://www.digitaluk.co.uk/how_do_i_switch/your_aerial

NOTE :  

This product can be upgraded from software updates broadcast over the air to your

recorder. Top Up TV reserves the right to transmit software updates that it would consider
appropriate in order to improve the functionality of the product, without degrading the quality
level.

Getting started

Summary of Contents for DTI6300

Page 1: ...3633633D DTI 6300 COMMON USER MANUAL ...

Page 2: ...memory to live TV Rewind and 24Hr in the TV listings Stop recording or playback Current programme information Skip back in recordings Controls the Audio Video signals sent to the TV Used to select the corresponding colour option shown on the screen Turns the DTR or TV on or off Sets the remote control to TV mode Display the recorded programmes screen Displays the DTR main menu Up down channel or p...

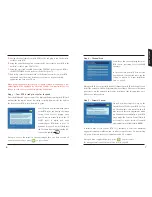
Page 3: ...to receive the best digital signal you may need an aerial upgrade For more information go to http www digitaluk co uk how_do_i_switch your_aerial 4 Six quick and easy steps to get you up and running Step 1 Unpack your Digital TV Recorder DTR and check you have all the following accessories Remote Control SCART lead Aerial lead Mains lead Remote control TV set up codes 2 x AA batteries to place in ...

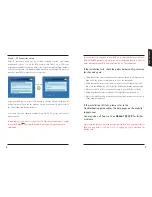
Page 4: ...but it is likely that the TV remote button will be labelled AV or have this symbol Once you can see the image on screen displayed here and have ensured all connections are correct press on your remote 7 Step 4 Channel Scan You will see this screen showing that your DTR is now searching for all available channels In the event that your DTR does not find any channels or has missed some see the secti...

Page 5: ...Y whenever it is not in use Note that turning the power off at the mains will prevent your DTR from receiving Top Up TV programmes If the installation fails check the points below and try to rescan for channels again Check that all the connections have been made as shown in the diagram on page 6 and the power is switched on to all of the equipment Check that the batteries in the remote control are...

Page 6: ...points when installing and operating your recorder Note In order to disconnect this equipment completely from the mains it is necessary to withdraw the plug from the wall socket Please ensure that the plug remains accessible at all times As soon as the mains plug is inserted into the wall socket it will become powered and commence its initialisation sequence When complete the unit will remain in i...

Page 7: ...ries from the remote control if you are not going to use it for several weeks Immediately remove any leaking batteries Take care in doing this as leaking batteries may cause burns to the skin or other physical injury Inserting the batteries Please respect the environment and prevailing regulations Before you dispose of batteries ask your dealer whether they are subject to special recycling and if ...

Page 8: ...IGITAL AUDIO OUT socket on your DTR to the DIGITAL AUDIO IN on your AV amplifier S Video connection to a TV Plasma Display or Projector The scart connection to a TV provides the best picture as RGB Red Green Blue separately but some types of display device don t have a scart socket In this case either an adaptor should be purchased or connect an S Video lead from the S VIDEO OUT on your DTR to the...

Page 9: ...35 To turn on your DTR press the DTR button or the button The red standby indicator light will go green To turn off your DTR press the button The standby light will turn red again An amber light indicates the box is updating and that you should wait before pressing any further buttons The DTR must be on or left in standby if you want to keep the Programme Guide and Top Up TV programmes updated Tur...

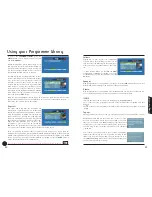
Page 10: ...psis of the programme It also shows the start and end times for that programme in the top right hand corner To set up and work the other facilities of your DTR you will need to get used to operating the menus Throughout this manual we will use BOLD text when referring to remote control button presses and ITALIC text when referring to a particular menu level You will be using the remote control but...

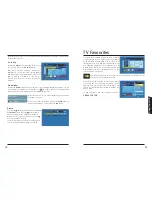
Page 11: ...ecord Pressing the button will take you to the PLANNED RECORDINGS screen Press the button again to add the recording to the planned recordings list When you go back to the TV Guide you will see next to the planned recording For more information on planned recordings please refer to Using Planned Recordings on page 24 TV Favourites In addition to the standard Freeview channels your DTR can also giv...

Page 12: ...ng in the small preview window on the right hand side of the screen If you wish to watch the programme press the OK button If you had previously not finished watching a programme press the GREEN button to resume the playback from the last watched point You can always access the Top Up TV programmes by pressing the Top Up TV button Folders Programmes on your recorder are automatically placed in fol...

Page 13: ...r and save space on your DTR for future recordings Your DTR is also capable of automatically adding time to a recording to guard against programme over run Please refer to Page 31 for more information on Guard Times Space for recordings When you add a recording to the Planned Recordings your DTR will check to see if there is enough space to complete all the scheduled recordings If there is a risk ...

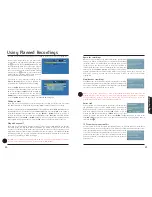
Page 14: ...gh the recording to your desired point Trick modes These are functions that enable you to move forward or rewind through a recording There are nine incremental speeds for both forward and rewind these are fi x1 x2 x4 x8 x16 x32 x64 Press the forward or rewind button on your remote control to enter the trick mode Repeated presses of that button will increase the speed To reduce the speed press the o...

Page 15: ... RF modulator advanced Your DTR is equipped with an RF aerial modulator This feature allows you to watch pictures on a TV set when only connected via the aerial lead This can be useful if you wish to send the pictures from your DTR to more than one TV in your house Using the example method below you can also view the VCR on other TV s in your home Check your VCR manual for details on its RF modula...

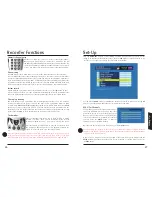
Page 16: ...a new channel you may not have enough space on your disk drive for planned recordings The warning will advise you to review your Planned Recordings as soon as possible Please refer to page 25 on how to make space by deleting unwanted recordings Recording Preferences There are two options available to change the Guard time and the rewind buffer size Use the UP and DOWN arrow buttons to move between...

Page 17: ...a certificate higher than the maximum certificate allowed the recorder will blank the screen mute the audio and pop up the PIN entry window Unless a valid PIN is entered the content cannot be viewed The available settings are U PG 12 15 or 18 Note that the default is 18 which means that there is no automatic block of any content from being viewed You should lower this to a level suitable for the p...

Page 18: ...y you may be experiencing problems Your current aerial and cabling may not be able to receive all the digital channels due to its age and condition Now is the time to renew them We recommend the use of CAI Benchmarked aerials Look for the logo Always use good quality double screened aerial cable e g CT100 coaxial cable In your location the digital channels may be transmitted on different frequenci...

Page 19: ...noise in the DTR This is the noise from the fan and the hard disk and is normal It will not generally be noticeable and is unavoidable DTR won t change channels Two record events are happening at once Wait for the recordings to stop Programme Guide is empty You must leave the DTR plugged in overnight to allow it to receive the programme information This takes place at about 3am every day No or les...

Page 20: ... for any reason 7 0 VIEWING CARD 7 1 What is a Viewing Card A Viewing Card is an electronic device that when activated acts like a key to enable you to view those parts of the Top Up TV Service to which you are entitled We or a third party we appoint may provide you with a single Viewing Card An additional charge will apply to further Viewing Cards that you request and to replacement Viewing Cards...

Page 21: ...o obtain a replacement fuse contact your retailer If the mains sockets in your home differ or are not suitable for the type of plug supplied then remove the fuse from the plug for safety cut the plug from the mains lead and refit a suitable type following Brown Live Blue Neutral You must use a 13 AMP plug BS1363 and fit a 3 AMP BS1362 fuse If any other type of plug is used a 3 AMP BS1362 fuse must...

Page 22: ...Notes Notes ...
Reviews: