background image

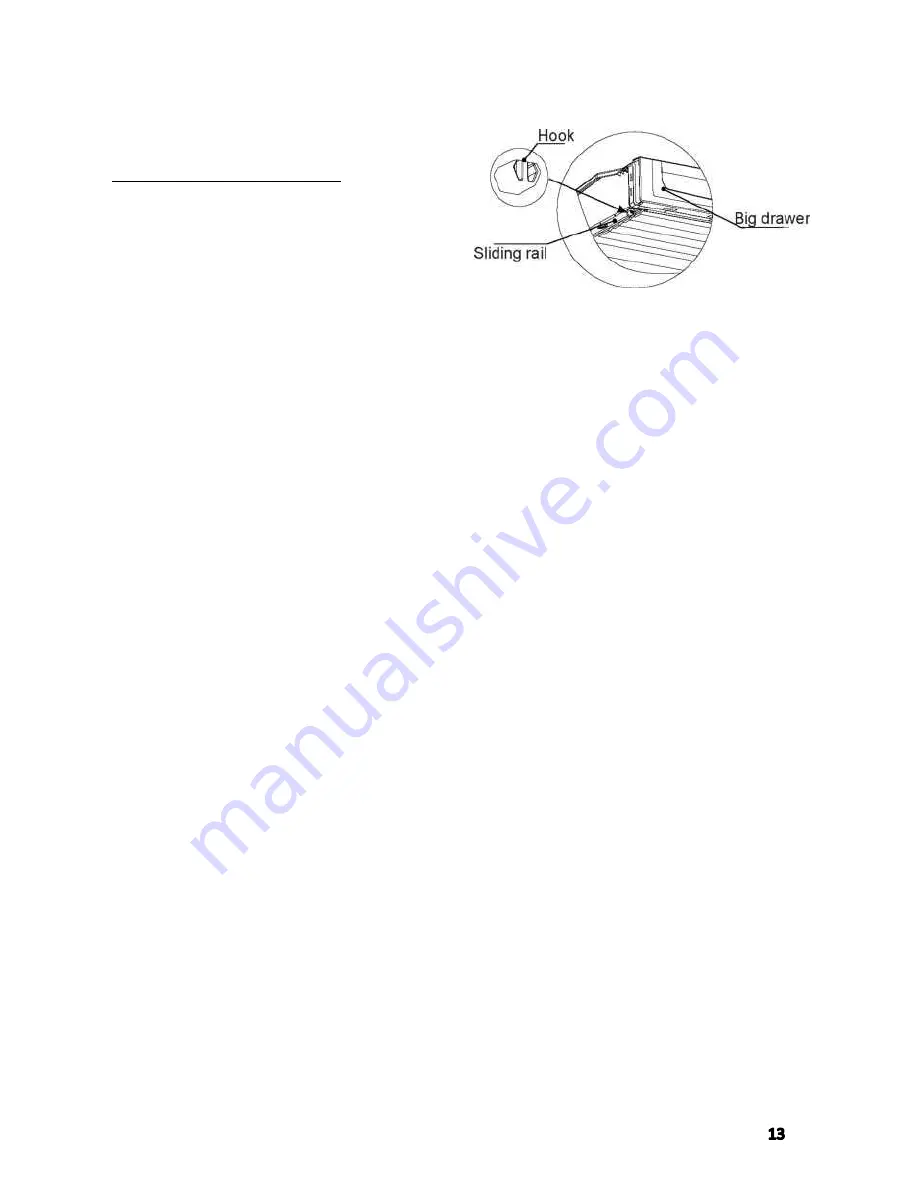
Big Drawer 

The big drawer has a maximum load of 10kg. 

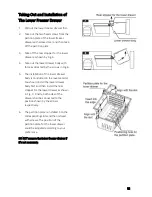
Pull out and install the big drawer 

1.


Pull out the big drawer; 

2.


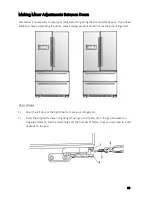
Find the hook at the left and right sides 
at the drawer bottom (shown 

in the figure). 

3.


Hold the hook at two sides with a nose 
pliers or tweezers and push it up and 
out of the groove of sliding rail, and 
take out the hook at the other side with 
the same method. 

4. Take out the drawer. 

5. Install the drawer by putting the hook into 
the right place. 


Summary of Contents for HRF3601F

Page 1: ...CARE AND USER MANUAL Thor Kitchen Refrigerator User Instructions Model HRF3601F Please read this manual carefully before using the product...

Page 2: ...resentative in the event that your refrigerator needs servicing Environmental Advice The packaging material used is recyclable we recommend that you separate plastic paper and cardboard and give them...

Page 3: ...Fast Freezing Mode 23 Cleaning and Maintenance 25 Solutions to Problems 26 Warranty 27 Warranty and Product Registration 28 Attention The refrigerator you have just purchased may be slightly differen...

Page 4: ...ngly corrosive substances into the refrigerator to avoid damaging the refrigerator or starting fire or other accidents DO NOT use inflammable solvent near the refrigerator to avoid risk of fire danger...

Page 5: ...s out of service please take down the refrigerator s door remove the door seal and shelves and put them at proper places to avoid that children might play inside and cause accident This product is a h...

Page 6: ...r for freezer compartment Lower door for freezer compartment Door handle Right door for refrigerator compartment Drawer handle Ice storage box Ice scoop Partition plate for lower freezer drawer Partit...

Page 7: ...ompartment lamp Top lamp for refrigerator compartment Right door for refrigerator compartment Butter box Air duct cover plate Folded cantilever rack Side lamp for refrigerator compartment Gallon bottl...

Page 8: ...grounding wire The grounding pole of the socket shall be provided with a reliable grounding wire Open the refrigerator body and take out the accessory decorative cover for bottom beam and the three sc...

Page 9: ...before turning the power switch on in order to avoid damage to the refrigeration system and compressor Make sure the power wire is not pinned by the refrigerator or other objects to avoid accidents a...

Page 10: ...ator in either of the following two ways Auto Mode We suggest you to choose this mode if you have no special requirements for the setting Your refrigerator will work automatically after you chose this...

Page 11: ...h Adjustment of Cantilever Rack The cantilever rack could be adjusted to the proper height as required by food Please adjust the cantilever rack by following the arrows as shown in the diagram Raise i...

Page 12: ...the freshness of food for a long period of time Those foods which can be stored in freezer compartment but not exceed the storage period specified on the packaging of each kind of food You can take ou...

Page 13: ...rows in Fig B 5 The installation of the lower drawer body is conducted in the reverse order You should install the lower drawer body first and then install the rear stopper for the lower drawer as sho...

Page 14: ...k at the left and right sides at the drawer bottom shown in the figure 3 Hold the hook at two sides with a nose pliers or tweezers and push it up and out of the groove of sliding rail and take out the...

Page 15: ...ly and stop ice making when the ice storage box is full 6 You will hear the sound of motor after about two hours which is the sound of pump providing water to the ice maker and doesn t indicate malfun...

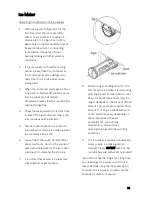
Page 16: ...the lock as shown in Fig 1 of Pg 14 pull it out as shown in Fig 2 of Pg 14 and take out the ice cube box Rinse the ice cube box with warm water below 60 140 F and DO NOT use detergent Air dry the ice...

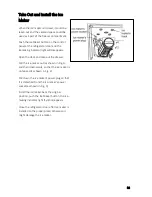
Page 17: ...door and take out the drawer Pull the ice maker out as shown in Fig 1 and then downwards so that the ice maker is unhooked as shown in Fig 2 Pull down the ice maker s power plug so that it is detached...

Page 18: ...le above the set bolt 3 Use the small hexagon spanner supplied in the box to set the handle fixing socket head cap screws into both the small screwed holes on the handle After they are screwed down ge...

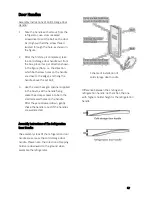
Page 19: ...adjusting the doors please review previous section on leveling the refrigerator Do As Follows 1 Raise the left door or the right door to make your refrigerator 2 Insert the supplied fastener ring usin...

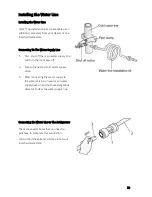
Page 20: ...supply line and turn the ice maker off 2 Locate the nearest cold water supply valve 3 After connecting the water supply to the water valve turn your main water supply back on and flush several gallon...

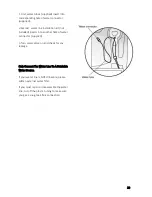
Page 21: ...into another hole of water connector supplied 3 Turn water valve on and check for any leakage Only Connect The Water Line To A Drinkable Water Source If your water line is NOT drinkable please add an...

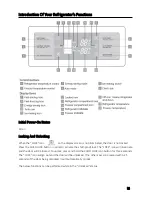
Page 22: ...button in order to activate the child proof lock The LOCK icon will illuminate and the door will be locked To unlock press and hold the CHILD LOCK icon button for three seconds The LOCK icon will go o...

Page 23: ...Mode Press AUTO MODE and the AUTO icon will illuminate indicating the activation of AUTO MODE Selecting AUTO MODE will automatically de activate all other modes To toggle between Celsius and Fahrenhe...

Page 24: ...artment can be independently turned off When the refrigerator compartment is turned off the freezer compartment will remain working This function is recommended when the refrigerator compartment will...

Page 25: ...will be on when the refrigerator door open the lamp will be off after the door open lasts for 1 minutes Light wave fresh keeping lamp will be on for 10 minutes off for 5 minutes after the refrigerator...

Page 26: ...l Wave Only Some Models Keep fresh with optical wave use the optical wave lamp to maintain the Photosynthesis of fruit and vegetables prolong the growth period and keep it fresh effectively Power Shut...

Page 27: ...ged by the repairmen designated by our Service Centers to avoid any risk Normal phenomena not regarded as malfunctioning Refrigerant inside the capillary tubes of the refrigerator flow in high speed a...

Page 28: ...ordance with electrical or plumbing codes or use of products not approved by Thor Group 5 Cosmetic damage including scratches dents chips or other damage to the finish of your major appliance unless s...

Page 29: ...like to schedule service you may contact Thor Group at the number below Have your complete model number ready You can find your model number and serial number on the label located on the inside wall...

Reviews: