background image

E L E C T R I C A L   S Y S T E M

T H O R   M O T O R   C O A C H         |         M A D E   T O   F I T


67

10

Electrical System

Shore Line Power Cord

During very cold or very hot weather conditions, the 

image on touch-screen control panels (radio, multiplex, 

and other liquid crystal display (LCD) panels) may 

appear unclear or react slowly. Once the interior 

temperature of the motorhome stabilizes, normal LCD 

panel display and operations will resume.

NOTICE

NOTICE

The campsite 120 volt power receptacle(s) should 

always be tested for proper functionality prior to 

connecting your motorhome’s shore line power cord 

to it. Do not hook up the shore line power cord to any 

receptacle until you have verified proper polarity and 

grounding.
DO NOT plug the shore line power cord into a campsite 

receptacle:
•  That has reverse polarity
•  With non-functioning ground circuits
•  That shows outward signs of heat or other damage
Doing so may result in property damage or serious 

injury. Damage or injury resulting from a connection to 

a malfunctioning or improperly wired power source is 

not covered by warranty.
It is the responsibility of the owner of the electrical 

receptacle to ensure that the receptacle is properly 

wired and grounded. Reverse polarity and/or improper 

grounding of your motorhome can cause equipment 

damage, personal injury or death.

WARNING

WARNING

Do not use cheater plugs, adapters, or extension cords 

to reconfigure incoming alternating current (AC) power 

or break the continuity of the circuit connected to the 

grounding pin.
•  Do not connect the shore line power cord into an 

outlet that is not grounded, or adapt the power 

cord plug to connect it to a receptacle for which it 

is not designed.

•  Do not remove the grounding pin to connect to a 

non-grounded receptacle. Removal of the ground 

pin disables an important safety feature designed 

to prevent shock and electrocution hazards.

•  Do not connect the shore line power cord to an 

extension cord. Use of an improper extension 

cord will cause overheating of the cord as well 

as potentially causing premature failure of the AC 

equipment.

WARNING

WARNING

Make sure the circuit breakers at the electrical power 

source are in the OFF position before connecting or 

disconnecting your shore line power cord.
The shore line power cord must be fully extended when 

in use, and not left coiled in the electrical compartment 

or on the ground.

WARNING

WARNING

WARNING

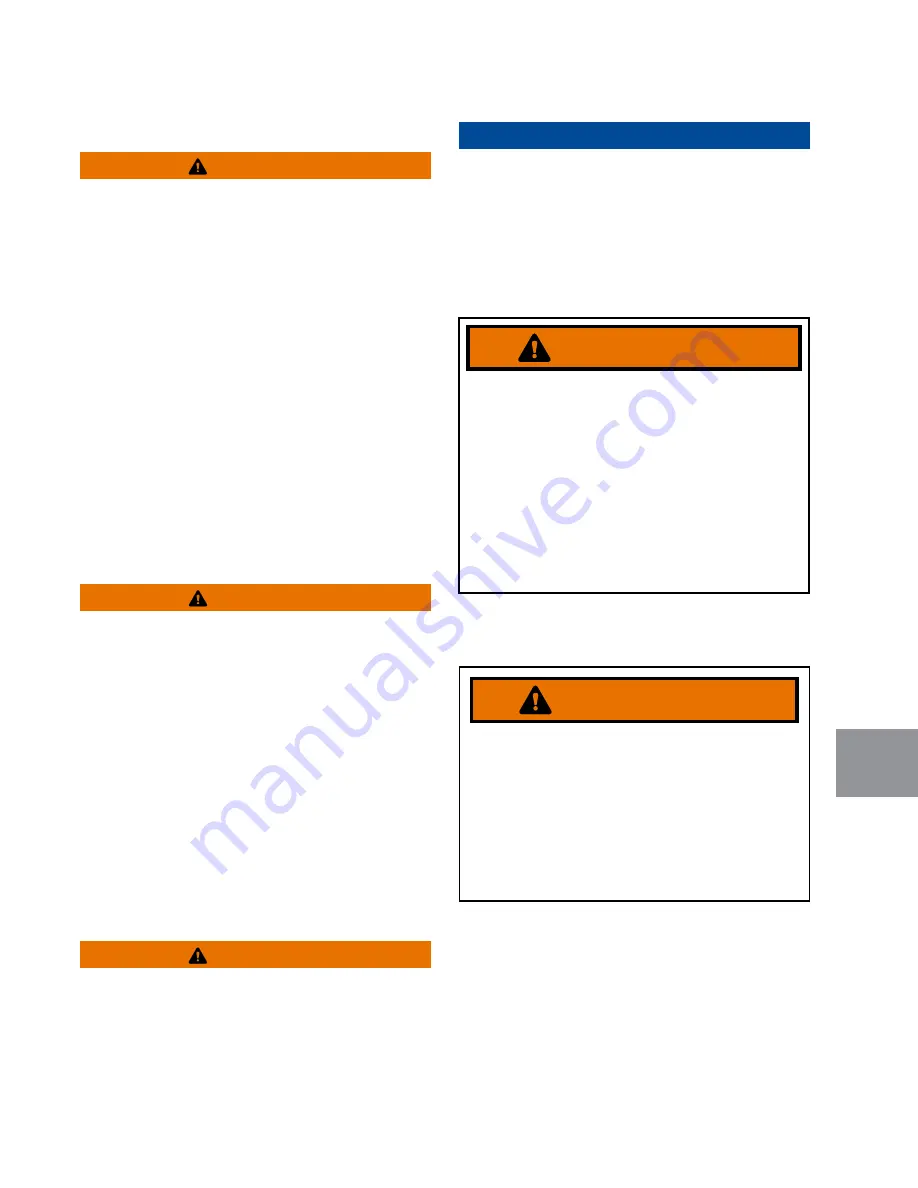
THIS CONNECTION IS FOR 110-125-VOLT

AC, 60 HZ, 30 AMPERE SUPPLY.

DO NOT EXCEED CIRCUIT RATING.

EXCEEDING THE CIRCUIT RATING MAY

CAUSE A FIRE AND RESULT IN DEATH

OR SERIOUS INJURY.

WARNING

THIS CONNECTION IS FOR

208Y/120-VOLT or 120/240-VOLT

AC, 3-POLE, 4-WIRE, 60 HZ,

50 AMPERE SUPPLY.

DO NOT EXCEED CIRCUIT RATING.

EXCEEDING THE CIRCUIT RATING

MAY CAUSE A FIRE AND RESULT IN

DEATH OR SERIOUS INJURY.

Typical 30 amp electrical service warning label

Typical 50 amp electrical service warning label

Summary of Contents for CLASS A

Page 1: ...OWNER S MAN UAL CLASS A AND CLASS C MOTORHOMES ...

Page 2: ......

Page 3: ... to the State of California to cause cancer and birth defects or other reproductive harm To minimize exposure avoid breathing exhaust do not idle the engine except as necessary service your vehicle in a well ventilated area and wear gloves or wash your hands frequently when servicing your vehicle For more information go to www P65Warnings ca gov passenger vehicle WARNING WARNING ...

Page 4: ... your new motorhome is Made to fit your recreational aspirations Your motorhome was built following the high standards set by Thor Motor Coach TMC the Recreational Vehicle Industry Association RVIA and if applicable the Canadian Standards Association CSA as well as complying with the requirements of all applicable state and federal agencies at the time of manufacture Our customers are extremely im...

Page 5: ...hicle Safety Safety Alerts 11 Safety Decals and Information Labels 11 Fire Safety 12 Basic Rules of Fire Safety 12 Fire Extinguisher 13 Operation 13 Inspection 13 Replacement 13 Smoke Alarm 13 Operation 13 Test 14 Maintenance 14 Replacement 14 Carbon Monoxide CO 14 Propane Gas Safety 15 Combination Carbon Monoxide and Propane Alarm 16 What to do if the Alarm Sounds 16 Test 17 Maintenance 17 Replac...

Page 6: ...Controller 72 Chassis Alternator 72 Battery Isolation Relay 73 Emergency Auxiliary Start Switch if equipped 73 Section 4 Fuel Systems Fuel System Safety 29 Fuel Transfer System if equipped 29 Fuel Transfer System Operation 31 Fuel Cap 32 Fuel Pump Collision Shut off Switch if equipped 32 Section 5 Tires and Wheels Tire Safety 33 Tire Inflation 33 Common Tire Wear Patterns 34 Lug Nut Torque 35 Whee...

Page 7: ... Water System 86 Waste Water System 87 Drain Pipes 87 Vents 87 Waste Water Holding Tanks 87 Termination Valves and Termination Compartment 87 Emptying Waste Water Holding Tanks 88 Black Tank Flush 88 Winterizing the Water System 89 De winterizing Your Motorhome 90 Cold Weather Use of the Water System 90 Section 13 Heating and Cooling System Introduction 91 Dash Heater and Air Conditioner 91 Contro...

Page 8: ...this owner s manual is subject to change without notice and represents information relevant at the time this version was printed Nothing in this owner s manual creates any warranty either expressed or implied The only warranties offered are those set forth in the Thor Motor Coach Limited Warranty and in the Thor Motor Coach Structural and Lamination Limited Warranty as applicable to the motorhome ...

Page 9: ...e to your motorhome are available from the Thor Motor Coach web site www thormotorcoach com owners owners manual Owner s Packet Included with your new motorhome is the Owner s Packet which contains instructions regarding the warranty safety operation and maintenance of the factory installed com ponents found in your motorhome Please read follow and retain for reference the information provided by ...

Page 10: ...ed components Documents are provided in a viewable printable and download able pdf format Visit your TMC Owners Resource account often for updates and new features are continually being introduced TMC Instructional Videos As an added resource TMC provides informational how to videos through the Thor Motor Coach YouTube channel This video library is constantly being updated and includes helpful inf...

Page 11: ...el Club is not a principal or agent of Thor Motor Coach Inc For more information regarding how you can become a club member please contact Thor Diesel Club 5715 Hwy 85N 557 Crestview Florida 32536 website www thordieselclub org email thordieselclub gmail com NOTE If you have purchased a new previously un titled Class A diesel motorhome Thor Motor Coach will pay for your first year of membership to...

Page 12: ...C U S T O M E R C A R E 8 7 7 8 5 5 2 8 6 7 This page is intentionally left blank 4 ...

Page 13: ...nses If you have questions regarding warranty coverage contact TMC Customer Care at 877 855 2867 Inspect the entire motorhome during the test drive and pre delivery inspection PDI and note any issues in writing on the TMC Product Warranty Registration Form Ask any questions you may have before leaving the selling dealership Consumer Information 1 Complete and return all applicable warranty cards a...

Page 14: ...e are within 1 to 2 business days You must include your name and a valid email address Also include your VIN and briefly describe the purpose of your inquiry You will receive a reply by email or if you choose a TMC Customer Care representa tive will return a phone call as soon as possible Your selling dealer and or your TMC Customer Care rep resentative should be able to solve any question or conc...

Page 15: ...r for assistance If your selling dealer is closed contact TMC Customer Care at 877 855 2867 available 24 7 for warranty pre repair authorization and for emergency weekend or after business hours repair assistance see How To Obtain Assistance in this section NOTE Please refer to your TMC Factory Service Appointment Form for additional important information Obtaining Service Repair at Thor Motor Coa...

Page 16: ... third party sites and does not endorse warrant or guarantee any products services information centers or schools described or offered at these links Thor Motor Coach Recreational Vehicle Privacy Notice Your Thor Motor Coach RV contains systems which allow Thor Motor Coach to collect information about your rec reational vehicle how it is used and where it is located and your Internet connection es...

Page 17: ...ffice of Defects Investigations CRD NVS 216 1200 New Jersey Ave SE Washington DC 20590 TO CONTACT THOR MOTOR COACH BY PHONE Contact TMC Customer Care at 877 855 2867 TO CONTACT THOR MOTOR COACH BY MAIL Thor Motor Coach Attn Customer Care PO Box 1486 Elkhart IN 46515 1486 In Canada If you believe your recreation vehicle has an alleged safety defect you should contact the Department of Transport and...

Page 18: ...C U S T O M E R C A R E 8 7 7 8 5 5 2 8 6 7 This page is intentionally left blank 10 ...

Page 19: ...may also be used to alert against unsafe practices Indicates a potential situation that if not avoided may result in property damage or damage to your motorhome DANGER DANGER CAUTION CAUTION WARNING WARNING NOTICE NOTICE Safety Alerts Thor Motor Coach uses the following safety symbols and signal words to warn you of possible safety concerns and to provide information to help prevent personal injur...

Page 20: ...sconnect the negative battery cable s at the auxil iary battery and chassis battery 4 DO NOT attempt to use water to put out the fire Water can spread some types of fire grease or oil and electrocution is possible with an electrical fire 5 Always have faulty or damaged wiring electrical compo nents propane tanks valves pipes gas and electrical ap pliances inspected by a certified RV repair technic...

Page 21: ...recommended for the hearing impaired WARNING WARNING The smoke alarm installed in your motorhome is listed for use in recreation vehicles They only work as intended if they are maintained in operational condition Smoke alarms have a limited life and over time will cease to function Immediately replace the smoke alarm if it is not working properly if it displays any type of problem or as recommende...

Page 22: ...on monoxide poisoning which can cause death or serious injury DANGER DANGER The following symptoms are related to carbon monoxide poisoning and should be discussed with all members of the household Mild Exposure Slight headache nausea vomiting fatigue often described as flu like symptoms Medium Exposure Severe throbbing headaches drowsiness confusion fast heart rate Extreme Exposure Unconsciousnes...

Page 23: ... Securely cap inlet when not connected for use After turning on propane except after normal cylinder replacement test propane piping and connections to appliances for leakage with soapy water or bubble solution Do not use products that contain ammonia or chlorine to test for leaks These substances may weaken piping components and cause gas leaks leading to fire or explosion which could result in d...

Page 24: ...de gas that results from incomplete combustion such as those emitted from appliances furnaces fireplaces and auto exhaust along with propane gas that may be present A carbon monoxide propane alarm is NOT A SUBSTITUTE for other combustible gas fire or smoke detection alarms Please note that there are hazards against which carbon monoxide detection may not be effective such as detection of natural g...

Page 25: ...ed while driving or run ning the generator if equipped to avoid drawing dangerous exhaust gases into the motorhome If you suspect that exhaust fumes are entering the passenger compartment have the cause determined and corrected as soon as possible If you must drive under these circumstances close all the windows and adjust the heating or cooling system to draw outside air into the motorhome set th...

Page 26: ... be clearly marked with an Exit label and be red in color 3 Rotate the handle until it is perpendicular to the window frame 4 Push the handle which opens the window You may need to push on the window glass to free it from the window seal Continue to push the handle until it is completely clear of the slot in the window frame Egress Window Latch Styles Egress windows may have a latch style similar ...

Page 27: ...g on the egress window design The egress window may be hinged at the top or side be designed to breakaway or have a sliding window pane Illustration of cab reclining and swivel seats All swivel seats located in the cab of the vehicle driver and front passenger must be in the locked upright and forward facing position while the vehicle is in motion and seats are occupied Driver front passenger and ...

Page 28: ...st be locked in a forward facing position with seat belts fastened while the motorhome is in motion Avoid seat rotation while in transit USING SEAT BELTS Insert the belt tongue into the proper buckle the buckle closest to the direction the tongue is coming from until you hear a snap and feel it latch Make sure the tongue is securely fastened in the buckle Adjust the belt to the proper position snu...

Page 29: ... requirements regarding the safe transport of children in your motorhome For additional information refer to http www nhtsa gov parents and caregivers or call 1 888 327 4236 In Canada refer to Transport Canada s website http www tc gc ca gne motorvehiclesafety safedrivers childsafety index 53 htm Never allow a passenger to hold a child on his or her lap while the motorhome is moving You are requir...

Page 30: ...ommercial Driver s License or CDL depending on the weight and or length of the motorhome Please check with your Bu reau of Motor Vehicles to ensure you have the proper endorsements on your driver s license Transporting Pets Air bags deploying in the front seat could harm your pet An unrestrained pet will be thrown about and possibly injured or injure a passenger during panic braking or in a collis...

Page 31: ...rhome at a distance of 100 feet to 500 feet from the stopped motorhome so as to afford ample warning to traffic approaching the motorhome 5 Always stand off the road out and away from of the lanes of traffic NOTE Curves and or hills may affect the safe place ment of warning indicators such as safety reflectors cones flares etc Extinguish flares before leaving the emergency parking site Reference E...

Page 32: ...he application of the left or right turn signals View the camera in the dash monitor radio screen to help aid with maneuvering the motor home around the turn When the turn signals cancel the dash monitor will revert to the previous screen Blind spot Indicator Your motorhome mirrors may be equipped with blind spot indicators If so a symbol in the mirror surface will appear whenever a vehicle or obj...

Page 33: ...e dash radio must be ON It is powered by the auxiliary battery ies there fore the Master Battery Disconnect Switch must also be ON It is normal to keep the Master Battery Disconnect Switch in the ON position while traveling Doing so also allows the vehicle s charging system to charge the auxiliary battery ies while the engine is running 2 When the gear selector is placed in REVERSE the radio displ...

Page 34: ... manufacture of the numerous materials and products used in the construction of recreational vehi cles Trace levels of formaldehyde are also released from smoking cooking use of soaps and detergents such as carpet shampoos cosmetics and many other household items Some people are very sensitive to formaldehyde while others may not experience a reaction to the same level of chemical exposure For the...

Page 35: ...severe reactions Immune compromised people and those with chronic lung illnesses may develop serious infections in their lungs when they are exposed to molds For mold growth to occur temperatures must be between 40 degrees and 100 degrees Fahrenheit and there must also be a source of moisture such as humidity in the air stand ing water damp materials etc Indoors the most rapid mold growth occurs w...

Page 36: ...C U S T O M E R C A R E 8 7 7 8 5 5 2 8 6 7 This page is intentionally left blank 28 ...

Page 37: ... in death or serious injury DANGER DANGER All pilot lights appliances and their igniters see operating instructions shall be turned off before refueling of motor fuel tanks and or propane containers Can cause ignition of flammable vapors which can lead to a fire or explosion and result in death or serious injury DANGER DANGER Flammable clean up materials should be temporarily stored in a nonflamma...

Page 38: ...uel nozzle In the event a static caused fire occurs when refueling leave the nozzle in the fill pipe and back away from the vehicle Turn OFF the fuel pump master switch immediately To avoid fuel spillage do not over fill or top off your vehicle tank Avoid prolonged breathing of gasoline vapors Never refuel in an enclosed space or building Keep your face away from the fuel nozzle and fuel container...

Page 39: ...Battery Disconnect Switch is ON 3 Connect the ground wire from the motorhome to the vehicle being fueled The clip must connect to a metal device of the vehicle being fueled such as the frame 4 Turn ON the fuel transfer pump switch NOTE One Press of the switch turns the pump ON two presses of the switch turns the pump OFF 5 Uncap the fuel tank cap on the vehicle being fueled and place the fuel nozz...

Page 40: ...fuel tank Fuel Cap If you should lose your fuel cap it should be replaced as soon as possible with a cap of the same size and type Always remove the fuel cap slowly and pay close attention to the fuel recommendations outlined in the Chassis Packet Fuel Pump Collision Shut Off Switch if equipped If your motorhome is involved in a collision an inertia switch in the fuel pump circuit may open shuttin...

Page 41: ...n traveling in your motorhome check the inflation pressure of each tire at least weekly to insure maximum tire performance and travel wear Tire pressure should only be checked when the tires are cold When the motorhome is underway tires heat up and the air pressure inside the tire increases NOTE NHTSA s tire rating listings are located on line at www safercar gov Vehicle Shoppers Tires Rating NHTS...

Page 42: ...r required in certain travel regions and or weather conditions Always check with the state s Department of Transportation for vehicle operating guide lines and regulations Your vehicle may include a Tire Pressure Monitoring System TPMS but this is NOT a substitute for manually checking tire pressure See the chassis manufacturer s own er s manual for additional information NOTE Check and adjust tir...

Page 43: ...torhomes Federal Weight Label WARNING WARNING It is very important to maintain proper wheel alignment for your motorhome Improper wheel alignment not only contributes to premature tire wear but also severely affects vehicle handling Keeping your motorhome s front wheels in alignment is part of a normal maintenance routine Please follow the recommendations listed in the notice above and on the corr...

Page 44: ...d place warning markers as described in Section 3 Emergency Stopping Contact a road service provider a qualified RV service repair center or call 911 in the U S for assistance To avoid personal injury do not attempt to change a spare tire or jack the motorhome yourself This is why a jack handle has not been included with your motorhome Make sure the road service technician reads and is familiar wi...

Page 45: ...number of 50 or lower indicates a short sidewall for improved steering response and better overall handling TRACTION The traction rating indicates the tire s ability to allow a car to stop on wet pavement in a shorter distance TREADWEAR The treadwear rating indicates how long the tire should last The higher the number the longer it should take for the tires to wear down SPEED RATING The speed rati...

Page 46: ...C U S T O M E R C A R E 8 7 7 8 5 5 2 8 6 7 This page is intentionally left blank 38 ...

Page 47: ... on your motorhome s Federal Certification Label to determine safe load limits For safe operation NEVER OVERLOAD YOUR MOTORHOME Weight Terminology GROSS VEHICLE WEIGHT RATING GVWR The maximum permissible weight of this motorhome UNLOADED VEHICLE WEIGHT UVW The weight of this motorhome as manufactured at the factory with full fuel tank engine oil and coolants OCCUPANT AND CARGO CARRYING CAPACITY OC...

Page 48: ...e The total weight of passengers cargo trailer tongue weight and water fresh and waste should never exceed the values shown on this label This label also includes important safety belt seating capacity information and the measured overall length of the motorhome NOTE If a boat trailer or other vehicle is being towed it should be weighed and combined with the motorhome s weight to ensure the total ...

Page 49: ...cale although any method recommended by the scale operator that correctly determines weight value is acceptable During all measurements it is important to keep the vehicle as level as possible 1 Pull onto the scale so that only the front axle is on the platform with the end of the scale midway between the front and rear axles and record the weight Reading A 2 Pull forward until the full unit is on...

Page 50: ... a combination of its size its construction its load range and corresponding inflation pressure Loading the Motorhome Always consider proper vehicle loading when preparing for travel By not overloading the motorhome and keeping the weight balanced side to side and as close to the axles as possible the drivability and safe handling of the vehicle will be maximized Store and secure all loose items i...

Page 51: ... in pounds or the maximum tongue weight rating of the hitch note tongue weight is the weight in pounds pushing down on the hitch Consult with your selling dealer to determine the GCWR of the motorhome and the towing capacity of the motorhome WARNING WARNING DO NOT USE WEIGHT DISTRIBUTING HITCHES OR WEIGHT DISTRIBUTING TOWING DEVICES WITH THIS MOTORHOME Applies to Class A and Class C motorhomes WAR...

Page 52: ...lustration Always use safety chains between your motorhome and the towed trailer or vehicle Cross the chains under the trailer tongue and allow slack for turning corners Connect the safety chains to the trailer or vehicle frame or hook retainers Never attach safety chains to the bumper of a vehicle see illustration Always check brake lights running lights emergency flashers and turn signals of the...

Page 53: ... four hydraulic jack rams DO NOT OPERATE ANY SYSTEM FUNCTIONS WHILE ANYONE IS UNDER THE MOTORHOME IF WORK UNDERNEATH YOUR MOTORHOME IS REQUIRED SUPPORT BOTH FRONT AND REAR AXLES WITH JACK STANDS DO NOT RELY ON THE SUPPORT OF THE LEVELING SYSTEM FAILURE TO DO SO MAY RESULT IN PERSONAL INJURY OR DEATH DO NOT USE THE LEVELING JACKS TO CHANGE TIRES THE SYSTEM IS DESIGNED FOR LEVELING AND STABILIZING A...

Page 54: ...ing the parking brake is engaged and the transmission is in a NEUTRAL for Class A Diesel Pushers b PARK for Class A and Class C front engine gas or diesel motorhomes 3 Press the ON button on the Leveling Jacks Control Panel 4 Press either the FRONT or REAR button on the Control Panel Depending on which switch is pushed either the front or rear pair of jack rams will deploy Release the switch when ...

Page 55: ... SUPPORT THE FULL WEIGHT OF THE MOTORHOME LIFTING WHEELS OFF THE GROUND MAY RESULT IN AN UNSTABLE VEHICLE CONDITION WHICH MAY RESULT IN SERIOUS PERSONAL INJURY OR DEATH ALWAYS MAKE SURE THAT PEOPLE AND PETS STAY WELL CLEAR OF THE STABILIZER JACKS WHEN IN OPERATION THE MECHANISM OF THE JACKS PRESENT PINCH POINTS THAT COULD CATCH ON LOOSE CLOTHING OR BODY PARTS AND CAUSE SEVERE INJURY WARNING WARNIN...

Page 56: ...ee from obstructions Extending the Slideout BEFORE OPERATING SLIDEOUT ROOMS Remove travel bars or slide locks if equipped Engage emergency parking brake Place driver and front passenger seats in the most forward position and place the seat backs in the upright position otherwise slideout may contact and damage these seats CAUTION CAUTION After completing the exterior and interior inspections prior...

Page 57: ...nts and how to videos available through your TMC Owners Resource on line account www thormotorcoach com owners owners resources Ensure that children and pets are kept well away from moving slideouts Gear tracks present a serious pinch hazard keep hands away from moving slideouts Ensure that the interior floor and space is clear of any obstacles that could impede the slideout travel or become entra...

Page 58: ...C U S T O M E R C A R E 8 7 7 8 5 5 2 8 6 7 This page is intentionally left blank 50 ...

Page 59: ...H OFF 1 Open the entry door the steps should automatically extend Look down and confirm that the steps have deployed and it is safe to exit the motorhome 2 Exit the motorhome while keeping the entry door open 3 Locate the step power switch and press or turn it to the OFF position 4 Close the entry door the steps should remain deployed RETURNING THE STEPS TO NORMAL OPERATING MODE 1 Open the entry d...

Page 60: ...ule may be faulty Repairs will need to be made at an RV service center NOTE If there is an electrical failure to the steps they may be manually retracted by removing the two bolts that hold the step arm collars to the drive shaft With these bolts removed manually push the steps closed The steps may need to be tied to the framework in the retracted position to keep them in place while travel ing to...

Page 61: ... are no obstacles in the path of operation 2 Provide power to the awning by turning ON the Master Battery Disconnect Switch or operate the generator or connect to shore power 3 Press and hold the RETRACT switch located near the entrance door or on the multiplex touch screen panel or remote see note until the awning is fully retracted NOTE Some awnings feature ONE TOUCH operation If equipped a sing...

Page 62: ...bays do not overload them with heavy packed items Remember that any carry on items or equipment placed in storage com partments affects the overall weight of the vehicle Ensure that the side to side loading is balanced and the load distributed evenly Please refer to Section 6 Weighing Loading and Towing NOTE Items placed in exterior storage compartments may shift during travel Exterior Ladder If e...

Page 63: ...n your Owner s Packet for Ramp Patio set up and stowage To prevent injuries due to falls inspect ramp door cables and attachment brackets before each use to ensure the cable system is in good working order Always use the patio barriers whenever the patio is in use and ensure all fasteners are secure Never overload the ramp door when it is used as a patio or loading ramp NOTE Full instructions for ...

Page 64: ...C U S T O M E R C A R E 8 7 7 8 5 5 2 8 6 7 This page is intentionally left blank 56 ...

Page 65: ...issingfromyourOwner s Packet please have the brand model and serial number of your specific appliance available before contacting your Typical range and microwave selling dealership for assistance in obtaining a replacement For your convenience many appliance manufacturers have their component manuals available for download from their respective websites Each appliance in your motorhome is warrant...

Page 66: ...i Connectivity if equipped Your motorhome may be factory equipped with a Winegard WiFi extender Designed specifically for the mobile environment the ConnecTTM 2 0 is a long range high performance WiFi extender that increases the range of existing WiFi hotspots It maximizes speed and range from both WiFi and 4G LTE networks to keep users con nected in all but the most remote areas The ConnecTTM 2 0...

Page 67: ...ations Many floor plans feature permanent queen and king size beds while others feature bunks Murphy beds and over cab bunks permanent and lowering convertible sofas and dinettes Your dealer is best equipped to instruct you in the opera tion of beds convertible furniture and bunks Front Cab Power Drop Down Overhead Bunks if equipped TO LOWER THE FRONT OVERHEAD BUNK 1 Turn the chassis engine OFF 2 ...

Page 68: ...our dealer about suitable bed safety systems and options When installing a bed safety system follow the manufac turer s installation instructions carefully ensuring anchors are securely affixed to structural components Take in to account the size and height of the mattress either originally installed or a replacement so that the safety system is the appropriate height above the top of the mattress...

Page 69: ... is installed along a slideout wall extend the slideout 2 Lift the front edge of the bottom cushion to approxi mately 45 degrees and pull towards you Figure 1 3 With the pulling motion the back of the sofa should begin to recline Push the back down while continuing to pull the bottom towards you Figure 2 4 When the back cushion is horizontal lower the bot tom cushion to lay flat Figure 3 TO RETURN...

Page 70: ...re 1 2 Release the catch lever located on the outside arm of the sofa Figure 2 3 Pull the L Shape seat to its full extension Figure 3 4 Grasp the pull strap located along the front edge of the seat cushion and pull up AND outward Then lower the seat cushion in its extended and horizontal posi tion Figure 4 5 Flip the back panel to its vertical position Figure 5 6 Place the back cushion against the...

Page 71: ...Figure 10 Figure 11 Figure 12 Figure 9 NOTE Sofas are usually fitted with safety belts which may fall into the sofa base during bed conversion When converting the bed back to a sofa be sure to feed the safety belts through the space between the bottom cushion and back panel so that the safety belts are available for passenger use TO RETURN THE BED TO A SOFA 1 Lift the leading edge of the bottom cu...

Page 72: ...VERT A TRI FOLD SOFA INTO A BED 1 If the sofa is installed along a slideout wall extend the slideout to ensure adequate floorspace for the bed 2 Remove the back cushions and set aside Figure 1 3 Grasp and lift the front edge of the bottom cushion Figure 2 and rotate to approximately 90 degrees Figure 3 4 While holding the seat in position flip and lock both folding legs Figure 4 5 With a firm gras...

Page 73: ...ack cushions and set aside 2 Lift the tabletop from its support pedestal s 3 Remove the support pedestal s from the floor bracket s 4 Place the tabletop between the dinette seats ensuring the table edges are engaged in the seat channel 5 Place the seat and back cushions on top and across the lowered table and dinette seats DREAM DINETTE BED CONVERSION 1 Remove both dinette back cushions Figure 1 2...

Page 74: ...C U S T O M E R C A R E 8 7 7 8 5 5 2 8 6 7 This page is intentionally left blank 66 ...

Page 75: ...t use cheater plugs adapters or extension cords to reconfigure incoming alternating current AC power or break the continuity of the circuit connected to the grounding pin Do not connect the shore line power cord into an outlet that is not grounded or adapt the power cord plug to connect it to a receptacle for which it is not designed Do not remove the grounding pin to connect to a non grounded rec...

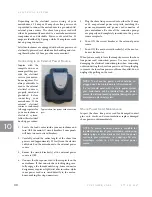
Page 76: ...ce Typical shore line power cord connection port Depending on the electrical service wiring of your motorhome a 30 amp or 50 amp shore line power cord is provided to connect the motorhome to a grounded AC external power source The shore line power cord will either be permanently mounted to a motorhome interior compartment or detachable Power cords rated for 30 amps are identified by 3 prongs while...

Page 77: ...ems have other features integrated into the controller For further assistance contact your selling dealer or TMC Customer Care at 877 855 2867 Rapid Camp Multiplex Control Systems Select TMC motorhomes are equipped with Rapid Camp multiplex wiring systems A multiplex system uses low voltage digital signals to control the electrical and electro mechanical devices within your motorhome via an intuit...

Page 78: ...ghts fans etc Multiplex systems details are described in the manufac turers owner s manuals included with your TMC Owner s Packet Multiplex system how to videos are also available on TMC s YouTube site www youtube com user ThorMotorCoach Auxiliary Battery ies Keep sparks cigarettes and flames away from the batteries as the hydrogen gas they create may explode Do not connect a booster battery or ot...

Page 79: ...omes the inverter If the battery condition is below its full charge the charger will begin recharging the auxiliary battery at a rate that reflects the level of discharge When the battery is fully charged the charger drops its charging level back to a maintenance or trickle level to keep the battery fully charged Typical Class C motorhome auxiliary battery location is under the entrance step The a...

Page 80: ... is not designed to directly power the ap pliances and or electric components installed in your motorhome All 12 volt systems and components are either pow ered directly from the auxiliary batteries or through the converter which receives input power from either the on board generator or external shore power Chassis Alternator The 12 volts DC chassis alternator supplies power to both the automotiv...

Page 81: ...vehicle s charging voltage drops below 13 2 volts for a period of 4 seconds due to low idle speed and or excessive load the battery isolation relay will discon nect the auxiliary batteries from the vehicle s charging system until the vehicle s charging voltage returns to a level of 13 2 volts or above For this feature there is a built in delay period of approximately 10 seconds 4 The battery isola...

Page 82: ...h which powering the motorhome s electrical system When 120 volts AC is not present the Automatic Transfer Switch connects the auxiliary battery to the house 12 volt system If an inverter is installed limited 120 volts AC is available for a restricted number of circuits and appliances THE AUTOMATIC TRANSFER SWITCH OPERATES UNDER THESE CONDITIONS When shore power is sensed it connects the external ...

Page 83: ...urther concerns contact your dealer Replacement circuit breakers must be of the same voltage amperage rating and type Never use a higher rated replacement circuit breaker doing so may cause a fire by overheating the motorhome s wiring WARNING WARNING Circuit Breakers Circuit breakers protect the 120 volt wiring and compo nents in your motorhome from circuit overloads and shorted circuits Should a ...

Page 84: ...ystem in the event of a power surge or spike Fuses are maintenance components and must be replaced as needed Please contact your selling dealer s Service Department for further repair assistance NOTE Refer to the Chassis Packet for information regarding the chassis fuses and circuit breakers Ground Fault Circuit Interrupter GFCI The ground fault circuit inter rupter GFCI receptacle is designed to ...

Page 85: ...aust pipe providing cross ventilation When parked orient the vehicle so that the prevailing winds will carry the exhaust away from the motor home DO NOT open nearby windows ventilators or doors into the passenger compartment particularly those that are down wind even or short periods of time DO NOT operate the generator when parked in close proximity to vegetation snow buildings vehicles or any ot...

Page 86: ...in maintenance parameters are not met i e low engine oil level clogged air and fuel filters etc If your generator fails to start or remain running and there is an adequate fuel supply and 12 volts DC present it may need maintenance attention Refer to the manufacturer s owner s manual for troubleshooting and maintenance procedures If your motorhome is supplied with an AGS sys tem refer to your moto...

Page 87: ...l be turned off before refueling of motor fuel tanks and or propane containers Can cause ignition of flammable vapors which can lead to a fire or explosion and result in death or serious injury DANGER DANGER Propane Gas Safety THIS PROPANE PIPING SYSTEM IS DESIGNED FOR USE WITH PROPANE ONLY Do not connect natural gas to this system Securely cap inlet when not connected for use After turning on pro...

Page 88: ... tem panel if installed Refer to Electrical System Section 10 Filling and Servicing Given that the propane tank is not removable the motor home will need to be driven to a qualified propane facility for filling and servicing Only an authorized propane ser vice technician s should be near the motorhome while the propane tank is being filled Drivers and passengers should wait at a safe distance away...

Page 89: ...pounds capacity for Class A motorhomes specifications subject to change External Propane Hook up WHEN USING THE OUTDOOR COOKING AREA The vehicle must be level and stabilized Do not violate manufacturers instructions on required clearances for cooking appliances during use Do not store cooking appliances until cool to the touch Can lead to a fire and explosion and result in death or serious injury ...

Page 90: ...k is properly repaired by a qualified technician WARNING WARNING Leaks may be found easily with a soapy water solution Do not use a solution containing ammonia or chlorine when searching for leaks These products are corrosive to copper gas lines and brass fittings which could result in deteriora tion of the copper and brass components Apply the soapy solution to the outside of the gas piping fitti...

Page 91: ... line with the water supply delivery hose Water pressure regulators are designed to reduce high external water supply pressures to a level that is safe for your motorhome s water system preventing potential damage RV water pressure regulators can be obtained at RV suppliers or dealers NOTICE NOTICE Some external water sources develop high water pressure particularly in mountainous regions These ca...

Page 92: ...our motorhome allowing for carrying capacity for other items if needed Refer to Section 6 Occupant and Cargo Carrying and Capacity OCCC NOTE While traveling water can slosh in the fresh water tank and a small amount may escape through the overflow tube This is a normal occurrence and you should not be alarmed if you arrive at your desti nation with less fresh water than you expected Water Pump Whe...

Page 93: ...stream from all your faucets turn the faucets OFF The water pump should stop operation automatically when all faucets are closed The pump should now run on de mand when a faucet is opened and stop when the faucet is closed 5 The water pump switch must be ON to provide water to the toilet The switch for the water pump is usually located on the Monitor Panel or Multiplex Main Control Panel if equipp...

Page 94: ...ker or washer follow the appropriate appliance manufacturer s instructions pertaining to sanitization 6 Prepare a solution using a gallon of water and cup of liquid household bleach 5 sodium hypo chlorinate solution Use one gallon of solution for each 15 gallons of tank capacity 7 Open your fresh water tank bypass tube shut off valves or uncap them 8 With an empty tank and all faucets and drains c...

Page 95: ...d in the Gray Water tank while solids from bathroom toilet s is collected and stored in the Black Water tank Some floor plans may have two black tanks while others may drain bathroom sinks and or the shower into the black tank Waste water collection tanks have valves that allow for emptying the tanks into an external sewage collection facility commonly known as a dump station When traveling it is ...

Page 96: ...xible sewer drain hose and rinse it thoroughly with clean water Remove the other end from the dump station inlet and replace it in its stor age container 7 Replace the sewer caps on both the motorhome outlet and the dump station inlet 8 Flush the toilet a few times to add a small amount of water to the black tank This will help keep any remaining solids from drying to the tank surfaces NOTE Always...

Page 97: ... water heater 2 Remove or by pass the potable drinking water filter if equipped 3 If you have a dishwasher ice maker or washer follow the appropriate appliance manufacturer s instructions pertaining to winterization and de winterization Disconnect and cap or by pass the refrigerator ice maker inlet water line if equipped Disconnect and cap or by pass the dishwasher inlet line if equipped Disconnec...

Page 98: ...eezing it may also be necessary to open the lower cabinet doors at night in both the bath and kitchen areas to keep warmer air circulating around the water pipes drain pipes and fixtures Always ensure you have an adequate supply of LP fuel to keep the furnace operational and regularly test your LP CO detector to ensure breathable air inside the motorhome remains safe If you are going to leave the ...

Page 99: ... even while the vehicle is in motion Regardless of the outside temperature your motorhome s heating and cooling system will keep you and your traveling companions comfortable Typical Class A heating and air conditioning dash controls The vehicle air conditioning system contains refrigerant 134a under high pressure and should only be serviced by qualified technicians Improper service methods could ...

Page 100: ...ach Customer Care Certain individual parts of the Heating and Air Conditioning System such as the compressor dryer and condenser are covered under the chassis manufacturer s warranty NOTE Components covered under the TMC Limited Warranty must be Original Equipment Manufacturer OEM parts The installation of after market compo nents or unauthorized repairs may void the warranty Heating Cooling with ...

Page 101: ...ting Analog and Digital temperature setting 2 On the thermostat select Heat Cool or Auto 3 Set the desired temperature Depending upon the selection the furnace or air conditioner s will begin operation If a wall mounted thermostat or multiplex system is not installed in the motorhome then air conditioner functions are controlled from a panel on the unit itself ceiling panel NOTE For complete infor...

Page 102: ...h shades or blinds Try to avoid using the cook top or oven when the ambient temperature is over 95 F When parked keep windshield covered when facing the afternoon sun Minimize opening exterior doors when the air condi tioner is running NOTE 120 volts AC must be present in order to operate air conditioners and or heat pumps The energy can be supplied by shore power or the on board generator Air con...

Page 103: ...r full air flow is observed the cooling coil should be clear of ice Roof mounted low profile heat pump Exterior cover may be white or black AIR CIRCULATION ONLY Turn the selector switch to LOW FAN or for maximum air flow HIGH FAN Position the louvers to the desired direction of air flow SHORT CYCLING When an air conditioner is in operation its compressor circulates refrigerant under high pressure ...

Page 104: ...ny other appliance with venting systems serving the furnace DO NOT allow snow or any objects to block exhaust system of furnace DO NOT use the furnace cabinet area as a storage compartment DO NOT block furnace outlet registers or return air grills Keep all insulating materials away from furnace Installation repairs and preventive maintenance should be done by a qualified service technician only Fa...

Page 105: ... TMC Owner s Packet The manufactur ers of the heating and cooling equipment installed in your motorhome are the best source for information regarding component features operation and maintenance For safe heating system operation please follow all safety warnings pertaining to the furnace hydronic system if installed propane system and electrical system printed in all manufacturer s documentation a...

Page 106: ...urnace Care and Maintenance Listed here are several safety related instructions that you the owner should follow each heating season to assure continued safe operation of the furnace A periodic inspec tion of the furnace by a qualified service technician is also recommended The combustion of any hydrocarbon based fuel creates carbon monoxide CO gas which is extremely poisonous to humans and pets C...

Page 107: ...ife threatening and correct the problem immediately Extinguish all open flames evacuate the motorhome shut off the LP gas supply at the tank Immediately shut furnace down and call a service technician for repairs if the furnace cycles erratically or delays on ignition Never attempt to repair the furnace by yourself or by an unqualified person Never restrict the ducting installed by the RV man ufac...

Page 108: ...C U S T O M E R C A R E 8 7 7 8 5 5 2 8 6 7 This page is intentionally left blank 100 ...

Page 109: ...wners owners manual Obligations and expenses incurred due to perform ing periodic maintenance service are not covered under Thor Motor Coach s Limited Warranties Chassis For information regarding proper maintenance and other important chassis details refer to the Chassis Packet infor mation You astheowner areresponsiblefortakingproper precautions when attempting any repair or maintenance for your ...

Page 110: ...of the motorhome the shell will require regular care and maintenance The shell includes the roof sidewalls windows doors and under carriage of the motorhome Regular inspections and maintenance is required to ensure the exterior shell pro vides a barrier against water intrusion The shell should be inspected periodically for cracks tears gaps and condition of sealants Check corner and joint moldings...

Page 111: ...uld be in an enclosed climate controlled environment however this is not always possible Follow these important storage steps to protect your motorhome Turn OFF and disconnect from all water sources Turn OFF all combustion appliances Winterize your motorhome s water system a Drain and flush all holding tanks b Drain the water heater tank and fresh water lines c If freezing temperatures are expecte...

Page 112: ...disinfectant and dry Pour one cup of nontoxic RV antifreeze into the drains to prevent freezing Wipe up any spilled antifreeze from surfaces battery will lose charge gradually over a 30 to 45 day period even when disconnected from the positive and negative battery cables You may wish to remove the batteries from the motor home and store them in a heated area approximately 50 60 F However even in w...

Page 113: ...d rotors Replace as necessary x x x Inspect parking brake for proper function Repair and replace as necessary x x Inspect brake lights and turn signals for proper function Repair and replace components as needed Weight Distribution x x Check for proper weight distribution of equipment and components Place heavy items as near and over axles as possible x Weigh loaded motorhome with vehicle scales t...

Page 114: ...s when washing exterior Repair and replace as needed x x Check door and window seals for damage Repair as needed x Lubricate power step components with spray or lithium grease x Lubricate hinges locks strike pockets of entrance storage and maintenance access doors x x Operate emergency egress window latches and open window s frequently to ensure easy operation Lubricate seals and latches with ligh...

Page 115: ...tabilizers deploy properly and fully retract Clean deployment mechanism with mild detergent and rinse with water Lightly lubricate as needed Inspect jack pads for damage Replace worn or damaged components as needed Cab Cockpit x x Vehicle horn test for proper function repair if defective x x Gauges and switches ensure all vehicle control functions and driver aids are in proper working order before...

Page 116: ...s per manufacturers recommendations Check generator engine oil level regularly and top off as needed with oil type recommended by manufacturer Check air filter and spark plug replace as needed x Test ground fault circuit interruption GFCI receptacle s to ensure their proper function x Inspect 120 volt electrical receptacles Repair and replace as necessary Propane System x LP tank pipes fittings ch...

Page 117: ... Air Conditioner s Heat Pump s x x x Inspect for proper function Inspect and clean filters Repair or replace faulty components as necessary Appliances LP gas x x Check ranges ovens refrigerators for proper functioning Repair gas leaks immediately Appliances electric x x Check microwave refrigerator fans and vents Repair or replace as necessary Entertainment Systems x x Inspect TV s radios DVD play...

Page 118: ...C U S T O M E R C A R E 8 7 7 8 5 5 2 8 6 7 This page is intentionally left blank 110 ...

Page 119: ...er Care 1 Consumer s Responsibilities 5 Customer Support Online 2 Dash Heating Cooling 91 Dealer s Responsibilities 5 De winterizing 90 Diesel Club 3 Dinette 65 Dinette Bed Conversion 65 Disclaimers 8 Drain Pipes 87 Driving the Motorhome 22 Dream Dinette 65 Egress Window 17 18 Electric Bed Lift 59 60 Electrical Connections Towed Vehicle 44 Electrical System 67 78 Elevated Beds 59 60 Emergency Egre...

Page 120: ...ransporting Pets 22 Traction tire rating 35 37 Traveling With Propane 82 Treadwear 34 37 Tri fold Sofa 64 Vehicle Safety 11 28 Ventilation 27 102 Isolation Relay 73 Jack knife Sofa 61 Kilopascals kPa 33 L Shape Sofa 62 63 Ladder Exterior 54 Laws of the Road 23 Leveling Jacks 45 47 Leveling Jacks and Slideouts 45 50 Loading the Motorhome 42 Lug Nut Torque 35 Maintenance 101 110 Maintenance Access P...

Page 121: ...eater 86 Water Hose Potable 83 Water Panel 85 Water Pump 84 Water Pump Strainer 85 Water System 83 90 Water System Sanitizing 86 Weighing Loading and Towing 39 44 Weighing Your Motorhome 41 42 Weight Capacity of Garage 40 Weight Distributing Hitch Warning 43 Weight Distribution 42 Weight Label 39 Weight Terminology 39 Welcome Letter Inside Cover Wheels 33 37 WiFi Connectivity 58 Window Emergency E...

Page 122: ...C U S T O M E R C A R E 8 7 7 8 5 5 2 8 6 7 This page is intentionally left blank 114 ...

Page 123: ......

Page 124: ...thormotorcoach com TMC Part Number 0454934 Rev Date 10 01 2020 ...

Reviews: