


GPX3800 and GPX3850 Glass Processors
Chapter 7: Maintenence
Rev B, July 24, 2018
Page 67
Upon re-installing the GPX Cleaver, you may need to adjust the “Machine Specific Blade Compensation” value
under the GPX Cleave Blade Service process.
7.7. Adjusting the Cleave Blade Height
Only a small portion of the cleave blade edge is used to scribe the fiber. If this local portion of the edge gets
damaged, the blade can be re-positioned to a new “un-used” section. While the lifetime of a given section of the
blade can be very long (greater than 10,000 cleaves), it is also very easy to damage the blade due to excessive
lateral stresses (stresses perpendicular to the edge of the blade). This can occur if the blade is in contact with the
fiber and the fiber then moves sideways across the edge of the blade. The most common occurrence of this is a
result the cleave tension being set so low that the fiber is unable to be cleaved. In this scenario, the fiber will slide
along the edge of the blade and take a small semi-circular “bite” out of the current section. For small localized
damage such as this, the blade can be re-positioned up to a maximum of 10 times.
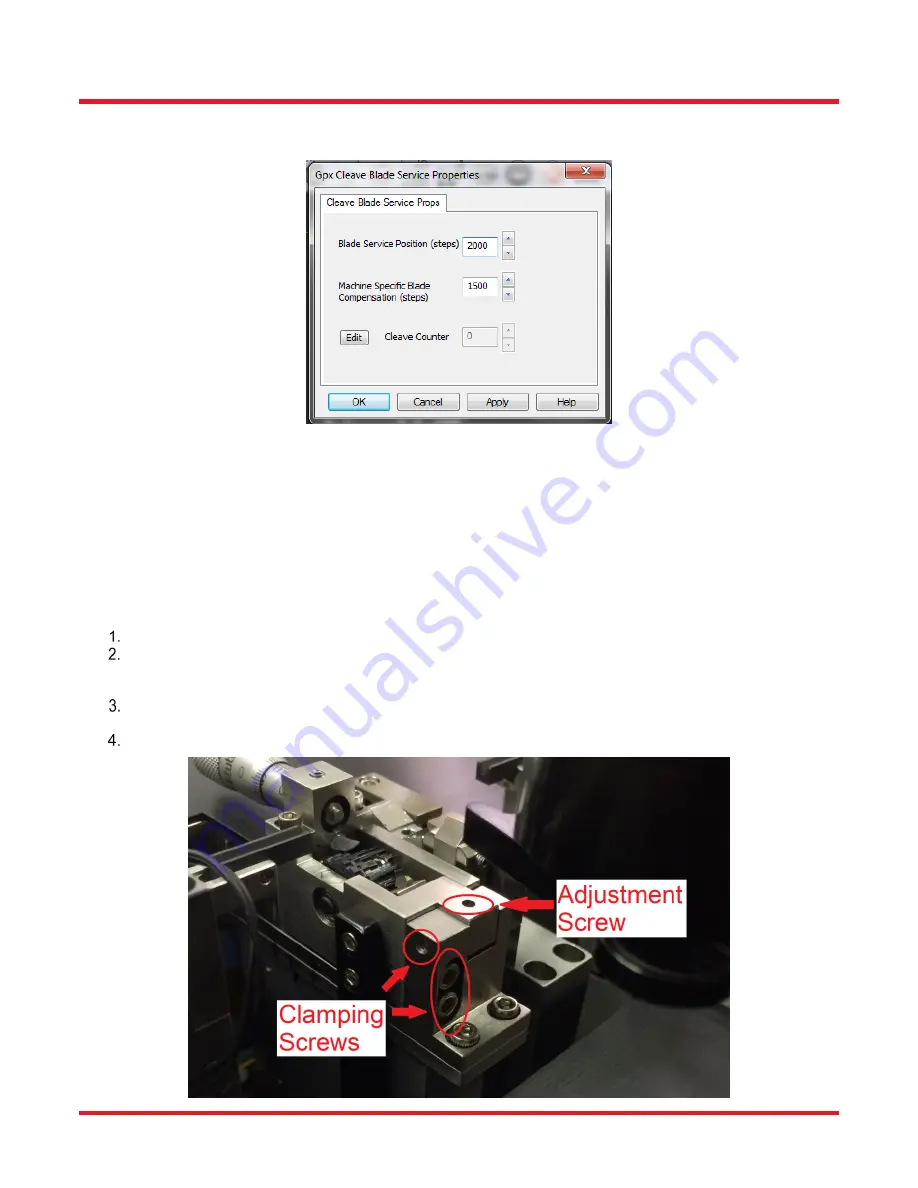
To re-position the cleave blade:
Loosen the two (2) “Clamping Screws” located at the back of the cleave assembly using the 3/32” Allen
wrench and the “Clamping Set screw” on the right side of the cleave assembly using the .050” Allen
wrench; turning counter-clockwise ¼ to ½ turn is sufficient.
Turn the “Height-Adjustment Screw” exactly ¼ turn clockwise using the 1/16” Allen wrench. This will raise
the “Cleave Blade Housing” and re-position the blade to a new section of the diamond edge.
Re-tighten the (3) “Clamping Screws”.


