Mi-Remote Plus Installation Guide
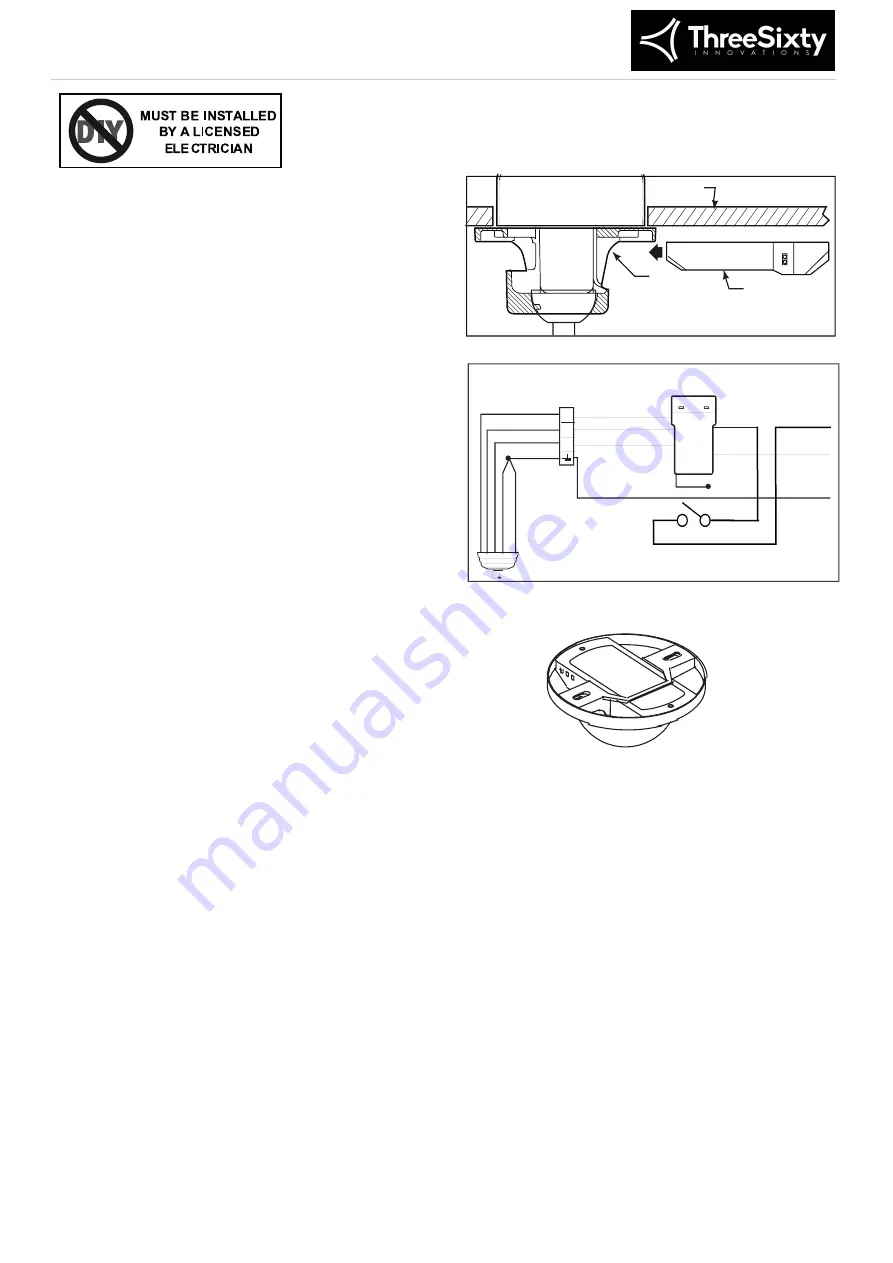
Receiver Unit
Ceiling
Bracket
(Open End)
NOTE: Receiver wires omitted for clarity
N
L1
L
Terminal Block
on Bracket
Fan
Wiring
Receiver
Unit
LIVE
NEUTRAL
EARTH – Green/Yellow
Motor
Neutral
Light
Green/Yellow
Antenna
BLUE
AC IN N
BRN
AC IN L
BLUE-
Neutral (out)
BRN-
Motor Live
GRN/YEL
from hg
r . ball
GRN/YEL
from bracket
RED - Light Live
* Wall Switch
* An isolation switch must be fitted to comply with the Wiring Rules and to
allow power to be removed by the user in case of a product fault.
House
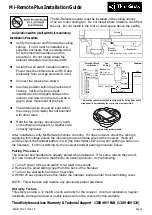
Correctly mounted receiver module.
Installation Procedure
Verify the receiver will fit inside the ceiling
canopy. If not it must be installed in a
separate enclosure that is suitably rated
for both electrical insulation and fire
prevention. Do not install where the
ambient temperature will exceed 40
o
C.
Install the wall switch (isolation switch).
Power must be obtained via an RCD and
preferably from a surge protected circuit.
Connect the receiver as shown.
Carefully position within the bracket and
canopy. Verify all wiring is neat,
insulated and not trapped between the
receiver and down rod (there must be a
gap to allow movement of the ball).
The antenna wire should be kept within
the canopy (not visible) but not bunched
with other wires.
Refit the fan canopy ensuring any earth
connections and spacers or washers are
correctly replaced.
An isolation switch (wall switch) is mandatory.
After installation verify Mi-Remote functions correctly. If it does not work check the wiring is
supplying full voltage across the incoming brown and blue wires at the receiver. If still not
The Mi-Remote receiver must be installed in the ceiling canopy
of an AC motor ceiling fan. Do not install where moisture can affect
the unit. Do not install in the roof or crawl space above the ceiling.
working check the handset battery is OK (the transmitter LED is on when pushing a button on
the handset). If still not working try the receiver-handset pairing procedure below.
Pairing Procedure
The receiver and handset are already paired when delivered. If for some reason they aren't,
or a new handset has to be matched to an existing receiver, do the following:
1. Turn off power at the wall switch for at least 30 seconds.
2. Remove the small sliding cover from the back of the handset.
3. Turn on the wall switch and wait 5 seconds.
4. Within 20 secs press the button inside the handset, located under the small sliding cover.
NOTE:
This will erase and replace any previously paired handsets.
Warranty Factors
ThreeSixty provide a 12 month on-site warranty for the receiver. Incorrect installation, neglect
accidents, damage and power quality issues will not be covered by this warranty.
ThreeSixty Innovations Warranty & Technical Support 1300 4MY FAN (1300 469 326)
RCxxMAN V1.0 Jan 19
Page 2


