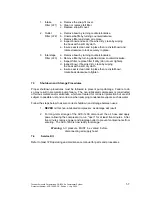
1. Intake
a. Remove the snap-fit cover.
Filter (LF1)
b. Clean or replace felt filter.
c. Replace snap-fit cover.
2. Outlet
a. Remove bowl by turning counterclockwise.
Filter (LF2)
b. Unscrew baffle by turning counterclockwise.
c. Remove filter and clean or replace.
d. Inspect bowl and seal. If bowl is dirty, clean by wiping
the bowl with a soft dry cloth.
e. Insure seal is clean and in place then re-install bowl and
rotate clockwise to lock securely in place.
3. Interstage
a. Remove bowl by turning counterclockwise.
Filter (LF3)
b. Remove filter by turning slotted screw counterclockwise.
c. Inspect filter, replace filter if dirty (do not over tighten).
d. Inspect bowl. If bowl is dirty, clean by wiping
the bowl with a soft dry cloth.
e. Insure seal is clean and in place then re-install bowl,
rotate bowl clockwise to tighten.
7.3
Shutdown and Storage Procedures
Proper shutdown procedures must be followed to prevent pump damage. Failure to do
so may result in premature pump failure. The non-lubricated compressor is constructed
of ferrous metals and/or aluminum, which are treated for corrosion protection but are still
subject to possible rust and corrosion when pumping condensable vapors such as water.
Follow the steps below to assure correct shutdown and storage between uses:
1.
NEVER
oil this non-lubricated compressor, as damage will result.
2. For long-term storage of the ACS-1200, disconnect the air hose and apply
power allowing the compressor to run "open" for at least five minutes. After
five minutes remove power and plug/cap outlet to prevent contaminants from
entering. The ACS-1200 is now ready for storage.
Warning
: All pressure MUST be vented before
disconnecting air supply hose!
7.4
Service Kit
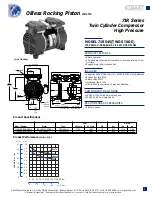
Refer to Gast 72R operating and maintenance manual for parts and procedures.
Thunder Scientific Corporation ACS-1200 Air Compressor System
1-7
Document Number: ACS-1200.DOC - Edition 1 - July 2005


