background image


Atlas IP+ Terminal User Manual 


Page 80 of 106 


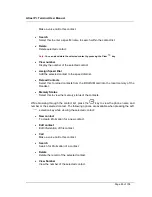
Make a voice call to this contact. 


Search 

Select this to enter a specific name to search within the contact list. 


Delete 

Delete selected contact. 


Note:

 You can also delete the selected contact by pressing the Clear 

 key. 


View number 

Display the number of the selected contact. 


Assign Speed Dial 

Add the selected contact to the speed dial list. 


Reload Contacts


Select this to reload contacts from the BDU/SIM card into the local memory of the 
Handset. 


Memory Status


Select this to view the memory status of the contacts. 


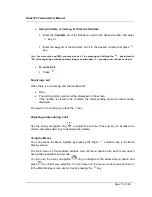
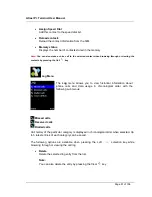
While  browsing  through  the  contact  list,  press  the


 key  to  view  the  phone  name  and 

number or the selected contact. The following options are available when pressing the Left 

selection key while viewing the selected contact: 


New contact 

To create information for a new contact. 


Edit contact 

Edit information of this contact. 


Call 

Make a voice call to this contact. 


Search 

Search for information of a contact. 


Delete 

Delete the record of the selected contact. 


View Number 

View the number of the selected contact. 
 

Summary of Contents for ATLAS IP+

Page 1: ...Thuraya ATLAS IP User Manual User Manual Revision 1 0...

Page 2: ..._____________________________________________ 11 4 GETTING STARTED __________________________________________________________ 15 5 USING WEB CONSOLE ___________________________________________________...

Page 3: ...t occur in a particular installation If this equipment does cause harmful interference to the radio or television reception which can be determined by turning the equipment off and on the user is enco...

Page 4: ...th these requirements Hazard Symbols Antenna Radiation Warning and Distance to other Radiation Equipment For safety reasons all personnel and other radiating devices must be kept at least 100cm from t...

Page 5: ...certain conditions dangerous voltages may exist even with the power cable removed To avoid injuries always disconnect power before accessing the equipment Alert Symbol Alert Button For triggering an e...

Page 6: ...f the radio spectrum To legally operate Thuraya equipment it is necessary to obtain permission from the local telecommunications regulatory authorities of the country you are operating from Using your...

Page 7: ...onnel will void the warranty Contents in this manual are subjected to change without notice and may contain errors or inaccuracies This manual is periodically revised and updated To obtain latest vers...

Page 8: ...ddvalue Innovation Pte Ltd neither endorses nor otherwise sponsors any such products or services referred to herein Microsoft Windows Windows NT Windows 2000 Windows XP and Windows 7 are registered tr...

Page 9: ...y transfer data from shipboard equipment and devices in support of M2M reporting routines an English Chinese web interface a built in firewall continuous GPS output and the ability to limit data sessi...

Page 10: ...uring congestion free satellite communications to keep you connected at all times From innovative satellite design to the reliability of each Thuraya device and accessory we provide a truly superior s...

Page 11: ...provides full coverage in azimuth and elevation Tracking is accomplished by measuring signals being continuously broadcast from the satellite The radome covers the antenna equipment which is composed...

Page 12: ...ilt in Web Console which can be accessed from a computer connected to the BDU using an Internet browser The Web Console provides easy configuration of the BDU firmware upgrade and daily use For more i...

Page 13: ...The terminal requires a dedicated Thuraya SIM card to access the Thuraya network and configure the settings of the terminal SIM VoIP Phone Service The terminal is embedded with a VoIP module and the...

Page 14: ...a Antenna Connector TNC b Wi Fi Connector SMA c LAN Ports RJ45 d PoE Port RJ45 e GPIO Port f Handset Port For Optional Atlas IP Handset g Phone Port RJ11 For VoIP voice call usage h RS 232 Serial Por...

Page 15: ...P Handset is an optional accessory and not included in standard packaging of Atlas IP Product packaging ADU BDU Router External Devices Above Deck Unit To be installed in an exposed area Below Deck Un...

Page 16: ...ime Service Provider for more information a Tilt up the SIM card slot rubber cover Note Make sure the BDU is switched off before inserting or removing the SIM card b Position the SIM card with its gol...

Page 17: ...Cable a Connect the antenna cable connector to the connector on the BDU front panel Rotate the connector in the clockwise direction until it is secured 4 1 3 Connecting the Wi Fi Antenna a Connect the...

Page 18: ...5 Connecting to DC Power Source a Insert the power cable plug to the terminal BDU s DC power socket until it clicks and is locked in place b Connect the power cable to a DC power source 12V or 24V No...

Page 19: ...perating normally Steady Red BDU powers up or detects failure ANTENNA Steady Green ADU is functioning normally Steady Red ADU detects failure No Light ADU is not connected or is calibrating REGISTERED...

Page 20: ...xplorer Google Chrome or Firefox c Type http 192 168 2 1 in the Address field and press Enter When the Login screen appear type in admin in the Username field and admin in the password field d Click L...

Page 21: ...Mode the status indicator will appear with the Voice Icon Select Voice Mode for CS call and SMS services These icons indicate the status of the indicated features Green indicates the item is active G...

Page 22: ...pose Connection Language Call History Inbox Data Profiles Terminal Info Sent Port Forwarding Ethernet Draft Firewall Wi Fi Mac Filtering VoIP Settings Tracking Misc Admin Modem About Home Menu Click o...

Page 23: ...anual Page 23 of 106 In Data Mode a prefix of D will be displayed In Voice Mode a prefix of V will be displayed Note The prefix V indicates the terminal is operating in Voice Mode and is not to be con...

Page 24: ...ing CS call when on Voice Mode only The Phonebook entries can be stored on the SIM card It allows you to view add edit and delete entries on your Phonebook list and to send SMS messages directly from...

Page 25: ...SIM or Terminal d Click on Save Edit a Phonebook record Follow these steps to edit a phonebook record a Select an entry to edit on from the Phonebook b Click on edit button c Update the information on...

Page 26: ...of the entry Send SMS to a Phone Book record Follow these steps to send an SMS to a phonebook record a Select an entry to delete on from the Phonebook b Click on Send SMS button c The Phonebook conso...

Page 27: ...ode Allows you to view VoIP call logs delete entries from the record Call History In Voice Mode Allows you to view call logs delete entries from the record and to send SMS messages directly from the s...

Page 28: ...nd missed VoIP calls Voice Mode Dialed Call To view the list of dialed calls only Received Call To view the list of received calls only Missed Call To view the list of missed calls only All To view th...

Page 29: ...b Click Delete c Click Ok to confirm or click Cancel to abort deleting the entry Refresh Call History display The terminal will periodically update and refresh the call records after a call has ended...

Page 30: ...ode To compose and send text messages Simply enter a mobile number type your message and click Send Composing a New Message Follow these steps to compose a new SMS a Enter the receiver s phone number...

Page 31: ...ers per message using Unicode UCS2 text message such as message typed in Chinese etc If the user does not need to store a copy of the sent SMS into SIM card do uncheck Store a copy in the SIM checkbox...

Page 32: ...Only available in Voice Mode Follow these steps to reply a SMS a Click on a SMS to select it The selected SMS will be highlighted in blue b Click Reply c Click OK to reply with the original contents o...

Page 33: ...gle SMS from the Inbox list a Click on a SMS to select it b Click Delete c Click OK to confirm or click Cancel to abort deleting the SMS Deleting multiple SMS from the Inbox list Follow these steps to...

Page 34: ...ent SMS sending the same SMS to the same receiver a Click on a SMS to select it b Click Resend c The SMS will be sent to the recipient Forwarding a sent SMS Only available in Voice Mode Follow these s...

Page 35: ...to select it a Click Delete b Click OK to confirm or click Cancel to abort deleting the SMS Deleting multiple SMS from the Sent list Follow these steps to delete multiple SMS from the from the Sent l...

Page 36: ...SMS saved from the Compose console Sending a draft SMS Only available in Voice Mode Send and Forward button are not available in Data mode Follow these steps to send a draft SMS a Click on a SMS to se...

Page 37: ...o forward the SMS The SMS will be forwarded to the recipient Deleting a SMS from the Draft list Follow these steps to delete a SMS from the Draft list a Click on a SMS to select it b Click Delete c Cl...

Page 38: ...or deactivate PDP context internet connection Click Activate Default Profile to activate the PDP context APN and the assigned public IP Address details will be displayed and the user can proceed to ac...

Page 39: ...ndard profile is set as the default primary profile and the default connection type is standard this is charged by the VOLUME in kilobytes of data used Profile Name Change the profile name as desired...

Page 40: ...dress and enter the IP Address in the space provided Port Forwarding Port Forwarding is a feature for Router multiple user mode used for directing incoming data traffic to a specific port on a local P...

Page 41: ...estination Port number in the space provided For example listening port of the particular service for example TCP port 80 for web server on the PC that is connected to the terminal f Click Apply to al...

Page 42: ...Atlas IP Terminal User Manual Page 42 of 106 Rules To define rules to allow or reject with selected traffic type packets Allows maximum setting of up to 220 rules...

Page 43: ...gh LAN port and Wi Fi connection Select Enabled to activate the feature Reject List All devices will be allowed to access the terminal except for those MAC addresses listed in the Reject List Allow Li...

Page 44: ...Under Ethernet mode a Router Mode Single User Enable this mode to forward all incoming traffic to a single laptop or desktop based on IP address specified by user b Router Mode Multi User Enable this...

Page 45: ...45 of 106 Settings Menu Click on Settings icon Setting menu provides the following options Language Select the desired language for the Web Console to be displayed English Chinese Simplified Chinese...

Page 46: ...terminal Call Log and Call Data Usage Information Displays information a Software Version b Hardware Version c Modem Version d MCU Version e Model ID f BDU Serial Number g IMEI Number h IMSI Numbers i...

Page 47: ...the call history including the voice call and data sessions Select VOIP under Call Log Type to display the VOIP call session history Select PS under Call Log Type to display the data sessions history...

Page 48: ...lling enquiries Ethernet To change the Terminal IP address and Subnet Mask By default terminal IP address is 192 168 2 1 Note When the IP address of the terminal is different from the default the term...

Page 49: ...ge 49 of 106 When a reserved IP address is selected the terminal shall prompt an error message and the change shall not take effect DHCP To change the DHCP IP Pool Start address and Subnet Mask Wi Fi...

Page 50: ...n the WIFI setting To enable making a change on the WIFI setting change the terminal IP address back to the default value Setup a Select Enabled to turn on the Wi Fi module Go to Wireless Setting to e...

Page 51: ...nd Software Version Wireless Settings a Choose ideal Network Mode and Channel b If required Network Name SSID can be renamed by the user c Choose ideal Channel d Click Update Note Network Name SSID is...

Page 52: ...module a Select the security mode and authentication key Note There are four sets of security passwords available for your security configuration and you can only select one set of password b Under Se...

Page 53: ...by the Service Provider prior to using the VoIP service on the terminal VoIP Setup a By default VoIP is enabled LED should be in Data mode To activate the data connection select DATA Connection then...

Page 54: ...g in IP Data or SMS mode d Key in the desire Frequency in seconds The time interval to update the server e Key in Server Phone Number Voice Mode only f Key in Server IP Address Data Mode only g Key in...

Page 55: ...tlas IP Terminal User Manual Page 55 of 106 l Key in number of Retries when the alert fails to send out due to unexpected error m Key in desired seconds in Resend Frequency and Maximum Number of Tries...

Page 56: ...egrees b Select the desire latitude longitude format c Click Add d Select Trigger Type i In ii Out iii In Out e Select the type of Geo Fence i Circle 1 points radius ii Rectangle 2 points iii Polygon...

Page 57: ...e Service Centre Address has been predefined with SMSC contact number and it can be modified with the required contact number according to the service provider Alternatively click Predefined SMSC Sele...

Page 58: ...106 External Ringer Click Enabled to activate the external ringer or buzzer when there is an incoming call The external ringer s wires are connected to Pin 9 and Pin 10 of the BDU GPIO Output Port De...

Page 59: ...efer to your respective distributor for the latest firmware version to download Warning DO NOT abort the upgrading process or unplug the power of the BDU during the firmware upgrade process at any tim...

Page 60: ...k Reboot to reboot the terminal Refresh the browser to update the Web Console page after reboot Please be informed that firmware upgrading is done at your own risk and the equipment manufacturer will...

Page 61: ...the BDU will be cleared and reset to the default settings System Operation Mode Select either Data for IP data connection or Voice for CS voice mode connection Click Update Settings Warning Setting D...

Page 62: ...he Error Log will display the error code number with its short description as illustrated below Refer to Chapter 9 Error Codes for more information in the remedial actions or solutions Download Log Fi...

Page 63: ...he log files into a single archive file will take several minutes to complete After completing the creation of the log archive file click Download Log Archive and save it as your preferred location Th...

Page 64: ...afe mode before performing firmware upgrade for the built in modem Refer to Chapter 6 for the detailed instruction on the firmware upgrade for built in modem Click Safe Mode and then OK to enter Safe...

Page 65: ...e to be upgrade Choose Modem Firmware Upgrade and click Choose File Browse the file tar before clicking Update Firmware Follow the instructions till the Device Status shows the Modem Upgrade Successfu...

Page 66: ...Atlas IP Terminal User Manual Page 66 of 106 Reboot Terminal Click Reboot for the terminal to restart...

Page 67: ...lick Factory Reset with the security code admin for the terminal to carry out the factory reset The factory reset will clear all the settings and user data of the BDU and reset it to the default setti...

Page 68: ...Atlas IP Terminal User Manual Page 68 of 106 Firewall Click Enabled or Disabled and then Update Logout To log out from the Web Console...

Page 69: ...er press and hold it for at least 4 seconds The Alert Button will then be illuminated to indicate that it is active Additionally the alert icon will be blinking on the Web Console s indicator The pre...

Page 70: ...Atlas IP Terminal User Manual Page 70 of 106...

Page 71: ...ers the following features Making standard CS voice calls Messaging SMS View user contacts Speed dial View Call logs Displaying various BDU status and information Local handset configurations Switch o...

Page 72: ...ds free Headset Jack 4 OK Key 5 4 Way Navigation Ring 6 Select Left Key 7 Select Right Key 8 Call Answer Key 9 Call Menu End Key 10 Keypad Alpha Numeric 11 Mode Key 12 Clear Key 13 Microphone 14 Servi...

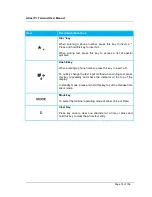
Page 73: ...n the guiding text shown on the display above the key Right selection key The function of this key depends on the guiding text shown on the display above the key Call Answer key After entering a phone...

Page 74: ...When entering a phone number press this key to insert a To quickly change the text input method when writing text press this key repeatedly and check the indicator at the top of the display In standby...

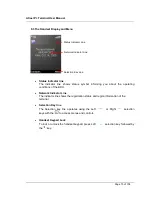
Page 75: ...rk Indicator Line The indicator line shows the registration status and region information of the terminal Selection Key line The Selection key line operates using the Left or Right selection keys with...

Page 76: ...ssfully registered with the network and ready for circuit switched voice connection services Status indicator should be on You can use the following two options for making a call Manual Dial Using the...

Page 77: ...splayed on the screen If the number is stored in the contacts the corresponding name of contact will be displayed To answer an incoming call press the key Adjusting volume during a call Use the 4 way...

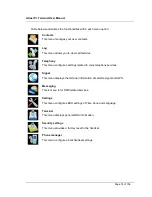
Page 78: ...figures settings related to voice telephony services Signal This menu displays the terminal information of satellite signal and GPS Messaging This is menu is for SMS related services Settings This men...

Page 79: ...mats country code phone number 00 country code phone number ii Press key longer to insert sign iii Saving of contact without number is not allowed d Select Save Left selection key or pressing the key...

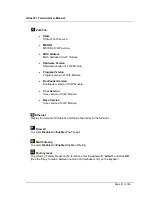
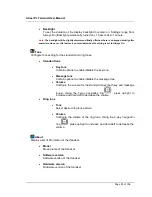
Page 80: ...from the BDU SIM card into the local memory of the Handset Memory Status Select this to view the memory status of the contacts While browsing through the contact list press the key to view the phone n...

Page 81: ...g Menu Missed calls Received calls Dialled calls Call history of the particular category is displayed in chronological order when selected Up to 5 latest entries of each category can be saved The foll...

Page 82: ...an also make a voice call to the number of the selected log entry when browsing through or viewing the call log by pressing the Call key Clear call lists Select this to clear the call log entries Avai...

Page 83: ...n e Select the desired contact to assign to the speed dial list f Press to confirm your selection Delete Remove contact from the selected entry This option is not available for empty entry Note You ca...

Page 84: ...ges from Inbox Drafts and or Sent folders and configure settings related to SMS with the following sub menus New Message Select this to create and send a new message To create new message a Select New...

Page 85: ...e message into the draft folder Clear screen Select this to clear all the written text Append GPS Select this to append GPS into the SMS message Tips for writing the text Press the 0 key to add a spac...

Page 86: ...icates read opened text messages The following are available options when pressing the Left selection key while browsing through or viewing the messages in this folder Open Open selected message You c...

Page 87: ...ss while browsing through the message list to open the selected message This option is not available when viewing the message Delete Delete selected message Note You can also delete the selected messa...

Page 88: ...e number of the selected message into the contact list Note You can also make a voice call to the selected message contact when browsing through the message list by pressing the Call key Options The f...

Page 89: ...ble folder options are All messages Delete messages in all folders including Inbox Sent and Draft Inbox Sent Draft Settings Menu Local Time Zone Change the local time zone of the handset Language Chan...

Page 90: ...version Software version of the BDU Thuraya Module Firmware version of Thuraya Module IMEI number IMEI number of the BDU IMSI number IMSI number of the SIM card Own Number Telephone Number of the SIM...

Page 91: ...loader version of VoIP Module Core Version Core version of VoIP Module Base Version Core version of VoIP Module Ethernet Display the terminal IP Address and the Subnet mask fo the terminal Firewall To...

Page 92: ...ger Menu Display Configure settings that are related to Handset display Wallpaper To select the available wallpaper for the handset background The Security menu provides an option to carry out a facto...

Page 93: ...one Contain options to enable disable the key tone Message tone Contain options to enable disable the message tone Volume Configure the volume for the standard tones both key and message tones Using t...

Page 94: ...Atlas IP Terminal User Manual Page 94 of 106 Copyright Display Copyright message...

Page 95: ...valid APN Ensure that the satellite signal strength is good Ensure that the BDU is set as Data Mode Ensure your SIM card supports PS services Ensure your prepaid credit is not exhausted Unable to acc...

Page 96: ...revent access to the BDU Handset Symptoms Descriptions Remedial Actions No display on handset Check the DC power is supplied into the BDU Check the handset is properly inserted to the HANDSET port Una...

Page 97: ...user name and password have been changed and forgotten follow these steps to get a temporary password from the service provider o Enter admin in User name and leave the password field blank o Click o...

Page 98: ...t the phone line is connected to the phone port of the BDU Hang up and retry the call again Unable to receive incoming call Ensure that the line is not engaged by any other telephony devices Ensure th...

Page 99: ...registered Ensure that the device is provided with ample setup time after a power cycle for initialisation Wait for about 10mins for device registration process to be completed before trying again Ch...

Page 100: ...tenna unit with its label Antenna is only for use with Atlas IP BDU 102 HPA disabled The ADU transmitter is powered off Please restart the BDU 103 HPA thermal alarm The ADU transmitter has overheated...

Page 101: ...problem persists replace the SIM card with a known good SIM card otherwise please return the BDU to your Service Provider for service 203 SIM communication problem Power down the BDU and try again 204...

Page 102: ...ontact your Service Provider 309 GPRS not allowed Verify the correct settings in the web console and contact your Service Provider to activate authorised service 310 Service not allowed Verify the cor...

Page 103: ...re the connection If the problem continues and the new connection cannot be re established please contact your Service Provider 501 LLC or SNDCP failure Network connection failure caused by LLC or SND...

Page 104: ...the correct network settings 509 QOS rejected Network connection failure due to rejected QOS by the network If the problem persists please contact your Service Provider 510 PDP insufficient resources...

Page 105: ...beam Registration is delayed or a handover is in progress Please wait for the terminal to re register within 1 to 3 minutes If the problem persists contact your Service Provider 603 Lack of resources...

Page 106: ...cks Unit DC Direct Current FTP File Transfer Protocol GPS Global Position System GPIO General Purpose Input Output HPA High Power Amplifier IP Data Internet Protocol Data LNA Low Noise Amplifier LLC L...

Reviews: