background image

14

Getting started with TI-Navigator

2.

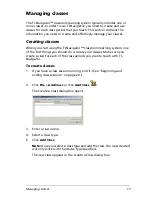
Select 

NavNet

 from the list of applications.

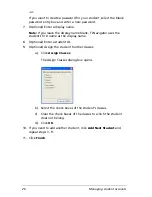
The NavNet screen opens.

Note:

 If you attempt to log in to a class using a calculator other than 

the type of calculator that is being used for the class, you will receive 
an error message. (For example, you cannot log in to a class designed 
for the TI-73 Explorer using a TI-84 Plus Silver Edition.)

3.

Press any key on your calculator.

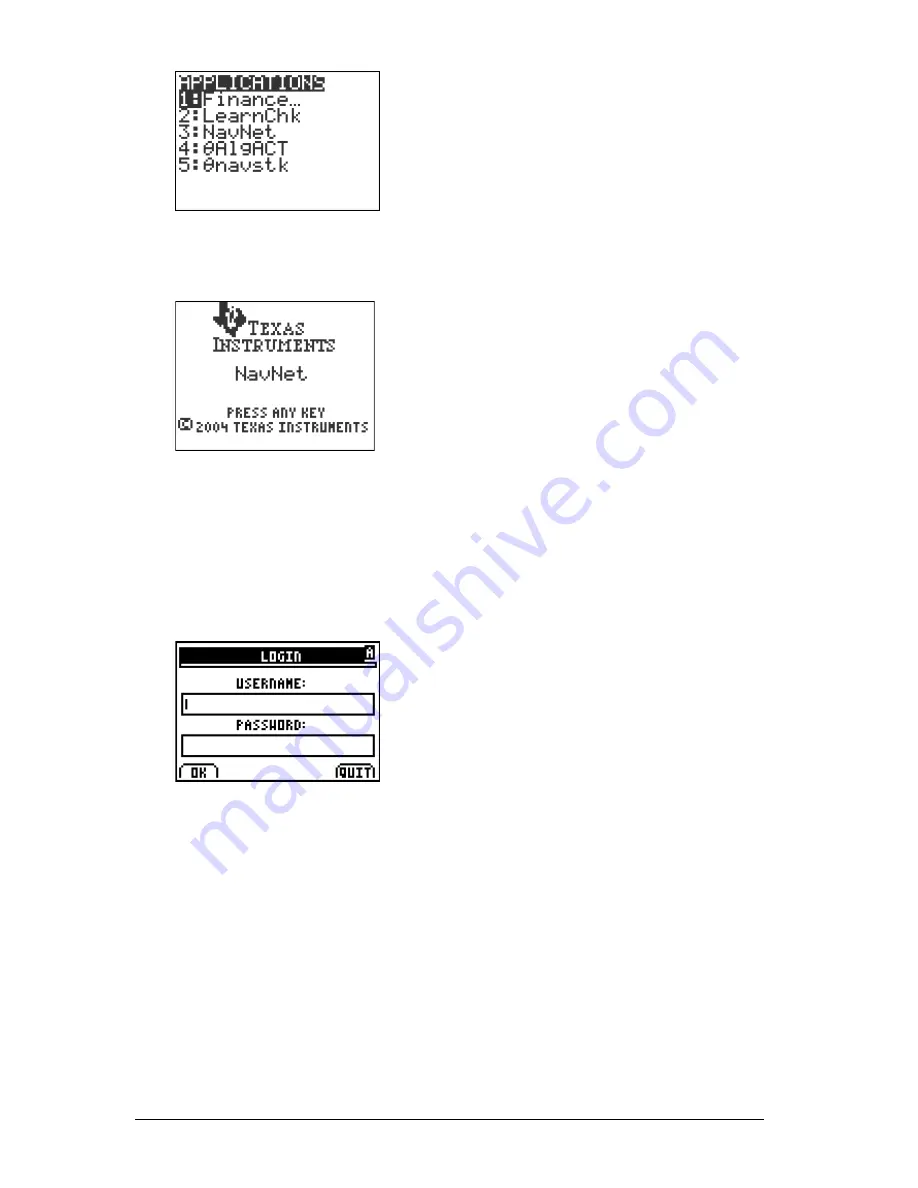
The Login screen opens.

4.

Enter your user name and password.

Note:

 If you do not know your user name or password, ask your 

teacher.

5.

Select 

OK

.

The TI-Navigator Home screen opens. From the TI-Navigator Home 
screen, you can use the TI-Navigator activities, network apps, and 
transfer capabilities.

Summary of Contents for Navigator

Page 1: ...TI Navigator Reference Guide ...

Page 2: ...be liable to anyone for special collateral incidental or consequential damages in connection with or arising out of the purchase or use of these materials and the sole and exclusive liability of Texas Instruments regardless of the form of action shall not exceed the purchase price of this product Moreover Texas Instruments shall not be liable for any claim of any kind whatsoever against the use of...

Page 3: ...nging the class view 20 Removing items from the Class Record 23 Removing classes 24 5 Managing student accounts 25 Adding students to classes 25 Checking student login status 27 Arranging the seating chart 27 Sorting student information 28 Using the Student Portfolio view 29 Resetting student passwords 32 Changing the classes of a student 34 Changing student names and identifiers 36 Moving a stude...

Page 4: ...a 126 Viewing Frequency Plots 128 Showing and hiding activity data 130 Highlighting activity data 134 Sorting activity data 136 8 Polling students 141 The Quick Poll tool window and tabs 141 Opening the Quick Poll tool 143 Polling your students 144 Stopping polls 145 Pausing polls 145 Resuming paused polls 146 Responding to polls student instruction 146 Sending poll results to students 148 Saving ...

Page 5: ...04 Sending a document to a classroom network 206 Troubleshooting LearningCheck Creator 207 11 The Class Analysis Tool 211 Getting started 211 Creating a new class analysis 211 Interrupting file transfers 215 Opening a saved analysis 218 Viewing a slide show of the analysis 225 Glossary of terms used in Class Analysis 246 12 Installing Apps and OS files 249 Opening the App and OS Transfer tool 249 ...

Page 6: ...vi 15 Legal Information 273 Texas Instruments Support and Service 273 TI Navigator 3 x License Agreement 274 TI LearningCheck 3 x License Agreement 286 Privacy Policy 294 ...

Page 7: ... software The TI Navigator computer software contains the tools and options you need to run your wireless classroom network TI Navigator calculator software The TI Navigator calculator software contains the tools you and your students need to exchange information with each other through the TI Navigator network This section provides basic information about TI Navigator including information on bot...

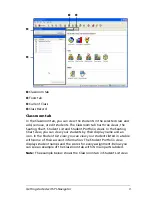
Page 8: ...indicates an error See Troubleshooting on page 255 The TI Navigator computer home screen The TI Navigator computer home screen provides the tools and options you need to run TI Navigator Below you can see an example of the TI Navigator computer home screen with its main parts labeled Following the TI Navigator computer home screen you can find detailed explanations of each labeled part ...

Page 9: ...t List and Student Portfolio views In the Seating Chart view you can view your students by their display name and an icon In the Student List view you can view your students listed in a table with some of their account information The Student Portfolio view displays student names and the scores for every assignment Below you can see an example of the Classroom tab with its main parts labeled Note ...

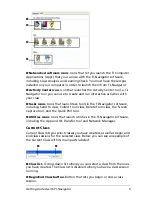
Page 10: ...nt information The Student List view lets you sort students by display name first name last name user name and student ID See Sorting student information on page 28 3 Student Portfolio View Displays students listed in a table with scores associated with each assignment that you have included in the Student Portfolio Ì View selector Lets you toggle between the Seating Chart view and the Student Lis...

Page 11: ...TI Navigator software including Send to class Collect from class Delete from class the Screen Capture tool and the Quick Poll tool Í Utilities icons Icons that launch utilities in the TI Navigator software including the App and OS Transfer tool and Network Manager Current Class Current Class lets you select classes you have created as well as begin and end class sessions for the selected class Bel...

Page 12: ...lculators to your computer File transfers remain current until all students receive the file you stop the transfer or you end the class session Ì Status The progress of an action For example 23 of 25 indicates that 23 out of 25 students have received a file Í Unprompted from Class folder A folder that contains the files students have sent to you that were not part of a collect action Î Current act...

Page 13: ...pp and OS Transfer Lets you install TI Graphing Calculator Applications Apps on your students calculators Class Analysis Lets you collect and analyze answers to assignments as well as use a slide show to review the results with your students Class Analysis is an optional tool If you do not install it then you cannot launch it in TI Navigator LearningCheck Creator Lets you create assignments to run...

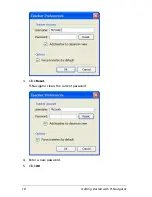
Page 14: ...in the Teacher Preferences section of the TI Navigator classroom learning system Your teacher account lets you log in to the TI Navigator network from your calculator See Logging in to TI Navigator on your calculator on page 12 After you create your teacher account you can later change your password or your user name To create your teacher account 1 If you have a class session running end it See B...

Page 15: ...tions The teacher calculator screen will be included in screen captures of the class 6 Select or deselect the option for transfers to be forced by default If you select this option all file transfers will be forced to student calculators unless you specifically deselect the option for a given file transfer 7 Click OK To change the password of your teacher account 1 Make sure you are not logged in ...

Page 16: ...10 Getting started with TI Navigator 3 Click Reset TI Navigator clears the current password 4 Enter a new password 5 Click OK ...

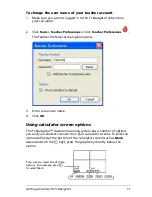
Page 17: ...erences dialog box opens 3 Enter a new user name 4 Click OK Using calculator screen options The TI Navigator classroom learning system has a number of options you and your students can use from your calculator screens To select an option defined at the bottom of the calculator screen such as Mark associated with the o key press the graph key directly below the option Press a key to select one of t...

Page 18: ...from your calculator during the TI Navigator class session then you must also log in to the TI Navigator network from your calculator Before you log in Create your teacher account in Teacher Preferences See Creating and managing your teacher account on page 8 To log in to the TI Navigator network 1 If you have not already done so begin the class session on your computer See Beginning and ending cl...

Page 19: ...e TI Navigator network In order for you and your students to communicate using this network your students must log in to the network from their calculators Below you can find instructions you can use to tell your students how to log in to the TI Navigator network Before your students log in Create your students accounts See Adding students to classes on page 25 Provide your students with their use...

Page 20: ...ive an error message For example you cannot log in to a class designed for the TI 73 Explorer using a TI 84 Plus Silver Edition 3 Press any key on your calculator The Login screen opens 4 Enter your user name and password Note If you do not know your user name or password ask your teacher 5 Select OK The TI Navigator Home screen opens From the TI Navigator Home screen you can use the TI Navigator ...

Page 21: ...lator using your teacher account your calculator has additional options Ê Task menu Contains a list of the tasks you and your students can perform on your calculators The task menu on your teacher calculator contains a Quick Poll task not shown in this picture Ë User name The name of the student logged in to the TI Navigator network Ì Task bar Contains the Quit option To select the Quit option you...

Page 22: ...o the TI Navigator network Quick Poll Lets you send polls to your students from your calculator This option is only available on your the teacher s calculator Transfers Lets you and your students exchange files with each other To launch TI Navigator calculator tools 1 If you have not already done so begin the class session See Beginning and ending class sessions on page 20 2 Log in to your calcula...

Page 23: ... system one of the first things you should do is create your classes Make sure you create a class for each of the class periods you plan to teach with TI Navigator To create classes 1 If you have a class session running end it See Beginning and ending class sessions on page 20 2 Click File Add Class or click Add Class The Create a Class dialog box opens 3 Enter a class name 4 Select a class type 5...

Page 24: ...ect the file that contains the students you want to import Note The file can be a CSV file or comma tab delimited text file d Click Open The Import Status dialog box opens telling you how many students TI Navigator successfully imported e Optional If some students did not import successfully click View Details to determine the problem ...

Page 25: ...ning system To view or start a class you must select it from a list of the classes in the Current Class section of the TI Navigator computer home screen To select a class 1 If you have a class session running end it See Beginning and ending class sessions on page 20 2 Click File Select Class A list of classes opens 3 Click the class you want TI Navigator displays the information for the selected c...

Page 26: ...rent Class drop down list select the class you want to begin 3 Click File Begin Class or click Begin Class To end class sessions f Click File End Class or click End Class Changing the class view In the Classroom tab you can view the selected class in either the Student List view or the Seating Chart view The Student List view shows your students in a table that contains their display names first n...

Page 27: ...the Classroom tab click View Student List The Classroom tab changes the class view to Student List To change the class view to Seating Chart 1 Click the Classroom tab The Classroom tab opens Note The contents of the Classroom tab vary depending on the selected class and view ...

Page 28: ...e Classroom tab click View Seating Chart The Classroom tab changes the class view to Seating Chart To change the class view to Student Portfolio 1 Click the Classroom tab The Classroom tab opens Note The contents of the Classroom tab vary depending on the selected class and view ...

Page 29: ...lass Record The Class Record maintains a list of all of the actions you have performed in your class See Class Record on page 6 Items remain in this list until you remove the items or you remove the class You can remove items from the Class Record at any time To remove items from the Class Record 1 In the Class Record click the item you want to remove TI Navigator highlights the selected item in t...

Page 30: ...class from the software and removes the file on the hard drive that correspond to that class If you have students who are not part of any other classes the software removes those students from the software as well Note You cannot undo the removal of a class To remove classes 1 If you have a class session running end it See Beginning and ending class sessions on page 20 2 From the Current Class dro...

Page 31: ...to add students once you create a class You can also add students when you create a class by importing them See Creating classes on page 17 To add students to classes 1 Select the class to which you want to add the students See Selecting a class on page 19 Note If you have a class session running you must end it to select the class See Beginning and ending class sessions on page 20 2 Click Class A...

Page 32: ...ator uses the student s first name as the display name 8 Optional Enter a student ID 9 Optional Assign the student to other classes a Click Assign Classes The Assign Classes dialog box opens b Select the check boxes of the student s classes c Clear the check boxes of the classes to which the student does not belong d Click OK 10 If you need to add another student click Add Next Student and repeat ...

Page 33: ...gator action until they open the NavNet App again Arranging the seating chart Initially the Classroom tab arranges the students in the Seating Chart view in the order that you added them However you can rearrange the students so that they have the same seating arrangement in the Classroom tab as they do in your actual classroom You can rearrange the seating chart at any time To arrange students in...

Page 34: ...ames first names last names user names and student IDs In the Student List view you can sort your students information by each of these categories The TI Navigator classroom learning system sorts the information alphabetically from A Z or Z A and numerically from 1 9 or 9 1 You can sort student information at any time To sort student information 1 Select the class that contains the student informa...

Page 35: ...s with the scores they have received for each assignment included in the Student Portfolio The class average for each assignment displays on the top line of the portfolio To view the Student Portfolio 1 Select the class that contains the student portfolio you want to view See Selecting a class on page 19 Note If you have a class session running you must end it to select the class See Beginning and...

Page 36: ...want to sort the selected information in the opposite order click the column title again To add a student to the portfolio view 1 Click to add a student to the portfolio view The student properties dialog box displays 2 Complete the student information and click OK The student is added to the portfolio view To add or remove students from the portfolio view 1 Click to select the name of the student...

Page 37: ...the caf file To include an assignment in the Student Portfolio 1 Locate the Class Analysis caf file that includes the assignment you want to display in the Student Portfolio view 2 Copy or save the caf file to the Student Portfolio directory for the class To view the location of the Student Portfolio files 1 Select Class Properties The Class Properties dialog box displays the location of the Stude...

Page 38: ...s passwords You can reset passwords for all of the students in a class or for individual students Note You cannot reset the passwords of students who are currently logged in to the TI Navigator network To reset passwords for all students in a class 1 Select the students class See Selecting a class on page 19 Note If you have a class session running you must end it to select the class See Beginning...

Page 39: ...nt to reset See Selecting a class on page 19 Note If you have a class session running you must end it to select the class See Beginning and ending class sessions on page 20 2 Click the Classroom tab The Classroom tab opens Note The contents of the Classroom tab vary depending on the selected class and view 3 Click the student you want to edit 4 Click Class Edit Student or click Edit Student The St...

Page 40: ...a password for the student tell the student the new password Changing the classes of a student Occasionally your students may move to a different class or they may take more than one of your classes The TI Navigator classroom learning system lets you change your students classes when necessary Note You cannot change the classes of students who are logged in to the TI Navigator network To change a ...

Page 41: ...om tab vary depending on the selected class and view 3 Click the student you want to edit 4 Click Class Edit Student or click Edit Student The Student Properties dialog box opens 5 Click Assign Classes The Assign Classes dialog box opens 6 Select the check boxes of the student s classes ...

Page 42: ...Last name User name Display name Student ID This section covers how to change any of these types of names and identifiers Note You cannot change the account information of students who are logged in to the TI Navigator network To change a student s names or identifiers 1 Select a class to which the student belongs See Selecting a class on page 19 Note If you have a class session running you must e...

Page 43: ...avigator classroom learning system as well Note You cannot move students who are logged in to the TI Navigator network To move a student 1 Select a class to which the student belongs See Selecting a class on page 19 Note If you have a class session running you must end it to select the class See Beginning and ending class sessions on page 20 2 Click the student you want to move 3 Click Edit Cut or...

Page 44: ...ect the class See Beginning and ending class sessions on page 20 2 Click the student you want to copy 3 Click Edit Copy or click Copy The TI Navigator classroom learning system copies the student onto the Clipboard 4 From the Current Class drop down list select the class to which you want to copy the student 5 Click Edit Paste or click Paste The TI Navigator software copies the student to the sele...

Page 45: ... the class See Beginning and ending class sessions on page 20 2 Click the Classroom tab The Classroom tab opens Note The contents of the Classroom tab vary depending on the selected class and view 3 Click the student you want to remove 4 Click Class Remove Student or click Remove Student The TI Navigator software asks if you are sure you want to remove the student 5 Click Yes The TI Navigator soft...

Page 46: ...40 Managing student accounts ...

Page 47: ... two choices that are not available when you send from your calculator You can Send files to your whole class members of the class currently logged in or to individual students Send files forced or unforced If you send files unforced students must receive the files from the transfers screen If you force send the files the students calculators receive the files immediately All the files you collect...

Page 48: ...s 4 At the bottom of the dialog box click the area of calculator memory where you want the TI Navigator software to send the file 5 Click OK To send files from your computer 1 If you have not already done so begin the class session See Beginning and ending class sessions on page 20 2 Click Tools Send to class or click Send to class ...

Page 49: ...the file you want to send and click it Note You can also drag and drop files from a Windows Explorer window onto the Navigator window to send files 4 Click Next The Select student s dialog box opens 5 Select the student s to whom you want to send the file To send the file to the whole class click Class To send the file only to class members who are currently logged in check the Logged in Students ...

Page 50: ...gator software transfers the file upon log in If you sent the files unforced students can receive the file from the transfer screen after they log in to their calculators See Receiving files student instruction on page 50 The file transfer appears in the Class Record Once students receive the file they can open it on their calculators To send files from your calculator 1 If you have not already do...

Page 51: ...Note The Send Var Selection screen varies depending on the option you choose and the files on your calculator 6 Navigate to the file you want to send and press Enter A check mark appears next to the file 7 Repeat step 6 for each file you want to send 8 Select Send The Transfers Complete screen opens after the TI Navigator software sends the file s to the calculators of all of the students in your ...

Page 52: ...time during a class session Below you can find instructions you can use to tell your students how to send files during a collection and how to send files unprompted Student Point of View The steps below are from the student s point of view To send files during collections 1 If you have not already done so log in to the TI Navigator network See Logging in to TI Navigator student instruction on page...

Page 53: ...device type 4 Navigate to the file type you want to send and press Enter The Send Var Selection screen opens Note The contents of the Send Var Selection screen vary depending on the option you choose and the files on your calculator 5 Navigate to the file you want to send and press Enter A check mark appears next to the file 6 Repeat step 5 for each file you want to send 7 Select SEND ...

Page 54: ...he files from their transfers screen When you force collect files the students calculators send the files immediately You also have the option of deleting the collected files from your students calculators To collect files 1 If you have not already done so begin the class session See Beginning and ending class sessions on page 20 2 Click Tools Collect from class or click Collect from class The Sel...

Page 55: ...m whom you want to collect the file To collect the file from the whole class click Class To collect the file from an individual student click Students and then click the student Note If you had any students selected in the Classroom tab the TI Navigator software already has them selected 6 If you want to force collect the file select Force collect from students now 7 If you want to remove the file...

Page 56: ...collect the file unforced students can send you the file from the transfer screen after they log in to their calculators See Sending files student instruction on page 46 The file transfer appears in the Class Record Receiving files student instruction If you do not force send files to your students then they must manually receive the files on their calculators Below you can find instructions you c...

Page 57: ... When necessary you can delete files from your students calculators You can have a forced or unforced file deletion If your file deletion is unforced students must delete the files from their Transfers screen using Auto Send Recv If you force delete the files the software immediately deletes the files from your students calculators To delete files from calculators 1 If you have not already done so...

Page 58: ...ox navigate to the file you want to collect and click it or If you want delete a custom file not in the dialog box a Click CUSTOM The options for custom files open b Enter the file name c From the drop down list select the file type d Click Add 4 Click Next The Select student s dialog box opens ...

Page 59: ...d 6 If you want to force delete the file click Force delete from students now 7 Click Finish If you force deleted the file the TI Navigator classroom learning system deletes the file from your students calculators If you deleted the file unforced students can delete the file from the transfer screen Auto Send Recv after they log in to their calculators The file deletion appears in the Class Record...

Page 60: ... indicates that a student received the collect or delete action but they do not have the file on their calculator A red background indicates that students have not yet sent received deleted the file Note You can also see the file transfer status in the file s Properties dialog box See Viewing file properties on page 56 Canceling file transfers If you change your mind about a file transfer you can ...

Page 61: ...s files that you have sent to your class To find transferred files 1 In the Class Record click the file you want to open 2 Click Edit Open Location A Windows Explorer dialog box opens to the location of the file Changing the unprompted file location By default the TI Navigator classroom learning system stores unprompted files in My Documents My TI Navigator Class Name Collect You can change the de...

Page 62: ...unprompted files to the one you have selected Viewing file properties Each file that you send or collect has a set of properties that you can view These properties include the file s name size date sent and status You can view the file properties at any time To view file properties in TI Navigator 1 Select the class with the file in its the Class Record See Selecting a class on page 19 Note If you...

Page 63: ...Exchanging files with students 57 3 Click Edit Record Item Properties or click Record Item Properties The Properties dialog box opens displaying the file s properties ...

Page 64: ...58 Exchanging files with students ...

Page 65: ...Center tool You can run all of your activities in the Activity Center tool The Activity Center tool lets you set up and use interactive activities with your students during your lessons Below you can find some basic information on the Activity Center tool including The Activity Center tool window and tabs Opening the Activity Center tool Closing the Activity Center tool The Activity Center tool wi...

Page 66: ...Poll tool from the Activity Center tool Ì Window controls Controls that let you alter the Activity Center tool window Í Graph controls Controls that let you set the graph window properties including axes axis labels grid lines point selection pan and zoom Í Activity data tabs Tabs that provide different views of Activity Center tool data including graphical symbolic equation and numeric list views...

Page 67: ...button that opens the Create New Lists dialog box where you can create new lists Ë Data entry fields Fields where you can enter list or point data for the data set Use the and buttons to enter fractions Ì Data set table Table that shows data sets of lists or points Ë Ê Ì ...

Page 68: ...t configuration button Button that opens the Plot configuration window where you can configure plots for the data sets Í Data set list Drop down list where you can select the data set you want to display Î Plot controls Controls that let you select plots and turn plots on or off Ï Data set table Table that shows data sets of lists or points Ð Point controls Controls that let you show or hide point...

Page 69: ...ou set the graph window properties including axes axis labels grid lines point selection pan and zoom Ë Graph window panning control Control that lets you pan the graph window There are four controls in the List Graph tab that let you pan the graph window up down right and left Ê Ë ...

Page 70: ...ntrol that lets you pan the graph window There are four controls in the Graph Equation tab that let you pan the graph window up down right and left Ì Equation gallery The list of equations shown with their color and the display name of their creator Í Equation entry field Field where you can enter new equations Use the and buttons to enter fractions Î Equation controls Controls that let you show o...

Page 71: ...s Ë Table of values Table where you can find the Y values of selected equations Ì Equation gallery The list of equations shown with their color and the display name of their creator Í Equation controls Controls that let you show or hide equations Î What if table Table where you can find the Y value of up to three X values of your choice Ì Í Ê Ë Î ...

Page 72: ...udent inputs Points and vectors submitted by students display here Ì Number line Specify the min and max vaules using the entry field at either endpoint Í Step Size When the step size is in fraction form the cursor value of the guide will display in fraction form Î Student answers Displays the vectors and or answers supplied by students Ï Show Hide buttons Click a student s name and click show or ...

Page 73: ...splay mode Í Display mode Determines how the number line and student response table display student responses Specify Decimal Fraction or Percentage Î Show Hide buttons Click a student s name and click show or hide to determine whether or not that student s answers display on the screen Opening the Activity Center tool You can open the Activity Center tool from the home screen of the TI Navigator ...

Page 74: ...contribute three kinds of mathematical data including points equations and lists You must configure the options for each of these types of data before you collect the data from your students This section provides information on Configuring equation options for activities Configuring point options for activities Configuring list options for activities Configuring form options for activities Configu...

Page 75: ...ntribute drop down list select Equations 3 Click Configure The Configure Calculators for Activity dialog box opens 4 Select or enter the number of equations you want each of your students to send Note The maximum number of equations is limited to four for TI 73 classes 5 Select or clear the Let students view graphs of equations check box Note If you select this option students can view graphs of t...

Page 76: ...raph window settings you should also set up the graph window settings before you start the activity When you start the activity the Activity Center tool sends the graph window settings to your students calculators See Changing the graph window settings on page 82 Configuring point options for activities Before you collect points from your students you need to configure the point options for the ac...

Page 77: ...6 Select or enter the name for the Y list 7 Select or clear the Display coordinates check box Note If you select this option students can view the coordinate points of their cursor at the bottom of their calculator screens 8 Select or clear the Let students resubmit points check box Note If you select this option students can change and resend their points ...

Page 78: ... 82 Configuring list options for activities Before you collect lists from your students you need to configure the list options for the activity When you configure the list options you can configure them for data sets or for independent lists Configuring the list options for data sets lets you plot the data while configuring the list options for independent lists does not Below you can find instruc...

Page 79: ...ndent lists 4 Optional Click Create New Lists and create new lists See Creating lists on page 97 5 Select Choose from Data Sets 6 From the data set drop down list select the data set where you want to add the collected data 7 Optional Configure the plots a Click Configure Plots The Plot Options dialog box opens b Next to the plot symbol that you want select the lists for your X and Y values ...

Page 80: ...you start the activity the Activity Center tool sends the graph window settings to your students calculators See Changing the graph window settings on page 82 To configure list options for independent lists 1 If you have an activity running stop it See Stopping an activity on page 96 2 In the Contribute drop down list select Lists 3 Click Configure The Configure Calculators for Activity dialog box...

Page 81: ...te If you select this option students can change and resend their lists 9 Select the lists containing the source data with which you want your students to start 10 Click OK Note If you want your students to have specific graph window settings you should also set up the graph window settings before you start the activity When you start the activity the Activity Center tool sends the graph window se...

Page 82: ...s click inside the text field and enter the input names and destination list names for the form 7 Select whether students submit data all at once or one at a time If you select All at once nothing will be submitted until a student has completed all of the data sets If you select One at a time each page of data data set will be sent when the student completes it Configuring number line options for ...

Page 83: ... not students will be allowed to resubmit marks 7 Check whether or not students will be allowed to view the cursor location value 8 Select whether student marks will submit number line vectors or points on the number line 9 Click OK to continue Configuring visual estimation options for activities 1 If you have an activity running stop it See Stopping an activity on page 96 2 In the Contribute drop...

Page 84: ...filling a glass except in the case of the Shaded Circle where the studen will shade the circle in a clockwise motion starting at the top center Divided Rectangle Divided Circle The Divided Rectangle allows you to specify the number of divisions by defining the height and width for the rectangle The width can be any number of squares between 1and 23 The height can be any number of squares between 1...

Page 85: ...anges Turning graph window attributes on and off Creating axis labels Zooming in and out on the graph window Zooming to fit data sets Zoom Stat Making the grid of the graph window square Zoom Square Panning the graph window Changing the graphing pen color and width for equations Changing the appearance of students cursors Adding and removing background images for the graph window Changing the grap...

Page 86: ...anges The X and Y graph limits control the range of X and Y values that the graph window shows You can change the X and Y graph window ranges as necessary Notes By default the X and Y graph window ranges are X Min 10 X Max 10 Y Min 10 Y Max 10 The X and Y graph window ranges are sent to your students calculators when you start activities To change X and Y graph window ranges 1 Click Edit Edit Wind...

Page 87: ...tool applies the new X and Y graph window ranges to the graph Turning graph window attributes on and off If you want to you can turn different attributes of the graph window on and off You can turn on and off the axes grid coordinates and axis labels Notes By default the axes and coordinates are turned on while the grid and axis labels are turned off The axis labels are sent to your students calcu...

Page 88: ... check box the Activity Center tool turns the axes on If you cleared the Axes check box the Activity Center tool turns the axes off To turn the grid on or off 1 Click Edit Edit Window Settings or click Edit Window Settings The Window Settings dialog box opens 2 Select or clear the Grid check box 3 Click OK ...

Page 89: ...indow Settings or click Edit Window Settings The Window Settings dialog box opens 2 Select or clear the Coords check box 3 Click OK If you selected the Coords check box the Activity Center tool turns the coordinates on If you cleared the Coords check box the Activity Center tool turns the coordinates off To turn the axis labels on or off 1 Click Edit Edit Window Settings or click Edit Window Setti...

Page 90: ...leared the Axis Labels check box the Activity Center tool turns the axis labels off Creating axis labels By default the X and Y axes in your graph window do not have labels If you need labels for your graph window you can create them in the Window Settings dialog box To create axis labels 1 Click Edit Edit Window Settings or click Edit Window Settings The Window Settings dialog box opens ...

Page 91: ...can also zoom to fit data plots Zoom Stat or to make the grid appear square Zoom Square See Zooming to fit data sets Zoom Stat on page 85 and See Making the grid of the graph window square Zoom Square on page 86 To zoom in on the graph window f Click View Zoom In or click Zoom In To zoom out on the graph window f Click View Zoom Out or click Zoom Out To zoom to the standard window settings f Click...

Page 92: ...area The cursor becomes a magnifying glass to indicate that you are in zoom mode 3 Click and hold at any point in the graph control area Move the cursor up to zoom in Move the cursor down to zoom out 4 Press and hold the Ctrl key to unlink the axes Move the cursor left or right to zoom the X axis Move the cursor up or down to zoom the Y axis Panning the graph window If you want to view locations o...

Page 93: ...er the graph area The cursor becomes a hand 3 Click and hold a point in the graph window Drag the cursor to a new location The screen updates as you pan the graph Changing the graphing pen color and width for equations When you use the graph window as part of your lesson you may want to emphasize certain equations that appear in that space In the Activity Center tool you have the option of changin...

Page 94: ...he Pen Color color palette click the color you want 4 Click OK To change the graphing pen width 1 Click the Graph Equation tab or the Equation tab The selected tab opens 2 In the equation gallery click the white colored box next to the graphed equation s name The Graphing Pen Attributes dialog box opens 3 From the Pen Width drop down list select the width you want 4 Click OK ...

Page 95: ...k View Individualize Student Cursors Adding and removing background images for the graph window The Activity Center tool lets you add a background image to the graph window If you decide you do not want the background image you can remove it at any time To add a background image to the graph window 1 Click File Load Load Background Image The Load Background Image dialog box opens 2 Navigate to the...

Page 96: ...ng activity settings Loading activity settings Saving activity settings When you save activity settings the Activity Center tool saves all of the activity data configurations and window settings Saving your activities settings can help in lesson planning letting you set up the Activity Center tool for your classes before they begin To save activity settings 1 Configure the activity options See Con...

Page 97: ...n The Activity Center tool loads the activity settings Note The maximum number of equations that a student can contribute is limited to four for TI 73 classes If you save activity settings from a TI 83 classroom with Contribute Equations set to more than four equations and then load those saved settings into a TI 73 class you will receive the alert below Starting and managing activities You can us...

Page 98: ...r students 3 Click File Start Activity or click Start Activity To instruct students on joining activities Once you start an activity in the Activity Center tool your students can join the activity from their calculators You can use the following instructions to instruct your students on how to join an activity you have started Note As the teacher you can also use the steps below to join the activi...

Page 99: ...esume Activity The activity resumes The Activity Paused message no longer appears on your students calculators Students can again contribute data to the Activity Center tool Stopping an activity You can stop an activity at any time When you stop an activity the Activity Center tool considers the activity complete and you cannot resume it without starting the activity over again If you plan to resu...

Page 100: ... your students you can also use these instructions yourself to create lists of class points from your calculator Entering fractions in Activity Center The and keys have the same function in Activity Center as they do on the TI 73 Explorer The key is pressed between the unit and the fraction The key is pressed between the numerator and the denominator For example the number 5 1 2 is entered by typi...

Page 101: ...d to any other defined lists 4 Select the number of lists you want to create 5 Select the names of the lists 6 Click OK 7 Optional Add data to the list or collect data from your students using the Contribute Lists activity Adding data to existing lists The Activity Center tool stores lists under the List tab and the List Graph tab Under the List tab you can add data directly to existing lists when...

Page 102: ...all lists must have the same dimensions Because of this you must add new data in complete rows 4 Click Add The Activity Center tool adds the data to the list Creating points The Activity Center tool displays the coordinates of points as paired lists under the List tab and the List Graph tab To create points you must add coordinates to these paired lists You can do this under the List tab To create...

Page 103: ...data set Entering fractions in lists When editing lists you can enter fractions using the keyboard in addition to using the and keys The mixed fraction 5 1 4 for instance would be entered by typing 5 space 1 4 Creating Y and X equations You can create equations under either the Graph Equation tab or Equation tab The Activity Center tool lets you create both Y equations and X equations Note To crea...

Page 104: ... not enter any spaces 3 Click Enter The equation appears in the equation gallery If you are under the Graph Equation tab the Activity Center tool also plots the graph of the equation To create X equations 1 Click the Graph Equation tab The Graph Equation tab opens 2 If the X Entry field is not showing click View Show X Entry The X Entry field appears in the Equation Entry field ...

Page 105: ...cuss the submitted points with your class On their calculators your students can request the entire collection of the points submitted by the class and store this data in a pair of lists You can use this section to instruct your students on how to request and store lists of the class s points Student Point of View The steps below are from the student s point of view To create lists of class points...

Page 106: ...option of resubmitting points You can update the list of class points by selecting Get Creating tables of values for an equation In the Activity Center tool s window you can create lists of coordinate pairs under the Equation tab In the Table of Values you can list the Y values for X values within the current range of the graph window In the What if table you can list the Y value for any X value T...

Page 107: ...these equations appear in the rows of the corresponding X values 4 If necessary scroll to see more of the X and Y values To populate the What if table 1 Click the Equation tab The Equation tab opens 2 If necessary create additional equation s See Creating Y and X equations on page 97 3 From the Table of Values drop down lists select the equation s whose values you want to list ...

Page 108: ...ivity data student instruction Once you configure and start an activity your students can join the activity from their calculators and participate by contributing data equations lists and points See Starting an activity on page 95 You can use this section to instruct your students on how to contribute activity data from their calculators including Contributing equations student instruction Contrib...

Page 109: ...ns You can use this section to instruct your students on how to send the equations from their calculators Student Point of View The following instructions are from the student s point of view To contribute equations 1 Join the activity from your calculator See Starting an activity on page 95 The Contribute Equations activity screen opens on your calculator Note The contents of the Contribute Equat...

Page 110: ...s activity on their calculators and contribute the requested points Depending on how you have configured the activity your students can send you points one at a time or all at once You can use this section to instruct your students on how to send the points from their calculators Student Point of View The steps below are from the student s point of view To contribute points one at a time 1 Join th...

Page 111: ... screen At the same time the point appears in the Activity Center tool on your teacher s computer Note The appearance of the points in the Activity Center tool varies depending on which tab your teacher has selected 4 Repeat steps 2 3 for each point your teacher has asked you to submit 5 Optional If you have a resubmit option select New and repeat steps 2 4 ...

Page 112: ...tivity screen opens on your calculator 2 Use the arrow keys to move your cursor to the point you want to submit 3 Select Mark A point appears on your calculator s screen 4 Repeat steps 2 3 for each point your teacher has asked you to submit 5 Select Send Your points appear in the Activity Center tool on your teacher s computer Note The appearance of the points in the Activity Center tool varies de...

Page 113: ...start the Contribute Lists activity your students can join the Contribute Lists activity on their calculators and contribute the requested lists You can use this section to instruct your students on how to contribute the lists from their calculators Student Point of View The following instructions are from the student s point of view To contribute lists 1 Join the activity from your calculator See...

Page 114: ...ay already be data in the lists sent down from your teacher or pulled from data already on your calculator 3 Select Send Your lists appear in the Activity Center tool on your teacher s computer Note The appearance of the lists in the Activity Center tool varies depending on which tab your teacher has selected 4 Optional If you have a resubmit option select New and repeat steps 2 3 The Activity Cen...

Page 115: ...ntribute forms 1 Join the activity from your calculator See Starting an activity on page 95 The Contribute Forms activity screen opens on your calculator Note The contents of the Contribute Forms activity screen vary depending on how your teacher has configured the activity 2 Enter your form data Note There may already be data in the forms sent down from your teacher or pulled from data already on...

Page 116: ...umber lines from their calculators Student Point of View The following instructions are from the student s point of view To contribute number lines 1 Join the activity from your calculator See Starting an activity on page 95 The Contribute Number Lines activity screen opens on your calculator Depending on how your teacher has designed the exercise you can contribute mark points or vectors input a ...

Page 117: ...er line settings if necessary 6 Select OK to accept the changes 7 When you have completed your inputs Select Send Your number line data appears in the Activity Center tool on your teacher s computer Note The appearance of the number lines in the Activity Center tool varies depending on the settings your teacher has chosen 8 Optional If you have a resubmit option select Edit and repeat steps 2 3 ...

Page 118: ...ators Student Point of View The following instructions are from the student s point of view To contribute Visual Fractions 1 Join the activity from your calculator See Starting an activity on page 95 The Contribute Number Lines activity screen opens on your calculator 2 Depending on the shape that displays select Row and Col or use the up and down arrow keys to shade the shape as instructed 3 When...

Page 119: ...s student instruction Plotting the class s points student instruction Plotting lists student instruction Note Although the plotting sections provide instructions for your students you can also use these instructions yourself to plot activity data on your calculator Configuring plots Once you gather all of the necessary activity data you can choose how you want the activity data to display in the A...

Page 120: ...Configuring list options for activities on page 75 To configure plots 1 Click the List Graph tab The List Graph tab opens 2 Click Configure Plots The Plot Options dialog box opens 3 From the drop down list select the data set you want to use to create plots 4 Next to the plot symbol that you want select the lists for your X and Y values ...

Page 121: ...e plots for your activity data you can switch from one plot to the another To select plots 1 Click the List Graph tab The List Graph tab opens 2 From the Data Set drop down list select the data set containing the plots you want 3 Click Next or Previous until you find the plot you want The plot appears in the graph Note The plot does not appear in the graph if it is turned off You must turn it on f...

Page 122: ...List Graph tab The List Graph tab opens 2 Select the plot you want to turn on or off See Selecting plots on page 115 3 Select or clear the On check box If you select the On check box the Activity Center tool displays the plot in the graph If you clear the On check box the Activity Center tool removes the plot from the graph Plotting equations student instruction Depending on how you set up the Con...

Page 123: ...elect Plot A graph of your equation s opens Plotting the class s points student instruction After your students contribute their points you may want to discuss the submitted points with your class On their calculators your students can plot the points submitted by the entire class You can use this section to instruct your students on how to plot the class s points Student Point of View The steps b...

Page 124: ...g lists student instruction After your students contribute their lists they may want to view their lists plotted in a graph The plot types available to students on their calculator depends on what type of list data you are collecting from them Students can plot both data sets and independent lists You can use this section to instruct your students on how to plot either data sets or independent lis...

Page 125: ... Plot screen opens 4 Use the arrow keys to navigate to the plot you want 5 Select Draw A graph of the selected plot opens Note The contents of the graph vary depending on the data you entered To plot independent lists 1 Join the activity on your calculator See Starting an activity on page 95 The Contribute Lists activity screen opens Note The contents of the Contribute Lists activity screen vary d...

Page 126: ...can edit the data as necessary This section covers information on editing activity data in the Activity Center tool s window including Editing points Editing equations Editing lists Editing points The Activity Center tool stores points in data sets of paired lists To edit the points you must edit them in their data sets under the List tab or the List Graph tab To edit points 1 Click the List tab o...

Page 127: ...anges as well Editing lists After you create or receive lists from your class you may want to edit them You can edit lists under the List tab and the List Graph tab To edit lists 1 Click the List tab or the List Graph tab The selected tab opens 2 In the list table click the cell containing the list data you want to edit 3 Enter the new list data 4 Press Enter Saving and loading activity data After...

Page 128: ...ave them in independent lists To save lists 1 Move your cursor over the list s name until a hand appears Note The cursor must be a hand and not an arrow If the cursor is an arrow instead of a hand the Activity Center tool sorts the data instead of selecting it 2 Click the list s name The entire list is selected 3 Click File Save Save Selected Lists The Select Save Data dialog box opens 4 Select th...

Page 129: ... list files you have on your computer Loading lists is especially helpful if you want your students to start with existing lists in the Contribute Lists activity Note When you load lists the Activity Center tool considers the all of the data as teacher created data regardless of who created it or how it was created To load lists 1 Click File Load Load Lists The Select Files dialog box opens ...

Page 130: ...ing all activity data at once Deleting points The Activity Center tool displays points in data sets To delete points you must delete them from their data sets under the List tab or the List Graph tab To delete points 1 Click the List tab or the List Graph tab The selected tab opens 2 Click the data row corresponding to the point you want to delete 3 Click Edit Delete The Activity Center tool asks ...

Page 131: ...in the data set because the list data in the rows is correlated for plotting To delete list data 1 Click the List tab or the List Graph tab The selected tab opens 2 Click the list data row you want to delete 3 Click Edit Delete The Activity Center tool asks if you are sure you want to delete the selection 4 Click Yes The Activity Center tool deletes the list data row Deleting all activity data at ...

Page 132: ...iew points under the List Graph tab 1 Collect or create the necessary data 2 Click the List Graph tab The tab opens displaying a list and a graph of the points Note If the points do not appear you may need to configure the plot or turn on the plot See Configuring plots on page 116 or See Turning plots on and off on page 119 To view points under the Graph tab 1 Collect or create the necessary data ...

Page 133: ... view equations under the Equation tab 1 Collect or create the necessary data 2 Click the Equation tab The tab opens displaying the current equations and their coordinate pairs Viewing lists You can view lists under the List tab or the List Graph tab To view lists under the List tab 1 Collect or create the necessary data 2 Click the List tab The tab opens displaying the current lists To view lists...

Page 134: ...the current equations Viewing Frequency Plots The Activity Center tool displays lists submitted by students as columns of data under the List tab and the List Graph tab You can also choose to view this data in the form of a Frequency Plot To view list data as a frequency plot 1 Collect or create the necessary data 2 Click the List or List Graph tab The tab opens displaying the graph and the curren...

Page 135: ...cify an interval of 1 2 you would type 1 2 8 To change the display select a style from the Style dropdown 9 Select or deselect to determine whether or not the total for each column displays as the top of the column 10 To zoom in on the range of points displayed click 11 Data that does not fit into the Begin End Interval format you have specified displays on the lower right hand corner of the windo...

Page 136: ...aphs of equations Showing and hiding points in the graph Showing and hiding teacher input When you add activity data to the Activity Center tool you may not want your students to see your symbolic equation or numeric list input For example you may want to establish a target function but conceal the equation of that function You can choose to show or hide the activity data that you input during an ...

Page 137: ... hidden the students display names appear in the Activity Center tool s window If you had your students names showing the software replaces the students names with the word Hidden Showing and hiding graphs of equations The equations you create or collect have corresponding graphs under the List Graph tab Graph tab and Graph Equation tab When you discuss the equation graphs with your class you may ...

Page 138: ...ies 2 Click the equation s name 3 Click Edit Show or click Show The graph for the selected equation appears in the window To hide equation graphs 1 Click the Graph Equation tab The Graph Equation tab opens 2 Click the equation s name ...

Page 139: ...You can hide or show points in the graph under the List Graph tab Any changes you make to the points are reflected under all of the tabs with graphs Note By default the Activity Center tool shows the points created or contributed in plots To show points in the graph 1 Click the List Graph tab The List Graph tab opens 2 Click the hidden point you want to show The coordinates of the hidden points ar...

Page 140: ...on Press and hold the Ctrl key and click to deselect points 3 Click Edit Hide or click Hide The Activity Center tool dims and italicizes the coordinates of the point in the data set 4 Click a blank portion of the Data Set table to deselect the point The point no longer appears in the graph Highlighting activity data During your class sessions you may want call attention to equations or points in t...

Page 141: ...Equation tab The selected tab opens 2 Click the equation that you want to highlight Highlighting graphed points You can highlight any point that the Activity Center tool s graph displays When you highlight the graphed points under one tab the Activity Center tool highlights the graphed points under the other tabs containing graphs To highlight graphed points 1 Click the List Graph tab The List Gra...

Page 142: ...ort your students work alphabetically by their display names To sort data by display names 1 Click the List tab or the List Graph tab The selected tab opens 2 Optional If the display names are hidden show them See Showing and hiding student names on page 134 3 Click Display Name The Activity Center tool sorts the students display names Note Under the List Graph tab you may not be able to see the w...

Page 143: ...st data numerically from least to greatest or from greatest to least To sort lists by values 1 Click the List tab or the List Graph tab The selected tab opens 2 Click the name of the column containing the list data you want to sort The Activity Center tool sorts the list data in the column 3 If you want to sort the list data in the opposite order click the column name again ...

Page 144: ...ints by their X values 1 Click the List tab or the List Graph tab The selected tab opens 2 Click the name of the X values list The Activity Center tool sorts the X values 3 If you want to sort the X values in the opposite order click the name of the X values list again To sort points by their Y values 1 Click the List tab or the List Graph tab The selected tab opens 2 Click the name of the Y value...

Page 145: ...Running interactive activities 139 ...

Page 146: ...140 Running interactive activities ...

Page 147: ...ck Poll tool to review the responses by yourself or with your class This section contains information you need to know to use the Quick Poll tool in your class The Quick Poll tool window and tabs The Quick Poll tool window contains several sets of controls and two tabs that you can use to run and view polls in the TI Navigator software learning system Below you can find the The Quick Poll tool win...

Page 148: ...a list or a graph Í Data controls Controls that let you show hide display names in Poll Listing and view previous poll results Î Poll responses Displays number of responses and number of students logged in Ï Status bar Displays number of responses and number of students logged in Poll Prompt tab Ê Active Poll Displays question and possible answers for currently active poll Poll Summary tab Ê Ê ...

Page 149: ...ng a list of the poll responses received from your students Ì Time Stamp column Column containing the dates and times that your students sent their poll responses Opening the Quick Poll tool You can open the Quick Poll tool from the home screen of the TI Navigator classroom learning system To open the Quick Poll tool 1 If you have not already done so begin the class session See Beginning and endin...

Page 150: ...lculator or computer When you poll your students from your computer you can create the question to send to your students When you poll your students from your calculator you cannot create the question or use open response polls You can only send the text Mark your answer Note If you start a poll from your calculator while you have a poll open on your computer the Quick Poll tool closes the poll on...

Page 151: ...receive the poll on their calculators 5 Instruct your students to respond to the poll See Responding to polls student instruction on page 146 Stopping polls You can stop polls at any time Once you stop a poll you cannot restart it If you plan to continue the poll you should pause the poll instead of stopping it See Pausing polls on page 145 Your students do not need to do anything on their calcula...

Page 152: ...ultiple choice and open response polls Note Multiple choice refers to Agree Disagree Yes No True False Right Wrong and Always Sometimes Never questions as well as standard multiple choice questions Student Point of View The following instructions are from the student s point of view To respond to multiple choice polls 1 If the poll says Mark your answer wait for your teacher to ask you the poll qu...

Page 153: ...r or y ƒ to enter only letters If you are using a TI 73 press y t 3 Select Send Your calculator sends your poll response to your teacher and returns you to the last screen you used Your poll response appears on your teacher s computer in the Quick Poll tool window Note The contents of the Quick Poll tool window vary depending on the tab your teacher has selected and the poll responses your teacher...

Page 154: ...ults or click Send Results Saving polls 1 If a poll is in process stop the poll See Stopping polls on page 145 2 Click Poll Save Results or click Save Results 3 Type a name for the file The poll data is saved with a caf extension This file can be opened and evaluated with the Class Analysis tool Viewing poll results After your students send their poll responses to you you can view their results gr...

Page 155: ... opens automatically on your calculator after you use it to send polls to your students To view poll results in a table f Click View Poll Details or click the Poll Details tab The Poll Details tab opens displaying the poll results listed in a table Note If you have an open response poll the Quick Poll tool evaluates any mathematical poll responses and shows both the students poll responses and the...

Page 156: ... title again Showing and hiding display names The Poll Details tab gives you the option of showing or hiding the display names of the students who respond to the poll Notes By default the Quick Poll tool hides the display names To show or hide display names f Select or clear the Show Student Names check box If you selected the Show Student Names check box the students names appear in the Display N...

Page 157: ...g polls on page 145 2 Click History A drop down list of previous polls opens 3 Click the poll you want to view The selected poll opens in the Quick Poll tool window 4 Click Poll Save Results or click Save Results Closing the Quick Poll tool You can close the Quick Poll tool in two different ways depending on whether you are running the Quick Poll tool from your calculator or from your computer To ...

Page 158: ...152 Polling students ...

Page 159: ...r network the Screen Capture tool cannot capture their calculator screens In order for you to capture your students calculator screens they must have logged into TI Navigator at least once during the class session However they do not need to have the NavNet App open when you perform the screen capture To capture calculator screens 1 If you have not already done so begin the class session and ask y...

Page 160: ...reens click Class To capture the calculator screens of individual students click Students and then click the student 4 Click OK The TI Navigator software captures the selected students screens and displays them in the Screen Capture tool window Viewing Captured Screens Once you ve captured screens you can rearrange their order and zoom the view ...

Page 161: ...nto your computer or you can save a snapshot of the entire class To save a Class Snapshot 1 Select Save Class Snapshot from the file menu The Save dialog box opens 2 Navigate to the location where you want to save the captured screen 3 Enter a file name 4 Click Save TI Navigator saves the image as a jpg file To save individual screens Once you save a captured screen you can then use it with TI Nav...

Page 162: ...students you can refresh them in the Screen Capture tool s window When you refresh screens the Screen Capture tool captures the latest screens from your students calculators To refresh captured screens f Click Refresh screens The Screen Capture tool captures the latest screens from the selected students calculators Note If the Screen Capture tool cannot refresh the screen of a student a yellow box...

Page 163: ...y default the Screen Capture tool hides your students display names To show or hide display names f Select or clear the Show Student Names check box If you selected the Show Student Names check box the Screen Capture tool shows the students display names under their captured screens If you cleared the Show Student Names check box the Screen Capture tool removes the students display names from unde...

Page 164: ...158 Capturing calculator screens ...

Page 165: ... and incorrect answers to allow students to test their own knowledge You can create quizzes and exams send them to student calculators then upload completed material to your PC for evaluation and grading You can use the LearningCheck Creator or TI Connect to transfer LearningCheck files from a PC to a TI handheld device The LearningCheck App on the device then tracks student answers and displays r...

Page 166: ...f sections and questions allows you to select a question type and create new questions Content Area area for adding content to questions Changing the preview panel view You can view items in the default outline mode which displays only item titles or you can view the item detail which includes a thumbnail of the question and answer f To switch to the detail view select View Item Detail Preview Con...

Page 167: ...LearningCheck Creator 161 ...

Page 168: ...Content area Specifying document properties Document properties allow you to store data with your documents that can be used to specify certain properties for use on the device Document properties can also be used as search criteria when searching for questions relating to particular topics or keywords You can specify the following properties for your LearningCheck documents Title Properties Autho...

Page 169: ...eck from the document type dropdown 4 If you want to add or change any other information about the document click the desired entry field and type the information in the box You are now ready to create sections and questions for the document Adding a new section To add a new section to the document 1 In the Preview pane click 2 Click Section LearningCheck Creator adds a new section 3 Type a title ...

Page 170: ...refer 4 If you want to include a section description type it in the Text area 5 If you want to include an image click Browse in the Image area and navigate to the location of the image file Double click the image file name The image appears in the Image area of the dialog box You can edit the image using the toolbar below ...

Page 171: ...ard choices question Adding a new text and image item Adding questions from the Item Bank Adding a question 1 In the Preview pane click the Insert Item drop down button 2 Click to select the type of question you want to add The content panel for the new question displays 3 Type the topic of the question in the Topic field 4 Type any keywords that relate to the question in the Keyword field Note Th...

Page 172: ...ts the answer from one of the points on the image Example The student might be presented an image of the state of Texas and asked to identify which of three points on the image showed the location of the capital city Austin To add a new choices on image question to a section 1 In the Preview pane click the Insert Item dropdown and select Choices on Image 2 Type the topic of the question in the Top...

Page 173: ... the point on the image Click to add the point 8 To add the correct answer point to the image click on the image toolbar and then click the correct location on the image 9 To create additional answer choices click and then click other locations on the image 10 To apply labels to the points click on the image toolbar and then click on each point The points are labeled A B C etc in the order in whic...

Page 174: ...archable in the item bank 4 Type a title for the question in the Title box 5 Type the question in Text box 6 If the question will include an image insert the image into the Image area The image appears in the Image area of the dialog box 7 To create answer choices click in the Response box and type the first response 8 To enter the second response click New and then type the response in the next b...

Page 175: ...estion in the Keyword field Note The Topic and Keyword information is used by the Item bank to provide search criteria for finding questions You must enter text in these fields for the question to be searchable in the item bank 4 Type a title for the question in the Title box 5 Type the question in Text box 6 Create the blank There are two ways to do this a Type the question including the text tha...

Page 176: ...cally selected and the number of characters contained in the word you placed in the blank is automatically entered into Field Length and Maximum Characters For numeric responses click the Number button To create a pull down list of responses click the Pull Down button If you want to make the blank longer so that the size of the blank does not reveal the answer change Field Length to a larger numbe...

Page 177: ... your question is a range of integers then using Range 25 to 27 for example might be easier 3 If more than one value is acceptable for the answer enter a Tolerance or enter Range in the Minimum Value and Maximum Value boxes If you want to make the blank longer so that the size of the blank does not reveal the answer change Field Length to a larger number Creating a question with a pull down blank ...

Page 178: ...t of Possible Responses click the button at the left of the correct response 5 If this question includes multiple blanks and you want to use the same list for more than one blank make the list a default list Click Default List 6 To use a previously created default list create the blank and then click Use Default List The list appears in the List of Possible Responses Adding a new open response que...

Page 179: ...finding questions You must enter text in these fields for the question to be searchable in the item bank 4 Type a title for the question in the Title box 5 Type the question in Text box 6 If the question will include an image insert or copy the image into the Image area 7 If you want to specify a Suggested Response type it in the box Adding a new sequencing question 1 In the Preview pane click the...

Page 180: ... image insert or copy the image into the Image area 7 To create answer choices click in the Response box and type the first response 8 To enter additional responses click New and then type the response in the next box After you enter all of the responses you will indicate the correct sequence Note To remove a response click at the left of the response 9 To specify the correct sequence click the re...

Page 181: ... the Correct Sequence box also corrects it in the Presentation Sequence box when you finish making the change If you add an answer to the Correct Sequence box and then close the question without generating the presentation sequence again the number of answers in the Correct Sequence box will be different from the number of answers in the Presentation Sequence box The LearningCheck Creator will aut...

Page 182: ...ion in the Title box 5 Type the question in Text box 6 If the question will include an image insert or copy the image into the Image area 7 In the Response drop down list click the response type 8 Click the button at the left of the correct response for the question Adding a new text and image item The Text and Image item does not require a response so you might use this for such things as instruc...

Page 183: ...he Topic and Keyword information is used by the Item bank to provide search criteria for finding questions You must enter text in these fields for the question to be searchable in the item bank 4 Type a title for the question in the Title box 5 Type the question in Text box 6 If the item will include an image insert or copy the image into the Image area ...

Page 184: ...ent but are copied into the new document when you select and copy them from the Item Bank To locate a question in the Item Bank 1 Click File Open Item Bank or click The Explore Item Bank dialog box displays 2 Use the Topic and Keywords dropdown menus to select terms to use to search for the question you want to find 3 If you know the type of question click to select it in the Item Type field 4 If ...

Page 185: ...met 7 Click Search The Item Bank returns a list of the items which meet the conditions you specified Note If the search does not return any results click Back to Search and modify the criteria to try the search again Adding Selected Items to Assessment 1 Scroll through the list of questions to locate the one you wish to add to your document 2 Click Add selected items to assessment The item s is ad...

Page 186: ...180 LearningCheck Creator To close the Item Bank f Click File Close Item Bank or click The Item Bank closes If more than one Item Bank is open the Item Bank that is in front closes ...

Page 187: ...box opens 3 Browse to the folder where you want to save the file LearningCheck Creator suggests a filename the same as the document name if you entered one 4 Click Save to accept the suggested filename or type in a new filename and click Save If you do not enter a title for the document but do enter a name for the file LearningCheck Creator changes the document title to the same as the filename To...

Page 188: ...ck Creator When you edit a document from a zipped file TIP TIG ZIP you cannot save the changes in the zipped file You must save the document to a different location See Editing a document in a zipped file on page 191 ...

Page 189: ...rt a character 1 Click to place the cursor in the text where you want to add the character s 2 Click 3 Select the Device All Common TI 83 Plus TI 84 Plus Family TI 89 Family TI 92 Plus or Voyage 200 from the drop down list 4 Select the Character Set All Math Punctuation Symbol Greek French German or Spanish from the drop down list 5 Click Show US Keyboard Characters if you want to see all of the l...

Page 190: ...e Window Close button to close the window When added to LearningCheck Creator documents characters shown in gray on the character map may not display correctly on all devices For example the square root symbol may display as _sqrt_ or a character may look slightly different Use Preview to see how the character is displayed In addition Unicode characters not in the character map can be inserted int...

Page 191: ...uestion You cannot enter keywords directly into a section or document list To add topics or keywords to a question 1 Double click the question title in the preview pane to open the question 2 Type the topic or keyword in the dropdown field or use the dropdown menu to select an existing topic or keyword Note To enter multiple keywords separate them with a comma 3 When the topic and keywords have be...

Page 192: ...ile without first unzipping the file See Editing a document in a zipped file on page 191 To open an existing document 1 Click File Open or click 2 Select the document s profile in the User Profile Selection dialog box If you always use the same profile and do not want to see this dialog box each time you open a document click Do not show this again The next time you open a document the User Profil...

Page 193: ...al information about specific items click the appropriate cross reference listed below 5 Click OK Editing a question To edit an existing question 1 Double click the question to open it 2 To change text highlight the text you wish to change and type the new text over it 3 To delete text highlight the text and press the Delete key on your computer keyboard 4 Click OK Editing a document in a zipped f...

Page 194: ... the location where you want to save the document 3 Type a new name for the document in the File name box 4 Click Save Checking spelling for the document You can check spelling for a question a section or an entire document To check spelling from the main window 1 In the Navigation pane or the Content pane click the question section or document 2 Click Tools Spell Check or click 3 Respond to the s...

Page 195: ...or image 2 Click Edit Cut or click To copy a question section or image 1 Click the question section or image 2 Click Edit Copy or click To select multiple consecutive items for copying hold Shift while selecting To select multiple items that are not consecutive hold Ctrl while selecting To paste a question or section 1 Click the question or section immediately above the location to which you want ...

Page 196: ...or move them to a different section To move a section 1 In the Navigation pane click the section to be moved To move more than one section at a time Shift click each section 2 Drag the section up or down to place it in the new location A positioning line shows where the section will appear Sections that are moved will automatically renumber themselves To move a question within a section 1 Click th...

Page 197: ...stion You may create documents using the default section and question titles Section 1 or Item 1 but you may find it easier to organize topics and questions if you assign section and question names that describe the topic To rename a section or a question 1 Right click the section name or question name 2 On the shortcut menu click Rename 3 Type the new name for the section or question 4 Press Ente...

Page 198: ...ve a document into it at the same time To create a new folder 1 Open the document you want to save 2 Click File Save As or click For a new document Save works the same as Save As 3 If you haven t entered a title for the document LearningCheck Creator prompts you to enter a title This title will display in the handheld device s Assignment List If you do not want to see this dialog box each time you...

Page 199: ...g Undo and Redo If you have worked with other Windows programs you are probably familiar with the Undo and Redo commands Use Undo to undo the last action and Redo to reverse an Undo command With the LearningCheck Creator the actions that you can undo depend on whether you are working with text or objects The number of actions that you may undo is limited only by the memory available on your comput...

Page 200: ...print 3 Click Print Preview paper version of assignment 1 Click File Print or click 2 Select the type of report you want to preview 3 Click Print Preview to see how the report will look 4 Click to print the report or Click Close to return to the Report Options window ...

Page 201: ...cropping an image Adding a point or label Changing a point or label Deleting a point or label Editing an image Image toolbar The Image toolbar appears below the Image area in each question template The Image toolbar changes slightly depending on the type of question and the actions you need to take but all of the icons are shown in the following table Icon Name or Expand or Collapse image area ...

Page 202: ...TI 83 Plus Silver Edition images 83i 8xi PIC TI 84 Plus and TI 84 Plus Silver Edition images 83i 8xi PIC TI 89 Family TI 92 TI 92 Plus and Voyage 200 images 89i 92i 9xi v2i Copy Image to Clipboard Paste Image from Clipboard Edit Image or Position Image Above Below Text or Scale Crop Image for Display on Device Add Points to Image Add Correct Points Add Incorrect Points Add Labels to Existing Point...

Page 203: ...dialog box and activates the image toolbar 4 If necessary click the image position icon to indicate whether the image should be below the text or above the text Places the image after the question text This is the default choice Places the image before the question text If you usually want the same image position you can set it on your User Profile General tab However you can always change the ima...

Page 204: ...d edit the image Scaling and cropping an image To scale and or crop an image 1 Click the appropriate icon to scale the image or to scale the image and then crop it to fit the device screen Scales down the image and any points and or labels to fit the device screen This is the default choice Scales down the image and then crops it to fit the device screen To make sure the viewable area includes the...

Page 205: ...e To create additional points click and then click other locations on the image 3 To apply labels to the points click and then click on each point The points are labeled A B C and so on in the order in which you click them 4 To move a point and its label to a different place on the image click the point and drag it to the new location Changing a point label You can change a point label by editing ...

Page 206: ...s are erased Editing an image The LearningCheck Creator allows you to open Microsoft Paint and edit the image in a question section or document template To open the image editor f On the image toolbar click Microsoft Paint opens with the image file ready for editing To put the edited image back into the template Saving the image in Microsoft Paint does not change the image in the template image ar...

Page 207: ...ction or document template Sending a LearningCheck Creator item as a Quick Poll You can send a LearningCheck Creator question to your class as a Quick Poll The TI Navigator network must be available and the class must be started 1 Open the question you want to send as a Quick Poll 2 Click Send item as Quick Poll The question is sent to the class as a Quick Poll and the Quick Poll tool window opens...

Page 208: ...tor 3 Click the Poll Summary tab to see student responses You can save this poll and view the results just as you would any Quick Poll item For more information about Quick Poll items see The Quick Poll tool window and tabs ...

Page 209: ... before previewing To preview a document 1 To view the entire document click Tools Preview Preview All or click or To view selected questions or sections click the questions or sections and then click Tools Preview Preview Selected or click The question section or document opens in a window similar to the device screen 2 Use the PC keyboard and your mouse to simulate viewing the document on the de...

Page 210: ... a calculator You can send a document to a single device or you can send a document to all the devices in a classroom network Checking AppVar size Sending a document to a calculator Sending a document to a classroom network Checking AppVar size You can check the size of the application variable AppVar that will be created from the document before you send it to a TI calculator or classroom network...

Page 211: ...mputer Connect a serial cable to the serial port connect a USB cable to the USB port 2 Connect the other end of the TI Connectivity Cable to the port on the device 3 In LearningCheck Creator open the document that you wish to send to the device 4 Click File Send To Send to Device or click The Send to Device dialog box opens 5 Select whether the document should be sent to the RAM or archive memory ...

Page 212: ...ssroom network To send a document to a classroom network 1 In the LearningCheck Creator open the document that you wish to send to the class 2 Click File Send To Send to Class or click The Send to Class dialog box displays 3 Select the document type 4 Select Randomize Question Order if you want students in the class to receive the questions in a different order from one another 5 Click Send The fi...

Page 213: ...e the message box Insert a new section in the document then delete the section you wish to remove File not found LearningCheck Creator cannot find the file you wish to open Click OK to close the message box Make sure the file name is spelled correctly and that the correct directory is selected One or more points are partially or completely outside the image One or more of the points and or labels ...

Page 214: ...ion is not installed Please reinstall TI Connect You selected Send to Device but TI Connect was not installed or was incorrectly installed Click OK to close the message box Install TI Connect TI Navigator or TI Connect is not properly installed Please reinstall the application You selected Send to Class but TI Navigator or TI Connect was incorrectly installed Click OK to close the message box Rein...

Page 215: ...g box opens 2 Click Desktop in the Save As dialog box 3 Click Save to accept the suggested filename or type in a new filename and click Save To save all of your documents to your desktop set your user profile to show the Desktop as the Working Directory 4 Open your user profile and go to the General tab 5 In the Working Directory section click beside the Document Directory field 6 Click Desktop an...

Page 216: ...ting questions or sections on page 192 Q Can I use the same LearningCheck Creator document on more than one handheld device A Yes A document created in the LearningCheck Creator can be made into an application variable AppVar for any of the supported handheld devices See Sending a LearningCheck Creator item as a Quick Poll on page 42 Q How much text can I copy into a Text box A There is a 64K limi...

Page 217: ...ers from response forms that your students create on their handheld devices Getting started This section describes some basic procedures you will use with Class Analysis It describes How to open Class Analysis How to start a new analysis choose an assignment and add the student s answers How to save the assignment the student answers and the analysis as a single class analysis caf file How to open...

Page 218: ...hecks all collected answers to ensure that they match the assignment 1 Click Edit Choose Assignment or click If an assignment is already chosen a confirmation prompt appears 2 Click OK to proceed The Choose Assignment dialog box opens 3 If necessary click the Look In list and navigate to the folder containing the assignment edc file 4 Click the file name and then click Open Class Analysis displays...

Page 219: ...network Specifying the assignment for which you are collecting answers 1 Click Actions Collect from Class or click The Collect Answer Files From Class dialog box opens Note The Choose Assignment portion of the dialog box appears only if you have not already chosen an assignment In that case Class Analysis assumes the most recently sent assignment as a default 2 Note the contents of the dialog box ...

Page 220: ...e of the assignment When you return to the Collect from Class dialog box the Device File Name will be the seven character name defined in the Send properties preceded by the letter U 4 Proceed to Collecting the answers below If you know the assignment s AppVar name 1 Type the seven character name preceded by the letter U as the Device File Name For example for an assignment stored on the calculato...

Page 221: ... longer active The collected student names and answers are shown in the analysis Students whose answers do not match the assignment are marked as Excluded in the analysis Note In a specific combination of circumstances some question numbers displayed in Class Analysis will not match those shown on the calculators This situation occurs only when all of the following are true All of the calculators ...

Page 222: ...collected successfully are added to the analysis What to do if you have not collected all the students answers After interrupting file transfers you may have some but not all of the students answers If you required students to log in repeat the collection process Class Analysis retrieves only those answers that were not successfully transferred If you did not require students to log in and you try...

Page 223: ...ox opens Note By default TI Navigator saves answer files in the folder My Documents MyTINavigator Collect 2 If necessary click the Look In list and navigate to the folder containing the usf answer file or files 3 Click the file name and then click Open Note To add the answers for multiple students click the first file name and then hold down the Ctrl key as you click the other file names Saving th...

Page 224: ...3 Type a name for the file and then click Save Note If you make changes but forget to save them you are prompted to save the changes when you choose a new assignment start a new analysis or close Class Analysis Opening a saved analysis You can open a class analysis caf file that you have saved The analysis file contains the assignment the student answers and the analysis results 1 Click File Open ...

Page 225: ... Class Analysis Tool 219 2 To proceed click Yes The Open dialog box opens 3 If necessary click the Look In list and navigate to the folder containing the caf file 4 Click the file name and then click Open ...

Page 226: ... assignment and adding the students answers you can view a class summary You can also modify some of the analysis data To view the summary f Click the Class Summary tab To show or hide specific columns On the Class Summary tab you can show or hide any of the columns labeled Student Device ID Assignment Type Device File Name or the scores for the individual items f Click View Class summary and clic...

Page 227: ...played with data for the selected student Viewing the analysis student by student After choosing an assignment and adding the students answers you can view the analysis for a specific student You can also modify some of the analysis data To view the results for a specific student 1 Click the Student tab 2 In the Select Student drop down list click the name of the student you want to view ...

Page 228: ...want to move The mouse pointer changes to a double headed arrow 2 Drag the boundary left or right To show or hide the assignment item f Click the up arrow or down arrow near the bottom of the analysis window or Drag the horizontal boundary that separates the analysis data from the assignment item Viewing the analysis item by item After choosing an assignment and adding the students answers you can...

Page 229: ...show or hide any of the columns labeled Student Student Response or Student Answer f Click View Items and click any column name to alternate that column between visible and hidden To change the width of a column 1 At the top of the column point to the boundary that you want to move The mouse pointer changes to a double headed arrow 2 Drag the boundary left or right ...

Page 230: ...ss Analysis sorts the analysis data by student names in ascending order However you can sort the data by any column Sorting works in the Class Summary Student and Item views To sort the data f Click the label at the top of the column by which you want to sort For example click Score to sort the data by highest or lowest score The data becomes sorted and a sort indicator is shown next to the label ...

Page 231: ...r home screen becomes minimized automatically This helps you avoid revealing individual student names and scores that might be visible on your computer screen when the slide show closes You must restore the TI Navigator home screen after closing the slide show To set slide show options You can set options for how you want to display slide shows The settings remain for the current Class Analysis se...

Page 232: ...window closes 2 Click the button for the minimized home screen in the Windows taskbar The home screen is restored Printing analysis reports Class Analysis lets you print the current assignment an answer key for the assignment and several types of analysis reports Setting page options for printed reports You can set the paper size margins and other options for your printed reports 1 Click File Page...

Page 233: ...urrent settings and if necessary click to change them 3 Click the Printer button if you want to select a different printer or change printer properties Previewing a report 1 Click File Print Report or click The Report Options dialog box opens ...

Page 234: ...ck Print Preview When the preview window opens you can right click the report to display a navigation menu or you can use the following keys to view the pages To scroll the contents of the window press an arrow key To show this Press this Next page PgDn or Enter Previous page PgUp or Backspace First page of report Home Last page of report End ...

Page 235: ...ents in the report 1 Click File Print Report or click The Report Options dialog box opens 2 If necessary click Class Summary 3 If you don t want to include the scores for individual assignment items click to clear Include Item Data 4 If you don t want to include the real names of the students in the report click to select Mask Student Names The names will be replaced with the word Student 5 Type y...

Page 236: ...er to include all students or only selected students in the report Each student s performance is printed on a separate page so you can use the report to review the student s performance with the student or the parents without compromising other students privacy 1 Click File Print Report or click The Report Options dialog box opens 2 Click Student Performance to select the type of report 3 If you d...

Page 237: ...int the student by student report Printing an item by item report The Item Analysis by Student report is the printed equivalent of the Item view You can choose whether or not to include the question text and images and you can choose whether to include all assignment items or only selected items in the report The results for each assignment item are printed on a separate page 1 Click File Print Re...

Page 238: ...don t want to include the text and images of each assignment item click to clear Include Item Data 4 To include selected assignment items instead of all items click Select Items click each item name to clear or select it and then click OK ...

Page 239: ...tem Analysis by Response report is the printed equivalent of the Slide Show You can choose whether or not to include the question text and images and you can choose whether to include all assignment items or only selected items in the report The results for each assignment item are printed on a separate page 1 Click File Print Report or click The Print Report dialog box opens 2 Click Item Analysis...

Page 240: ...text and images of each assignment item click to clear Include Item Data 4 To include selected items instead of all items click Select Items click Selected at the top of the item list click each item name to clear or select it and then click OK ...

Page 241: ...rint Printing the current assignment You can print a report that includes the text and images of all the assignment items Note This report does not include correct response information However you can print a separate answer key 1 Click File Print Report or click The Report Options dialog box opens 2 Click Hard Copy of Assignment ...

Page 242: ...e Teacher and type the name of the Class such as 1st period Chemistry 4 Click Print to print the assignment Printing an answer key for the assignment 1 Click File Print Report or click The Report Options dialog box opens 2 Click Answer Key to select it ...

Page 243: ...ick Print to print the answer key Working with analysis data Class Analysis lets you manage the analysis data in several ways You can Modify certain information such as a student name or the correct response for an item Remove a student s record from an analysis Temporarily exclude selected students answers or selected assignment items from the analysis Save data in a comma separated values csv fi...

Page 244: ...The assignment contains a question that requires the word Autumn as the correct answer One student has entered Fall If you want to give the student full or partial credit you can do so by changing the student s score for the question Note that you cannot change the student s answer but you can change the score earned by the student for that question 1 Click the Class summary tab 2 If the item scor...

Page 245: ...r example to see if the new response is appropriate for the type of question 1 Click the Student tab 2 If the Correct Response column is hidden click View Student Correct Response 3 Locate the item whose correct response you want to change 4 Double click the correct response A Special Character palette opens to give you an easy way to insert qualifier symbols in the response 5 Type the new correct...

Page 246: ...ck in the Special Characters palette 3 Type the tolerance value and then press Enter Example To allow any numeric response within 2 units of 98 6 as a correct response insert 98 6 2 0 in the Correct Response box Specifying a range of numeric values A numeric range is represented by two endpoints separated by a comma and bounded by parentheses or brackets A parenthesis specifies an endpoint that is...

Page 247: ...i lowercase only π and any numeric value from 3 14 inclusive to 3 142 exclusive insert pi π 3 14 3 142 in the Correct Response box Use the TI Character Map to insert the π symbol Example 2 To allow September exact case Sept exact case or 9 as a correct answer for the month following August insert September Sept 9 in the Correct Response box Removing a student entry You can remove one or more selec...

Page 248: ...lected student Excluding a selected student s answers You can temporarily exclude a student s answers from a class analysis for what if purposes Excluded students answers are shown in italics and with a different background color than that of the other entries Note If you prefer you can remove a student from the analysis If you have the Class Summary tab displayed f Click the Exclude check box nex...

Page 249: ...the analysis This keeps the item in the assignment but omits it from the analysis calculations averages response count and so on Excluded items are shown in italics and with a different background color than that of the other items 1 Click the Item tab 2 Click the current Item to display the list of items and then click the item you want to exclude 3 Click to select the Exclude Item from Analysis ...

Page 250: ... the text to select the text you want to copy 3 Click Edit Copy or click The selected text is now available for pasting To paste text from the Clipboard 1 Double click the item The item s text becomes highlighted to show that you can edit it 2 Click to insert the text cursor where you want to paste the Clipboard text 3 Click Edit Paste or click The Clipboard text is inserted at the cursor location...

Page 251: ...ere in the analysis data 8 Click Edit Paste or click The student s answers are inserted in the data and the data is sorted automatically Exporting scores as comma separated values After choosing an assignment and adding the students answers you can save Student IDs and Student Percentage Scores in a text file as comma separated values Some software applications grading programs in particular can r...

Page 252: ...lators as Application Variable AppVar files Assignment AppVars have a seven character name The student s answers for an assignment are stored in an AppVar with the same name as the assignment preceded by the letter U Glossary of terms used in Class Analysis Assignment Type Can be Self Check or Examination On Self Check assignments students can view the correct answers on their calculators On Exami...

Page 253: ...ned for the current item by each student Score In the Class Summary view the student s score for the entire assignment divided by the maximum score possible for the entire assignment expressed as a percentage This value can be greater than 100 In the Student view the current student s score on an individual item divided by the maximum score possible for that item expressed as a percentage This val...

Page 254: ...248 The Class Analysis Tool ...

Page 255: ...them on your students calculators This section covers the information you need to know to use the App and OS Transfer tool Opening the App and OS Transfer tool You can open the App and OS Transfer tool from the computer home screen of the TI Navigator classroom learning system To open the App and OS Transfer tool 1 If you have a class session running end it See Beginning and ending class sessions ...

Page 256: ...and the Apps that are being added largest file size sent first Apps may be transferred to a mixed classroom of TI 83 and TI 84 devices TI 73 Apps can only be sent to TI 73 devices Only one OS per device type may be added to the list You cannot transfer a version of the OS that is already on the device To add files to the transfer list 1 Select the Class Type from the drop down list 2 Click File Ad...

Page 257: ...ng to send all of them every time you install files To select files f Select the check box of the files you want to send To unselect files f Clear the check box of the files you do not want to send Removing files from the transfer list If there are TI Graphing Calculator Software Applications Apps or OS files in the transfer list that you no longer want to have available for transferring you can r...

Page 258: ... See Selecting and unselecting files to send on page 258 3 Click File Start Transfer or click Start Transfer The Transferring dialog box opens as the App and OS Transfer tool sends the selected files to the calculators connected to your hubs and or USB Silver Edition cables 4 When the App and OS Transfer tool finishes transferring the files click Close Note The App and OS Transfer tool has finishe...

Page 259: ...Installing Apps and OS files 253 ...

Page 260: ...254 Installing Apps and OS files ...

Page 261: ...ity Center tool Why can t I start activities after I open the Activity Center tool You haven t started a class session yet You cannot start activities until you start a class session See Opening the Activity Center tool on page 59 Can I participate in activities from my calculator Yes you can participate in activities from your calculator using your teacher account When you participate you can do ...

Page 262: ...of equations check box when you set up the Contribute Equations activity How can I tell if the graphs of equations are hidden If the graphs of equations are hidden the Equation Gallery shows the equations dimmed and italicized How can I tell if points are hidden If points are hidden the Data Set table shows the points dimmed and italicized In the graph how can I tell which equations are the ones I...

Page 263: ...class you must first end the running class session See Beginning and ending class sessions on page 20 Why can t I select a class You can t select a class because you have a class session running If you need to select a class you must first end the running class session See Beginning and ending class sessions on page 20 How many characters can I use in my class name Your class name can have 3 to 32...

Page 264: ...neral If you collected or acquired the file from a calculator s archive TI Navigator sends the file to the archive If you collected or acquired the file from a calculator s RAM TI Navigator sends the file to RAM If you send the file from a calculator s archive TI Navigator sends the file to the archive If you send the file from a calculator s RAM TI Navigator sends the file to RAM If necessary you...

Page 265: ...le of reasons why your students might not receive a poll The students were not logged in to the network The students exited NavNet Why can t I send poll results to my students There are a couple of reasons why you might not be able to send a poll You cannot send poll results to your students because you have not stopped the current poll You must stop the current poll to send poll results The poll ...

Page 266: ...in it This indicates that TI Navigator cannot find the student on the network The student s calculator may have become unplugged from the hub Students Why can t I see a student s icon Another students icon may be on top of the icon you are trying to find Why don t logged in students receive polls activities or transfers The students may be in an Exit App state The Exit App state occurs when studen...

Page 267: ...Can my students create their own passwords Yes When you add or edit your student select Student Chooses This lets your student choose their own password the first time they log in Why wasn t a student s password reset There are two reasons why a student s password might not be reset You did not select the student when you reset the passwords The student was logged in at the time you reset the pass...

Page 268: ...ed in to the TI Navigator network You only become logged out after the class session ends During class sessions can multiple students log in to the TI Navigator network from one calculator No During class sessions only one student per calculator can log in to the TI Navigator network In order for another student to log in to the TI Navigator network from the same calculator you must end the class ...

Page 269: ...indows 2000 with Service Pack 4 installed 900 MHz Pentium compatible CPU 1 2 GHz recommended Video adapter set at 1024 x 768 screen resolution 256 MB RAM 512 MB recommended Approximately 350 MB of available hard disk space to install TI Connect TI Navigator Network Manager Class Analysis and LearningCheck Creator CD ROM drive Available Ethernet or USB port on the computer Internet Explorer version...

Page 270: ... you or your students might come across while using the TI Navigator classroom learning system including Computer error messages Calculator error messages Computer error messages Error message Possible causes or solutions TI Navigator Network Unavailable TI Navigator cannot locate appropriate network hardware for example an access point and one or more hub Check your hardware connections If you st...

Page 271: ...In the Add Student dialog box you did not enter the student s last name or you included invalid characters in the last name Invalid User Name In the Add Student dialog box you either did not enter a user name or you did not meet the user name requirements User names must contain 3 to 12 letters and or numbers Invalid Password In the Add Student dialog box you either did not enter a password or you...

Page 272: ...t of view only The teacher hasn t started TI Navigator on his or her computer Wait until the teacher starts TI Navigator and the class then try again Class not started Student point of view only The teacher hasn t started the class in TI Navigator Wait until the teacher starts the class and try again Could not login The user name or password you entered is not correct Make sure you are using the c...

Page 273: ...pplication class A group of student accounts with an associated class record seating layout and various preferences and settings Class Record A component of the TI Navigator computer home screen The Class Record shows the network actions of a class as well as a list of historical actions class session A period of time when the TI Navigator network is available for a particular class Classroom tab ...

Page 274: ...orce send A send action that interrupts your students to send the file to the calculator immediately list A set of numeric data In TI Navigator the set of numeric data models the TI list calculator data type poll A survey of the class In a poll students use the TI Navigator network to respond to a verbal or written prompt plot A group of points graphed in the Activity Center tool plot configuratio...

Page 275: ... 3 then the cursor moves 3 tick marks every time you move it student list The Classroom view that lists of a class s students with their display names first names last names user names and student ID teacher account An account user name and password that lets you log into the TI Navigator network as a teacher TI Navigator calculator A calculator running the NavNet App TI Navigator computer A compu...

Page 276: ... name must be unique throughout all of your classes window settings The settings that control the display of the visible graph window in the Activity Center tool Also called graph window settings File types Below you can find a list of file types that you can send to or collect from your students calculators using TI Navigator Type TI 83 Plus or TI 84 Plus extension TI 73 Explorer extension Applic...

Page 277: ...Glossary 271 UserZoomWin 8xz WindowRange 8xw 73w Type TI 83 Plus or TI 84 Plus extension TI 73 Explorer extension ...

Page 278: ...272 Glossary ...

Page 279: ...s Always contact Texas Instruments Customer Support before returning a product for service All other customers Refer to the leaflet enclosed with this product hardware or contact your local Texas Instruments retailer distributor Home Page education ti com KnowledgeBase and e mail inquiries education ti com support Phone 800 TI CARES 800 842 2737 For U S Canada Mexico Puerto Rico and Virgin Islands...

Page 280: ...quivalents in other countries Licensor grants you a non exclusive non transferable license to install and use the Program on all institution owned leased or rented computers located at the Site for which the Program is licensed You may make one copy of the software for backup and archival purposes You agree to reproduce all copyright and proprietary notices shown in the software and on the media E...

Page 281: ... as amended Compliance with such regulations is your respon sibility You agree that you do not intend to nor will you directly or indirectly export re export or transmit the Program or technical data to any country to which such export re export or transmis sion is restricted by any applicable United States regulation or statute without the proper written consent or license if required of the Bure...

Page 282: ... rights These restrictions translate to certain responsibilities for you if you distribute copies of the software or if you modify it For example if you distribute copies of such a program whether gratis or for a fee you must give the recipients all the rights that you have You must make sure that they too receive or can get the source code And you must show them these terms so they know their rig...

Page 283: ...nnouncement including an appropriate copyright notice and a notice that there is no warranty or else saying that you provide a warranty and that users may redistribute the program under these conditions and telling the user how to view a copy of this License Exception if the Pro gram itself is interactive but does not normally print such an announcement your work based on the Program is not requir...

Page 284: ... or otherwise that contradict the conditions of this License they do not excuse you from the conditions of this License If you cannot distribute so as to satisfy simultaneously your obligations under this License and any other pertinent obligations then as a consequence you may not distribute the Program at all For example if a patent license would not permit royalty free redistribution of the Pro...

Page 285: ...ch everyone can redistribute and change under these terms To do so attach the following notices to the program It is safest to attach them to the start of each source file to most effectively convey the exclusion of warranty and each file should have at least the copyright line and a pointer to where the full notice is found one line to give the program s name and a brief idea of what it does Copy...

Page 286: ...rights These restrictions translate to certain responsibili ties for you if you distribute copies of the library or if you modify it For example if you distribute copies of the library whether gratis or for a fee you must give the recipients all the rights that we gave you You must make sure that they too receive or can get the source code If you link other code with the library you must provide c...

Page 287: ...n distributed under these terms A work based on the Library means either the Library or any derivative work under copyright law that is to say a work containing the Library or a portion of it either verbatim or with modifications and or translated straightforwardly into another language Hereinafter translation is included without limitation in the term modification Source code for a work means the...

Page 288: ...edium customarily used for software interchange If distribution of object code is made by offering access to copy from a designated place then offering equivalent access to copy the source code from the same place satisfies the requirement to distribute the source code even though third parties are not compelled to copy the source along with the object code 5 A program that contains no derivative ...

Page 289: ... and of the other library facilities is otherwise permitted and provided that you do these two things a Accompany the combined library with a copy of the same work based on the Library uncom bined with any other library facilities This must be distributed under the terms of the Sections above b Give prominent notice with the combined library of the fact that part of it is a work based on the Libra...

Page 290: ... our free software and of promoting the sharing and reuse of software generally NO WARRANTY 15 BECAUSE THE LIBRARY IS LICENSED FREE OF CHARGE THERE IS NO WARRANTY FOR THE LIBRARY TO THE EXTENT PERMITTED BY APPLICABLE LAW EXCEPT WHEN OTHERWISE STATED IN WRITING THE COPYRIGHT HOLDERS AND OR OTHER PARTIES PROVIDE THE LIBRARY AS IS WITHOUT WARRANTY OF ANY KIND EITHER EXPRESSED OR IMPLIED INCLUDING BUT...

Page 291: ... are permitted provided that the following conditions are met Redistributions of source code must retain the above copyright notice this list of conditions and the following disclaimer Redistributions in binary form must reproduce the above copyright notice this list of conditions and the following disclaimer in the documentation and or other materials provided with the distribution Neither the na...

Page 292: ...garding the Licensed Materials In no event shall TI or its suppliers be liable for any indirect incidental or con sequential damages loss of profits loss of use or data or interruption of busi ness whether the alleged damages are labeled in tort contract or indemnity Some states or jurisdictions do not allow the exclusion or limitation of inciden tal or consequential damages so the above limitatio...

Page 293: ...n any patent Licensable by grantor 1 11 Source Code means the preferred form of the Covered Code for making modifications to it including all modules it contains plus any associated interface definition files scripts used to control compilation and installation of an Executable or source code differential comparisons against either the Original Code or another well known available Covered Code of ...

Page 294: ...the additional rights described in Sec tion 3 5 3 2 Availability of Source Code Any Modification which You create or to which You contribute must be made available in Source Code form under the terms of this License either on the same media as an Executable version or via an accepted Electronic Distribution Mechanism to anyone to whom you made an Executable version available and if made available ...

Page 295: ...ights in the Source Code version from the rights set forth in this License If You distribute the Executable version under a different license You must make it absolutely clear that any terms which differ from this License are offered by You alone not by the Initial Devel oper or any Contributor You hereby agree to indemnify the Initial Developer and every Contribu tor for any liability incurred by...

Page 296: ...ant or ii with draw Your litigation claim with respect to the Contributor Version against such Participant If within 60 days of notice a reasonable royalty and payment arrangement are not mutually agreed upon in writing by the parties or the litigation claim is not withdrawn the rights granted by Par ticipant to You under Sections 2 1 and or 2 2 automatically terminate at the expiration of the 60 ...

Page 297: ...portions of the Covered Code as Multiple Licensed Multi ple Licensed means that the Initial Developer permits you to utilize portions of the Covered Code under Your choice of the NPL or the alternative licenses if any specified by the Initial Developer in the file described in Exhibit A EXHIBIT A Mozilla Public License The contents of this file are subject to the Mozilla Public License Version 1 1...

Page 298: ...censor or its representatives including but not limited to communication on electronic mailing lists source code control systems and issue tracking systems that are managed by or on behalf of the Licensor for the purpose of discussing and improving the Work but excluding communication that is conspicuously marked or otherwise designated in writing by the copyright owner as Not a Contribution Contr...

Page 299: ... are solely responsible for determin ing the appropriateness of using or redistributing the Work and assume any risks associated with Your exercise of permissions under this License 8 Limitation of Liability In no event and under no legal theory whether in tort including negli gence contract or otherwise unless required by applicable law such as deliberate and grossly negligent acts or agreed to i...

Page 300: ...NG BUT NOT LIMITED TO PROCUREMENT OF SUBSTITUTE GOODS OR SERVICES LOSS OF USE DATA OR PROFITS OR BUSINESS INTERRUPTION HOWEVER CAUSED AND ON ANY THEORY OF LIABILITY WHETHER IN CONTRACT STRICT LIABILITY OR TORT INCLUDING NEGLIGENCE OR OTHERWISE ARISING IN ANY WAY OUT OF THE USE OF THIS SOFTWARE EVEN IF ADVISED OF THE POSSIBILITY OF SUCH DAMAGE End of BERKELEY SOFTWARE DISTRIBUTION LICENSE Privacy P...

Page 301: ...nformation security policies We also use cookie technology to speed your access to various areas of our web site Cookies will be used in interactions where you request something from TI literature CD ROMs technical support seminar registrations personalized web pages etc Most browsers are initially set to accept cookies If you prefer you can set your browser to refuse cookies If you choose not to ...

Page 302: ...296 Legal Information ...

Page 303: ...6 adding a new question 187 a new section 163 Apps to transfer list 250 background image to graph window 89 choices on image question 166 images 196 keywords 185 list data 95 questions from an Item Bank 178 special characters 183 standard choices question 175 students to classes 25 text and image item 176 adding student answers from answer files 217 from the network 213 analysis data excluding a s...

Page 304: ...s deleting files from 51 error messages 266 home screen 15 joining activities from 92 sending files from 44 tools 15 canceling file transfers 54 captured screens saving 155 capturing calculator screens 153 changing Classroom tab view 20 cursor appearance 89 graph window scale 79 graph window settings 79 graphing pen color 87 graphing pen width 87 point label 199 student classes 34 unprompted file ...

Page 305: ...es 110 points 104 points all at once 106 points one at a time 104 visual fractions 112 coordinates turning off 83 turning on 83 copy 189 copying 189 saving a document with a new name 192 copying data to the Clipboard 244 copying students 38 copying text 209 copyright statement ii correct answer term description 246 Correct Point Tool 195 correct response changing 239 term description 246 creating ...

Page 306: ...data 120 equations 121 lists 121 point label 199 points 120 editing analysis data 238 ending class sessions 20 entering keywords 185 Equation tab 65 equations configuring options for 69 contributing 103 creating 97 creating tables of values for 100 deleting 124 editing 121 highlighting graphed 135 plotting 116 viewing 127 Erase Tool 195 erasing points and labels 200 erasing a point label 199 error...

Page 307: ...zooming out on 85 graphics formats 196 graphs of equations hiding 131 showing 131 grids making square 86 turning on 82 H handheld device sending to 205 hiding activity data in the graph 130 display names in Quick Poll 150 display names on screenshots 157 graphs of equations 131 points in graph 133 student names 131 teacher input 130 highlighting activity data 134 graphed equations 135 points 135 h...

Page 308: ...aph tab 62 List tab 61 lists adding data to 95 configuring options for 72 contributing 107 creating 94 creating for class points 99 deleting 125 editing 121 loading 123 plotting 118 sorting 137 viewing 127 loading activity data 121 activity settings 90 lists 123 logging in to network students 13 teachers 12 M main window 160 managing activities 91 teacher account 8 maximum score changing 238 term ...

Page 309: ... label editing 199 erasing 199 Point Tool 195 points configuring options for 70 contributing 104 contributing all at once 106 contributing one at a time 104 creating 96 creating lists of 99 deleting 124 editing 120 hiding in graph 133 highlighting 135 plotting class 117 showing in graph 133 sorting 138 viewing 126 Poll Listing tab 141 Poll Visualization tab 141 polling students 144 polls frequentl...

Page 310: ...ng question 191 section 191 report previewing 193 printing 193 reports previewing 227 printing overview 226 setting page options 226 resetting student passwords 32 responding to polls 146 responses sorting in Quick Poll 150 results of polls sending 148 resuming paused activities 93 paused polls 146 resuming after interrupting file transfers 216 S Save As 192 saving activity data 121 activity setti...

Page 311: ... analysis data 224 special characters 183 special characters entering 239 Spell Check 188 standard choices question 175 starting activities 91 activities in Activity Center 92 TI Navigator 1 starting a new class analysis 211 stopping activities 93 polls 145 stopping file transfers 215 student term description 247 student answers adding from answer files 217 collecting from the network 213 excludin...

Page 312: ...template pane 160 terms 267 terms used in class analysis 246 text and image item 176 Text Tool 195 TI 83 Plus Silver Edition 209 time stamps sorting in Quick Poll 150 TI Navigator home screen calculators 15 home screen computer 2 logging in to network students 13 logging in to network teachers 12 starting 1 tools calculators 15 tools computer 7 toolbar image 195 tools on calculators 15 on computer...

Page 313: ...mmary 220 equations 127 file properties 56 graph 127 item by item analysis 222 lists 127 points 126 poll results 148 previous polls 150 slide show of analysis 225 student by student analysis 221 visual fractions contributing 112 W width of pen 87 window Activity Center 59 Quick Poll 141 X X maximum 80 X minimum 80 X values sorting points by 138 Y Y maximum 80 Y minimum 80 Y values sorting points b...

Page 314: ...308 ...

Reviews: